Page 1 of 2
Cage build
Posted: Mon Aug 30, 2010 9:42 pm
by Driftben
Hi all
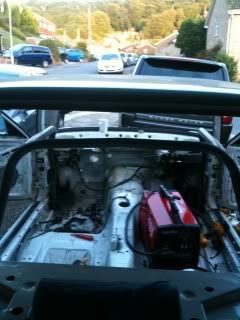
im currently getting on with my track project and id thought id share some pictures and stories.
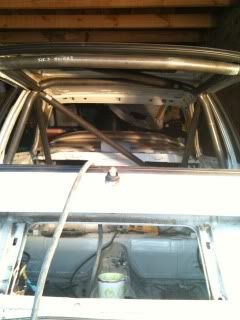
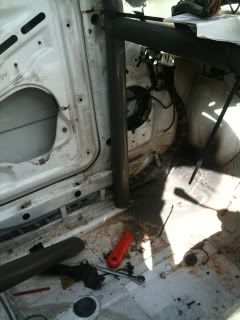
iv started putting the custom cages multipoint in and have got abit confused on what goes where for the bottom of the A pillar tubes?
i was going to tack it in place and then get a good welder to finish the job. save abit of £££.


Re: Cage build
Posted: Tue Aug 31, 2010 7:47 am
by RPM
This should help you:
http://www.customcages.co.uk/Rollcage/L ... Multipoint
We dont put the front struts in as they do, we relocate the fuse box and go to the centre of the turret.
Keep us updated
Re: Cage build
Posted: Tue Aug 31, 2010 7:55 pm
by Driftben
ahh i see.... well iv been going by that diagram but i have a box of parts (mostly feet) which im struggling with.
really good fitting kit but just loads of it....
ill take pictures as i go to help others out ;)
thanks mate

Re: Cage build
Posted: Thu Sep 02, 2010 12:23 pm
by martinpallot
Make sure you weld drop the cage to weld the front hoops to the main hoop. I doubt you can get a weld all the way round by keeping it in place judging by the pictures.
Re: Cage build
Posted: Thu Sep 02, 2010 12:33 pm
by UweM3
martinpallot wrote:Make sure you weld drop the cage to weld the front hoops to the main hoop. I doubt you can get a weld all the way round by keeping it in place judging by the pictures.
it can be done, but it's MAGIC

Re: Cage build
Posted: Thu Sep 02, 2010 12:35 pm
by Driftben
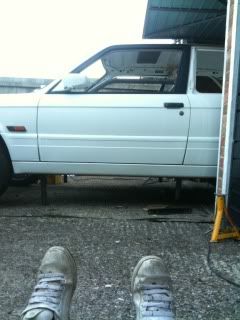
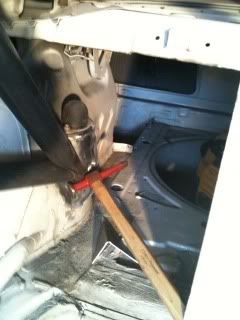
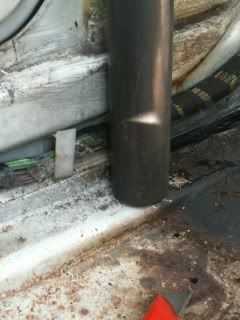
Iv been thinking about this.... What's the best option for dropping the cage? By cutting holes in the floor or by cutting the legs of the hoop and building the feet up to compensate?
Thanks
Ben
Re: Cage build
Posted: Thu Sep 02, 2010 12:45 pm
by Driftben
UweM3 wrote:martinpallot wrote:Make sure you weld drop the cage to weld the front hoops to the main hoop. I doubt you can get a weld all the way round by keeping it in place judging by the pictures.
it can be done, but it's MAGIC
Agh yes magic... Does tat involve a angle grinder and cutting the roof or just a call to Harry potter
Re: Cage build
Posted: Thu Sep 02, 2010 6:29 pm
by martinpallot
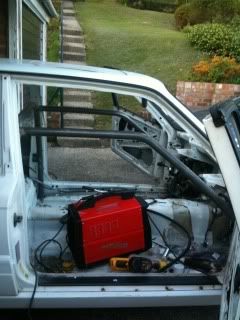
I fitted a custom cages multipoint to a mk1 clio, was much more comprehensive than the e30 which is mental as it is, some of the places we had to weld were near on impossible but provided things are done in the right order they can be done. Best bet is to tack it, use a holesaw in the floor then weld it back up. alternatively when we did an e36 a couple of years ago, we used a small tig torch with a mechanics mirror. All fun and games!
Re: Cage build
Posted: Thu Sep 02, 2010 9:31 pm
by Driftben
Hmmm this sounds like a right old job but I want to take the challenge. It just may take a while. I'll update the pictures as I go. I even brought myself a new welding mask for it haha.
Re: Cage build
Posted: Fri Sep 03, 2010 9:47 am
by RPM
As said drop it through the floor in the fitting kit you get from CC you should have plates to go over the holes which are welded under the legs where they meet the floor. Then be sure to seal from under the car.
Have you removed the fuel tank? if so you will want to as you weld right around it.
Re: Cage build
Posted: Fri Sep 03, 2010 12:17 pm
by UweM3
STiBen wrote:UweM3 wrote:martinpallot wrote:Make sure you weld drop the cage to weld the front hoops to the main hoop. I doubt you can get a weld all the way round by keeping it in place judging by the pictures.
it can be done, but it's MAGIC
Agh yes magic... Does tat involve a angle grinder and cutting the roof or just a call to Harry potter
as others said, you need to cut holes in the floor. I cut mine as slot, you can drop the cage much firther down this way.
Add some plates under the tube when lifted back up and weld plate to car and tube to plate.
that's the best picture I have at the moment

Re: Cage build
Posted: Sun Sep 05, 2010 10:43 am
by Driftben
Thanks for the pics ;)
Well uv taken pics of what I have done but can't put them up until I get back home.
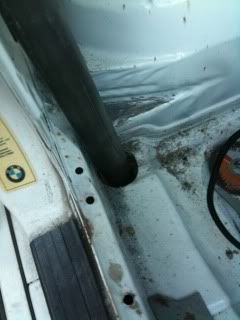
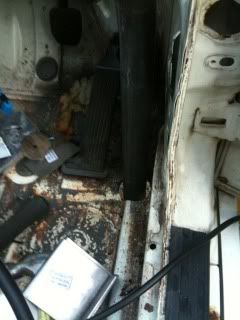
I have cut holes in the floor and the cage nicely drops down but for the plates that CC give, I can't see how thes will fit under the 'A' pillar tubes? I'll put a pics up of them too.
Thanks
Ben
Re: Cage build
Posted: Sun Sep 05, 2010 8:07 pm
by Driftben
Re: Cage build
Posted: Mon Sep 06, 2010 9:47 am
by martinpallot
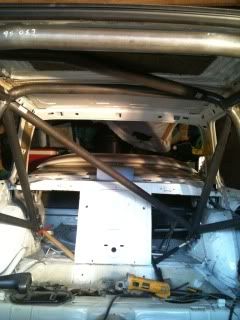
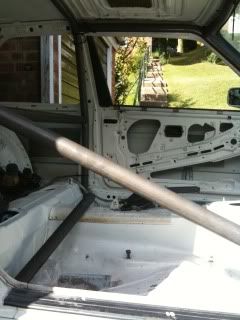
The roof bars are cut too long on purpose, we had to shave around 2 inches off when we did the clio, the foot plates will also need trimming, the step in the plate is to make up for the step in the floor.
Wait till you start putting the rest of the bars in, the profiling is somtimes so shocking that if you didnt know any better you would think they had sent you two halves of different cages
Re: Cage build
Posted: Mon Sep 06, 2010 10:13 am
by Driftben
Well that's the thing you see.. The roof bar seems too short to reach both corners of the cage?
And the floor plates for the 'A' pillars will need basically cutting in half because the step in the floor is half the size of the plate itself?
Re: Cage build
Posted: Tue Sep 07, 2010 8:46 am
by UweM3
did you cut holes front AND back???? You only need to cut the fronts and tilt the cage forward IMO.
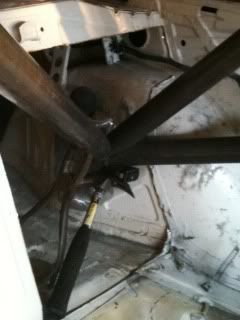
My front plates are just with ONE flange which went up against the sill and was pushed in by sliding it along the sill. I had kinked a small diagonal section of the bottom face of the plate to fit into the recess in the floor.
On the rear B-pillar base Matt from ETA (who fitted most of the cage BTW) has extended the flat face in front of the seat base to form a box on which the tube was welded.
I have more pictures on my other computer, just need to load them up.
Re: Cage build
Posted: Tue Sep 07, 2010 9:03 am
by Driftben
Ahh I see. Well cutting rear holes as well has made it a whole lot easier to weld that's my excuse
I think if you could get some pictures up that would be great

I have dicidied against moving the rear shock towers in as it's loads of work so now I can start the rear section woooo
Re: Cage build
Posted: Wed Sep 08, 2010 7:21 pm
by UweM3
Ok here some more pictures
can you see the little "box" under the B-pillar tube?


I have the boot brace prepared to tie the diff into the cage but decided against it because of the noise.Before I had the trailer I used to drive to the Nuerburgring.

front base plate

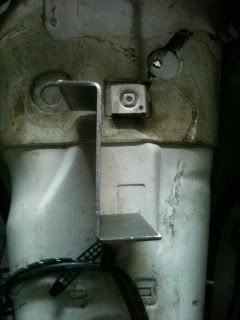
and this is how you remove the sound deadening from the heater cover


Re: Cage build
Posted: Wed Sep 08, 2010 7:47 pm
by Driftben
Ahh that's wicked thanks alot. Gives me abit of a better idea on my cage.
Looks like a awesome cage you have there.
Is it worth runing a bead of weld around the rear shock towers?
Re: Cage build
Posted: Thu Sep 09, 2010 12:23 pm
by UweM3
Mine needed welding because they fell out basically. At least at one side.
Once you start scraping the underseal off you can meet all sorts of horrors!!!!
Re: Cage build
Posted: Thu Sep 09, 2010 12:43 pm
by Driftben
Oh dear I have that to look forward to then

I'm going to do abit more on her tonight and hopefully get somewhere. Just usually too late to start grinding by the time I get home from work.
Re: Cage build
Posted: Mon Sep 13, 2010 8:24 am
by Driftben
Re: Cage build
Posted: Mon Sep 13, 2010 6:09 pm
by kimbo
Just a quick note to point out, if you don't already have it figured, that if you form a box under the cage feet, there must be a flat plate between the 'box' and the floor, extending beyond the box, if you see what I mean.
If you don't have this, you risk getting pulled up by the scrutineers if you are going to compete in any MSA type event.
I'll trawl through the blue book and post up a link if I can find the relevant section.
Kim
Edit:
This is the bit in question
http://www.msauk.org/uploadedfiles/msa_ ... Safety.pdf
It's drawing # 18 right near the bottom. It's not very clear and shows a bolt in cage, but shows a requirement for a 'spreader' plate under the raised box section.
Re: Cage build
Posted: Mon Sep 13, 2010 6:17 pm
by Driftben
Legend cheers Kim.
Re: Cage build
Posted: Mon Sep 13, 2010 8:05 pm
by Driftben
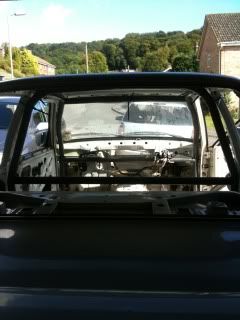
ahh i see what you mean now kim. dont worry mate i have boxing still to be put in which custom cages kindly provide. i still need to weld the tops of the cage so thats why i havent got them in yet.
ill be hopfully doing abit more tomorrow so pictures to follow.
Re: Cage build
Posted: Tue Sep 14, 2010 10:35 am
by UweM3
you know that you can single skin that sunroof panel?
Re: Cage build
Posted: Tue Sep 14, 2010 10:50 am
by Driftben
Single skin? what do you mean by that? And how would I do it without damaging the sunroof panel?
Re: Cage build
Posted: Tue Sep 14, 2010 11:22 am
by nickso
STiBen wrote:Single skin? what do you mean by that? And how would I do it without damaging the sunroof panel?
look carefully at the edges of the SR panel. you will see the spot welds holding the second panel into the outer panel. carefully grind the welds down and then lever the inner panel off, its bonded in with sticky gunk, i heated it first to loosen it off.
Re: Cage build
Posted: Tue Sep 14, 2010 11:35 am
by UweM3
nickso wrote:STiBen wrote:Single skin? what do you mean by that? And how would I do it without damaging the sunroof panel?
look carefully at the edges of the SR panel. you will see the spot welds holding the second panel into the outer panel. carefully grind the welds down and then lever the inner panel off, its bonded in with sticky gunk, i heated it first to loosen it off.
what the man said! Quite a bit of weight reduction IMHO
Did you remove the sunroof "tray" in the roof?
Re: Cage build
Posted: Tue Sep 14, 2010 12:18 pm
by Driftben
Ahh I see I'll have to unbolt the bugger again.
Yep I got rid of the sunroof tray and it was a right arse as well. I'll have a look tonight and report.
Cheers
Ben
Re: Cage build
Posted: Tue Sep 14, 2010 12:42 pm
by UweM3
STiBen wrote:Ahh I see I'll have to unbolt the bugger again.
Yep I got rid of the sunroof tray and it was a right arse as well. I'll have a look tonight and report.
Cheers
Ben
Matt from ETA welded my sunroof panel in (staggered, not all the way!) and the paint shop filled the gap with screen mastic AFTER painting the car. From the outside it looks like the sunroof is still present.
Re: Cage build
Posted: Tue Sep 14, 2010 7:11 pm
by Screacher
316 pre-facelift non-sunroof shell FTW

Re: Cage build
Posted: Tue Sep 14, 2010 8:16 pm
by Driftben
ahh i see so by staggering the welds it stops the roof from distorting?
well i didnt get the chance to have a look tonight so it will be tomorrow now (getting dark early is a pain)
did you get the car sprayed once the cage was in Uwe?
Re: Cage build
Posted: Tue Sep 14, 2010 11:41 pm
by nickso
i half riveted and half spot welded my sunroof in. i figure it would make it easier to remove in the future. just as well as it doesn't look like its ever going to stop rusting so i may need to source another.
Re: Cage build
Posted: Wed Sep 15, 2010 8:53 am
by UweM3
STiBen wrote:
did you get the car sprayed once the cage was in Uwe?
yes and yes again.
first time yes ,the inside was sprayed and just the roof (and the roof really bad I have to say)
second time yes was after I decided to park my car in the back of an E90 going into Dartford Tunnel (after doing 300kms in Brands Hatch) and the car was fully sprayed in jet black which was done really good.
Was shiny like a mirror!