Page 1 of 5
Another M30 Conversion
Posted: Sat May 27, 2006 1:47 pm
by m10man
Just in case anyone is interested in following another M30 conversion I will post my progress. I have learnt a lot from following other projects here on this forum. Thanks to Andy, Toby and Gareth for sharing their experience, it will save me a lot of time and headaches.
Our engines have arrived, all the way from Blackburn UK. It only took 3 months! I say our because my brother-in-law is putting an M30 into his track car aswell, but he is in Thailand for 3 months, so we wont be starting that until he gets back. So, progress of my installation will start tomorrow.

Posted: Sat May 27, 2006 1:50 pm
by Andy335Touring
Nice one mate, make sure to take loads of pictures !!!!

Posted: Mon May 29, 2006 10:12 am
by m10man
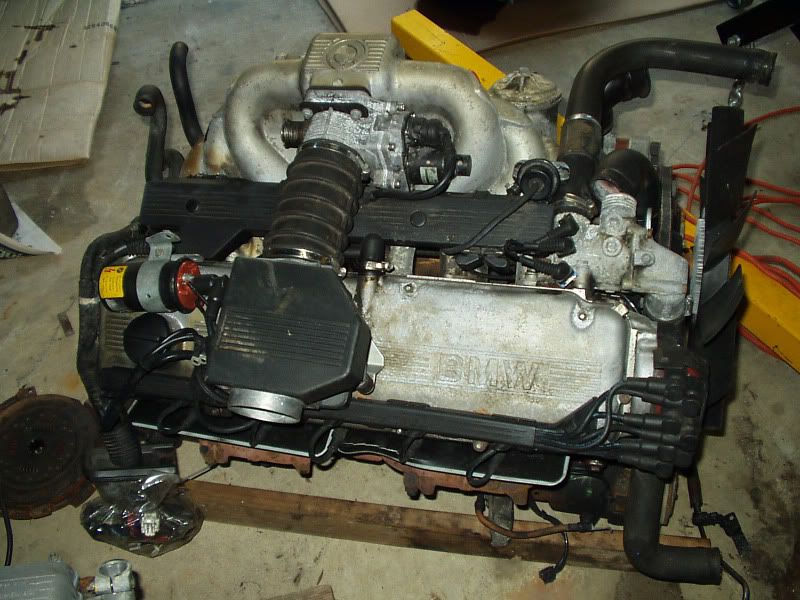
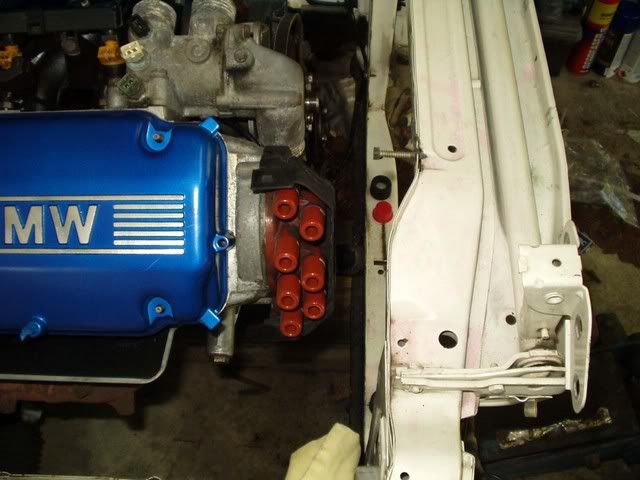
Here she is as arrived. Dont know whether to bother match porting the inlet manifold while the engine is out or not. Probably should as I will regret it later, just want to get it in though.
My humble 318i is getting a real upgrade. Put rear disc brake trailing arms in (only had drum rear) with K-Mac camber/castor adjustable bushes and an 8 bolt 3.46 LSD.
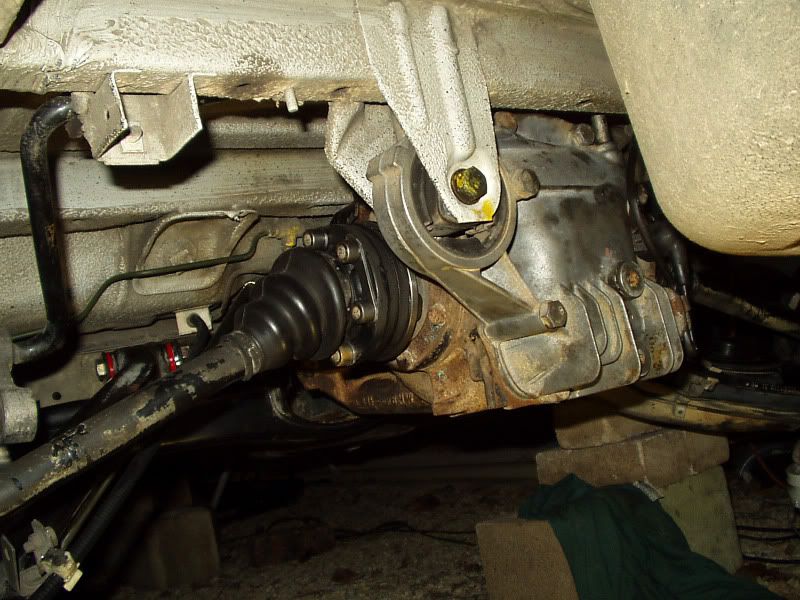
Also put a power steering rack in.
Posted: Mon May 29, 2006 10:54 am
by ed325i
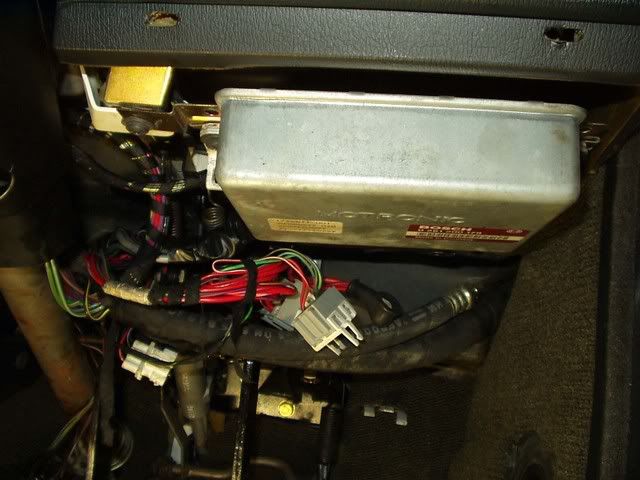
What all this for ? ( I have marked it on the pic )

ED
Posted: Mon May 29, 2006 11:29 am
by m10man
I am yet find out myself. Will let you know when I work it all out.
Posted: Mon May 29, 2006 11:37 am
by Demlotcrew
Looks like fly by wire to me.
The car will also have funky cruise control.
Andrew
Posted: Mon May 29, 2006 12:23 pm
by m10man
Spot on Andrew. Engine Power Regulation or drive by wire. Bugger! That means I have to find another wiring loom as the E30 does not have the other necessary components.
Posted: Mon May 29, 2006 2:07 pm
by ed325i
Are you not going to use the m30 loom. You could change the TB.
ED
Posted: Mon May 29, 2006 6:11 pm
by Andy335Touring
Yeah, electric throttle for later M30's with traction control i think ?
I'm guessing you'd need TB with TPS,wiring loom(or rewire it ?) and may be an ECU ?
Depending on the cost/availability of parts over there it might be worth considering a mega squirt set up ?
You still will need a TB though

Posted: Mon May 29, 2006 6:13 pm
by Andy335Touring
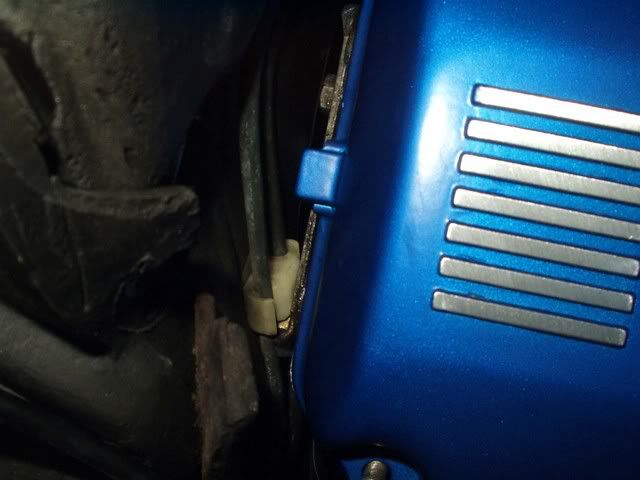
Just noticed you've also got three temp senders in the thermostat housing, normally theres only two
Posted: Mon May 29, 2006 6:26 pm
by ed325i
And there is no idle air stabiliser on the let pipe. Didnt dips use the fly by wire on his 350.
ED
Posted: Mon May 29, 2006 8:08 pm
by charlE30
Andy335Touring wrote:Just noticed you've also got three temp senders in the thermostat housing, normally theres only two
Could the third be for an electric fan? or did they all have viscous.
Didn't realise they used fly by wire with the M30.
Posted: Mon May 29, 2006 9:18 pm
by m10man
Just found out all I need is the potentiometer for the throttle pedal for it all to work. The third temp sensor is part of the fly by wire.
Posted: Fri Jun 02, 2006 1:23 am
by Andy335Touring
Hi mate, i've just copied a couple of posts from another forum that might interest you ?
does anyone know what the issues are with using the electric throttle rather than the mechanical. i have a 91 535i 5 speed that has some significant body damage and i wanna make the motor work in an e30 but was warned that it wouldn't work because the e30 lacked certain equipment. i'm wondering what that equip is and whether it could be swapped from the 5 series
___________________________________________________
for the throttle position sensor (TPS) on the throttle body, you dont need to replace the whole thing, just terminate the 3 wires that aren't used... because the other 3 perform the exact same operation and are even color coded the exact same.. My personal experience on my e32
Posted: Fri Jun 02, 2006 7:21 am
by m10man
Thats brilliant! Cheers mate! I thought I would have to chase another wiring loom because of the different connector to the throttle position switch. Thats just the info I needed.

Posted: Fri Jun 02, 2006 6:32 pm
by Andy335Touring
Glad to help mate
Posted: Mon Jun 12, 2006 10:49 am
by m10man
Nothing too exciting to report, still cleaning and preparing. The engine bay is ready and waiting.

I have ported out the exhaust manifolds to create the anti-reversionary effect. (if that is how you spell it??)
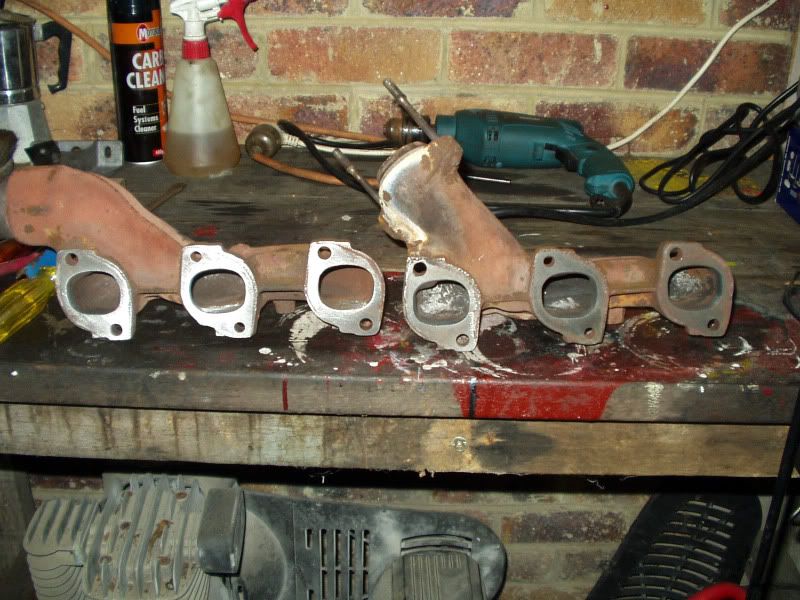
I have also ported the inlet manifold but havent taken a picture as I have yet to paint it. Just need to finish cleaning/painting all the brackets etc, put it all back together, buy a clutch, attach the gearbox, and she is ready to go in.
Posted: Sat Jul 01, 2006 3:47 am
by m10man
Here is an update. Not much time between work and family, so it is happening slowly. But damn I am sick of driving front wheel drive Jap cars!
Pilot bearing installed as the engine came off an auto.
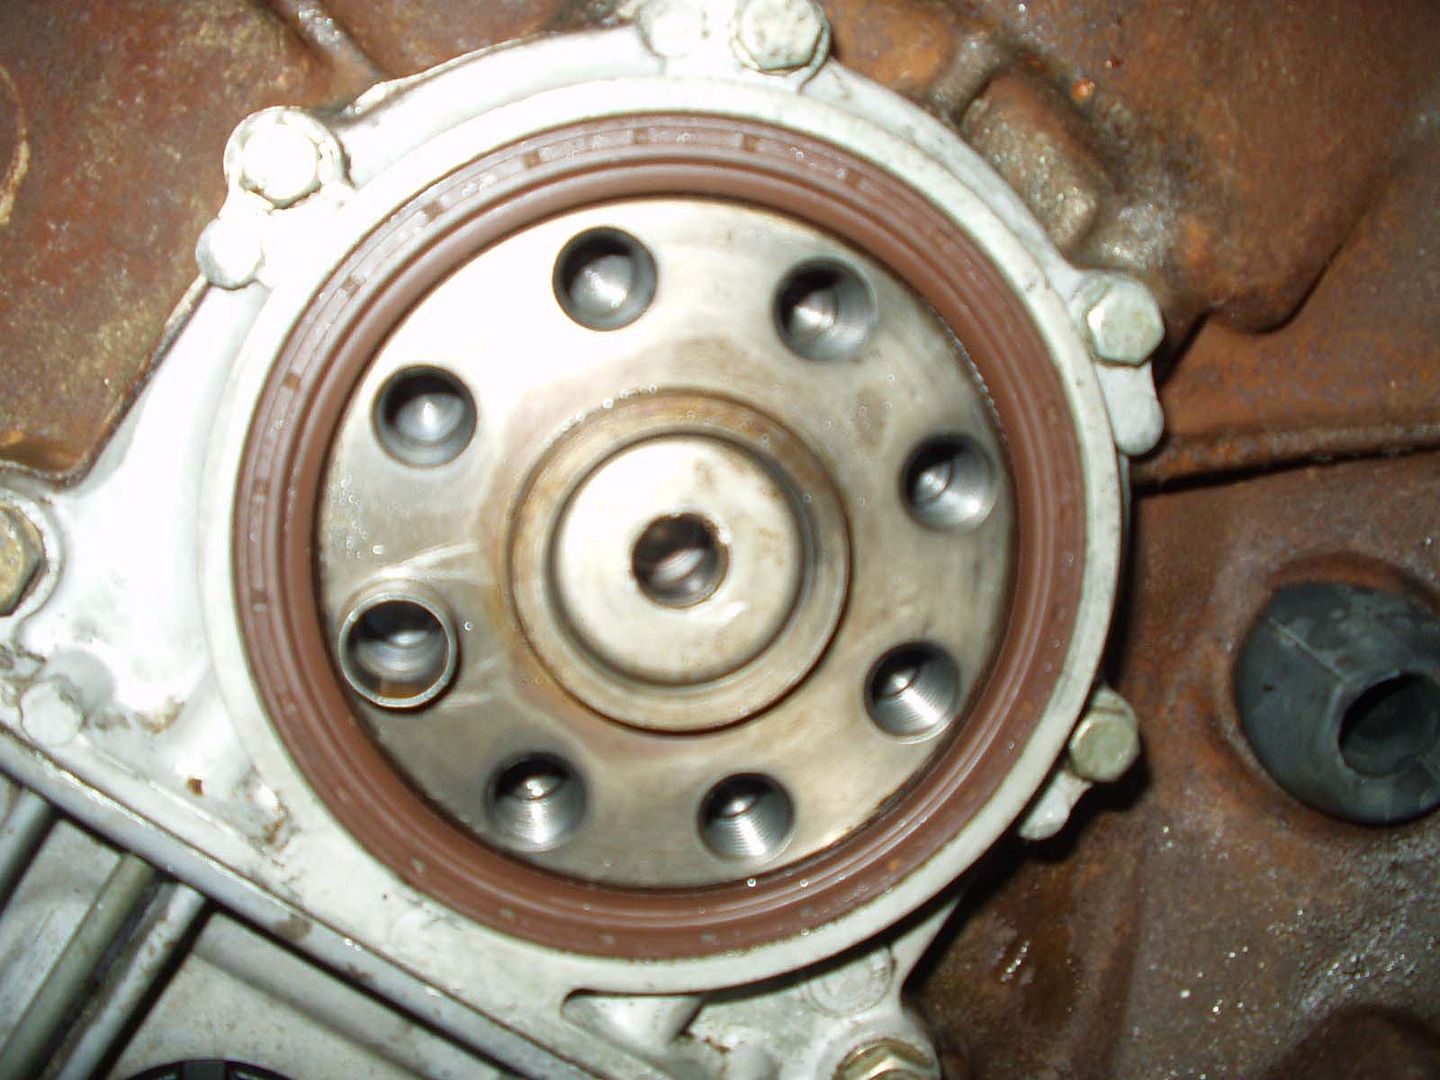
Flywheel and clutch on.
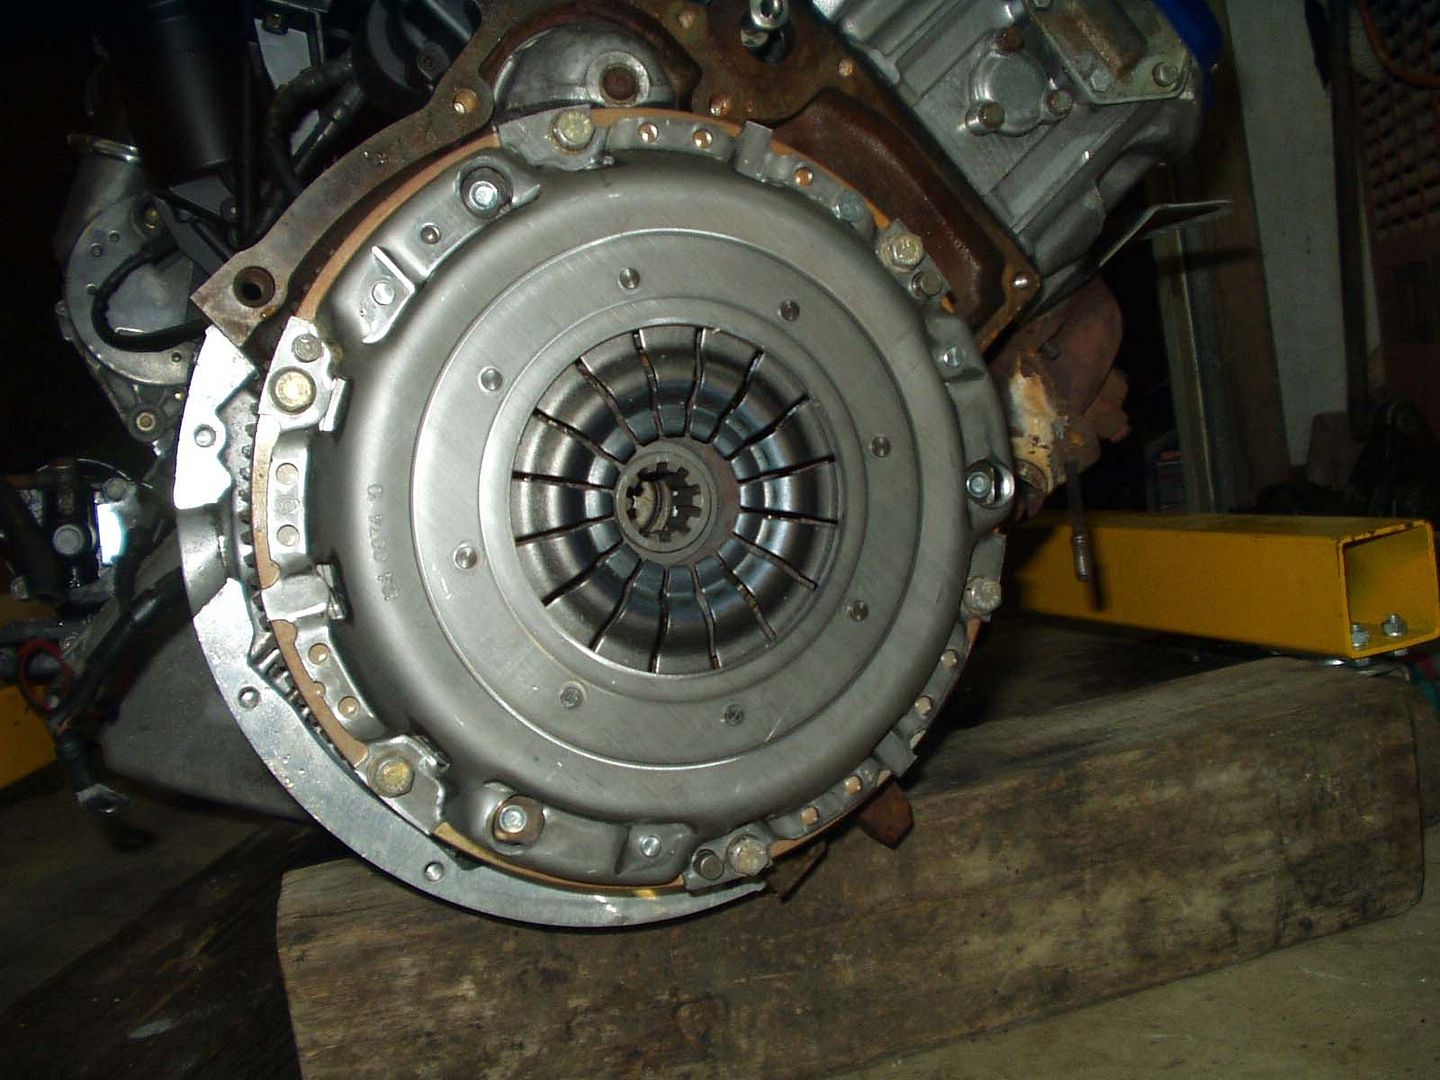
Gearbox on and ready for installation into the engine bay.
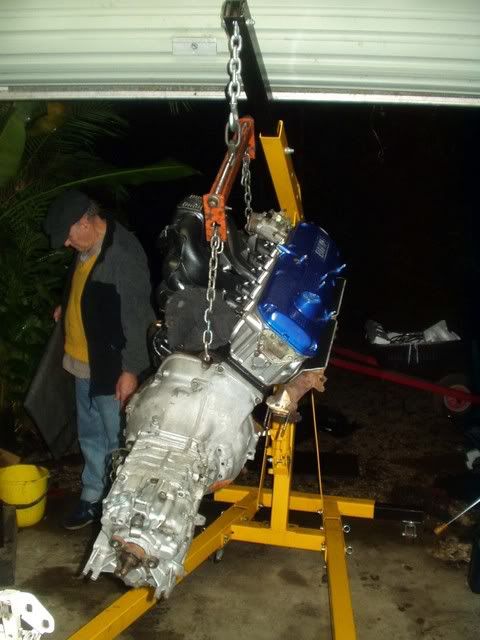
Engine in! Using a tilting bar is highlye recommended! The engine went in with no fuss in about 10 minutes.
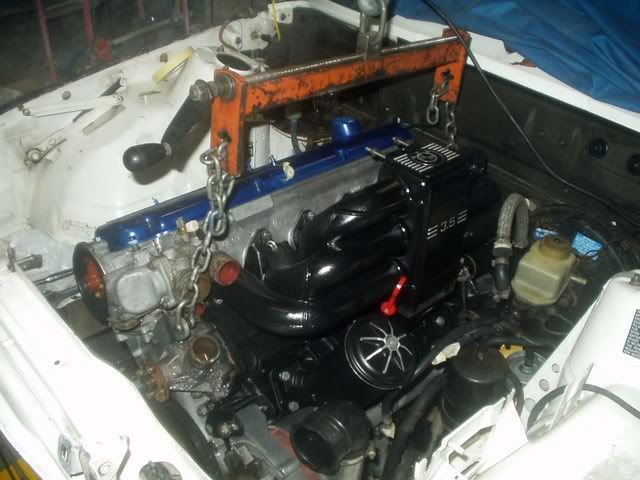
Not enough room for radiator, need another 10mm.
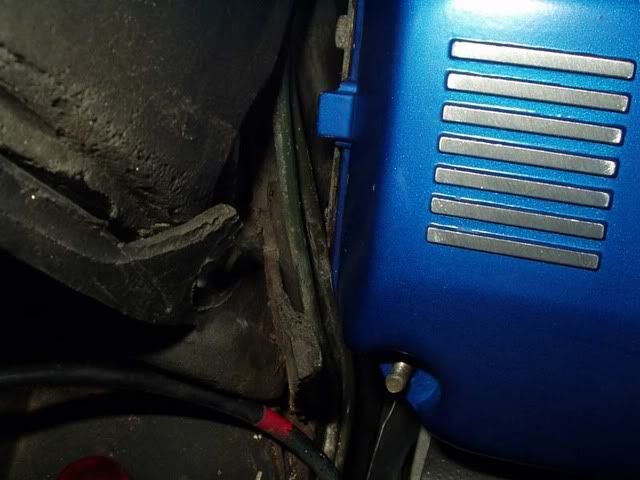
Brake and clutch line braket in the way. Need to take it off and bend the lines over to get the engine back another 10mm.
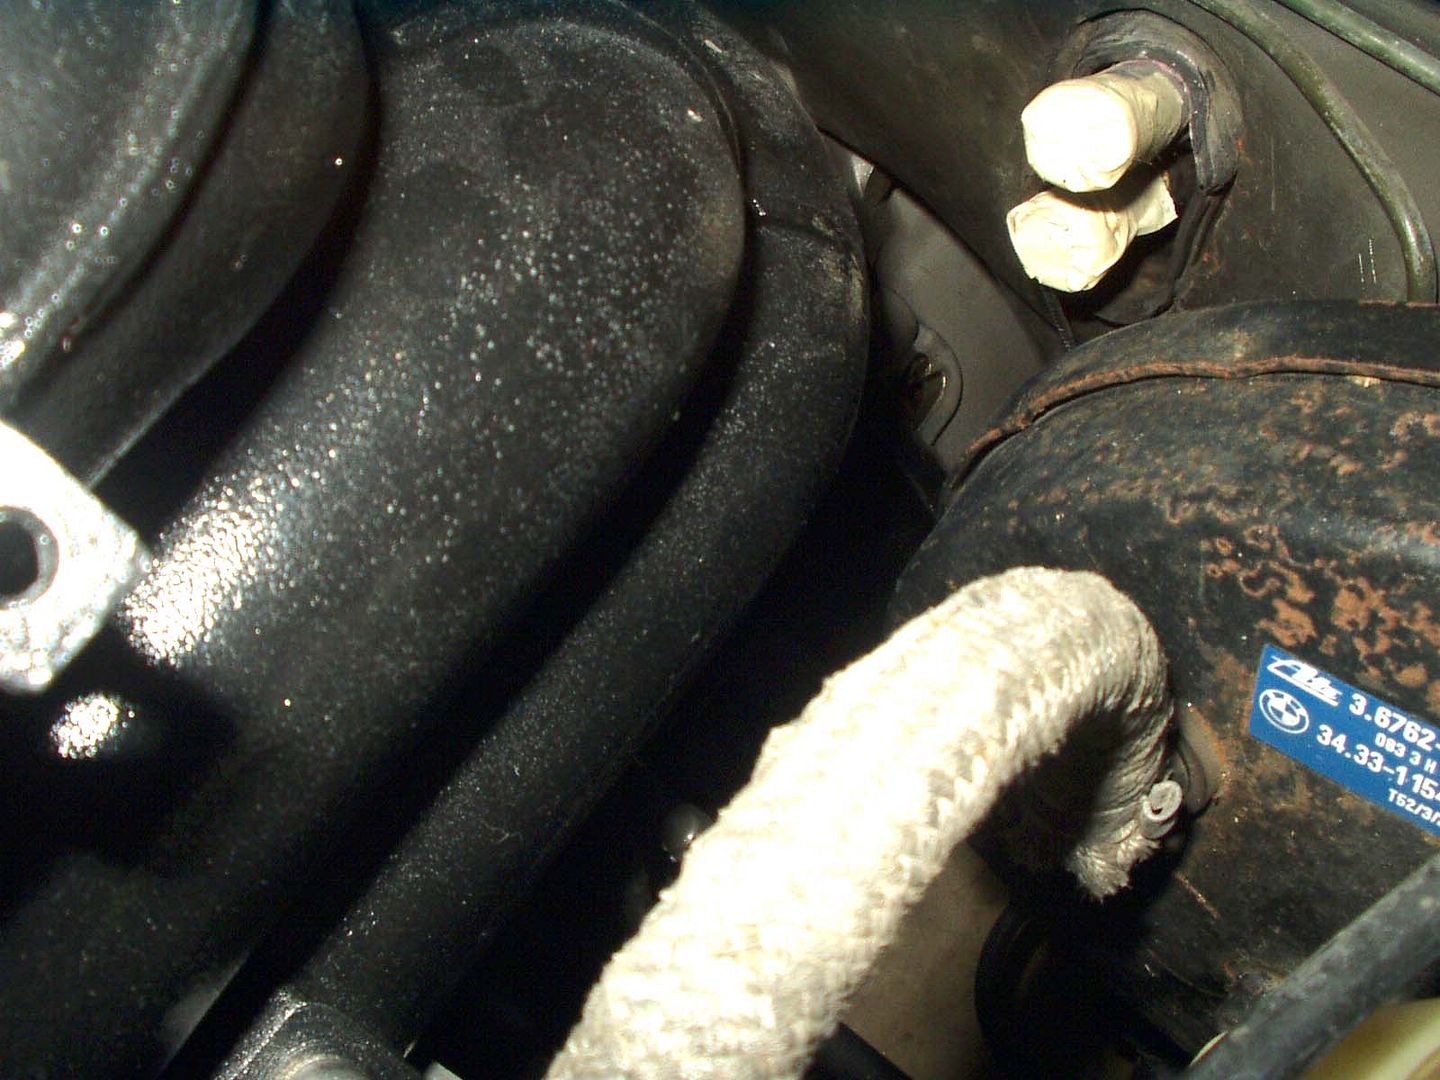
No problem with manifold to booster gap. Just in case though I had taken off the seem on the manifold.
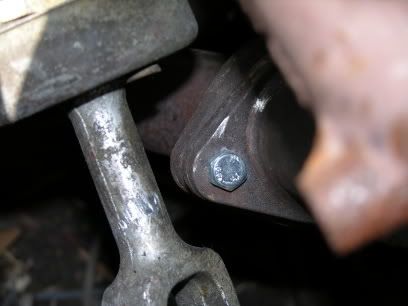
Exhaust manifold is hitting the steering arm! Will need to modify the exhaust manifold flange.
New water pump installed. Not taking any chances with the old one.

This weekend I will make the mounting brackets, connect the wiring etc. Cant wait to have it on the road.
Posted: Sat Jul 01, 2006 8:09 am
by charlE30
Looking really good

Posted: Sat Jul 01, 2006 8:30 am
by ed325i
Looking good
I havent driven mine yet wont be till next summer now

ED
Posted: Sat Jul 01, 2006 8:34 am
by ed325i
What engine mounts did you use ?
ED
Posted: Sat Jul 01, 2006 11:19 am
by Toby_Unna
did you put the engine and box in together from above then?

that's brilliant, which i had a hoist like that! i could barely make my engine go in with just the clutch plate on the back!
Posted: Sat Jul 01, 2006 11:50 am
by ed325i
I put mine in from the top with gearbox on just jacked the back of the car up to get the angle at the front.
I had trouble with the exhaust manifold, I moved the engine over bit and the inlet cleared the servo because I fitted a golf servo.
ED
Posted: Sat Jul 01, 2006 2:18 pm
by m10man
did you put the engine and box in together from above then?
Yes Toby, engine and box went in together from top. Went in real easy with the tilter. How does your turbo go? I bet it has some stick now!
Posted: Sat Jul 01, 2006 2:21 pm
by m10man
What engine mounts did you use ?
ED
I am making them up this weekend. Will post a picture of them when I have finished them. How come you wont have yours on the road until summer? Bummer.
Posted: Sat Jul 01, 2006 6:46 pm
by ed325i
[/quote]
How come you wont have yours on the road until summer? Bummer.[/quote]
Doing the body work on it and a bit low on cash but it will be worth it in the end

ED
Posted: Sat Aug 05, 2006 1:32 pm
by m10man
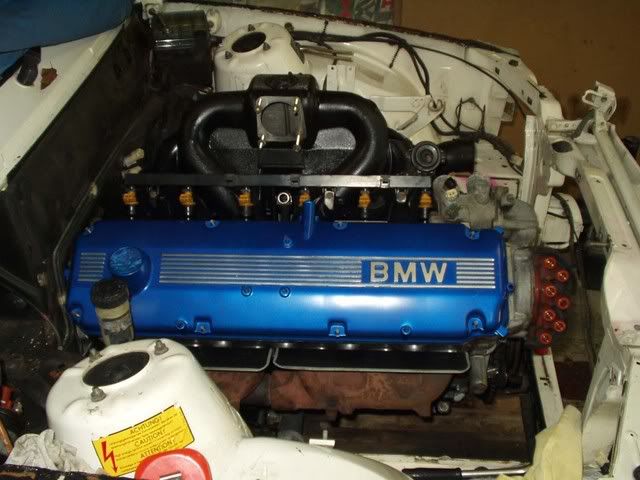
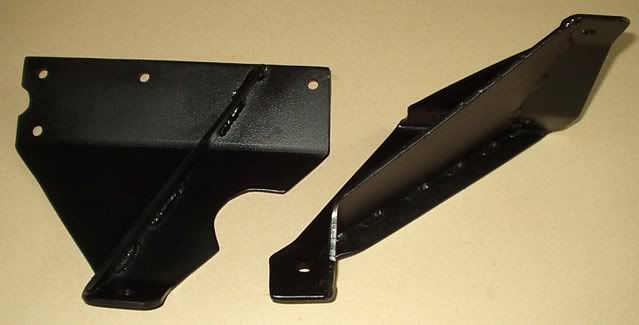
Got the engine all centred up and in final position before starting work on the engine mounting brackets.
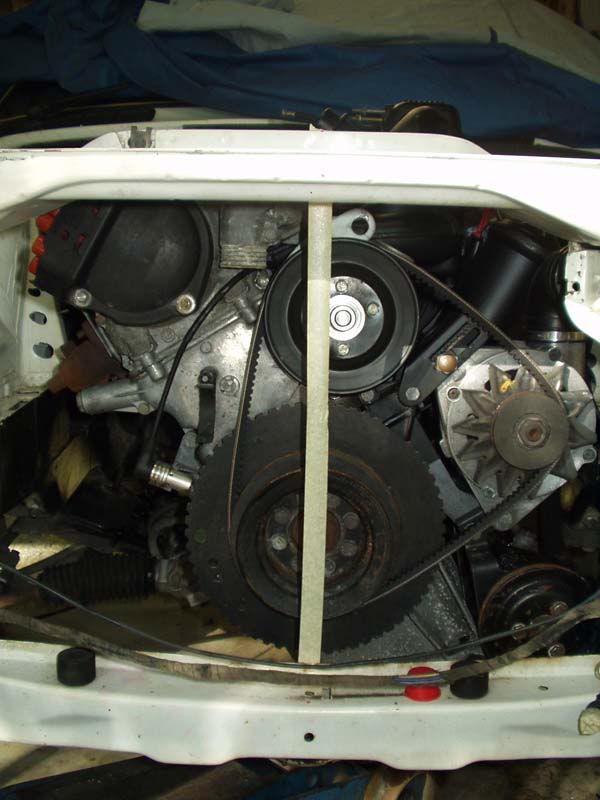
Final position clearances.

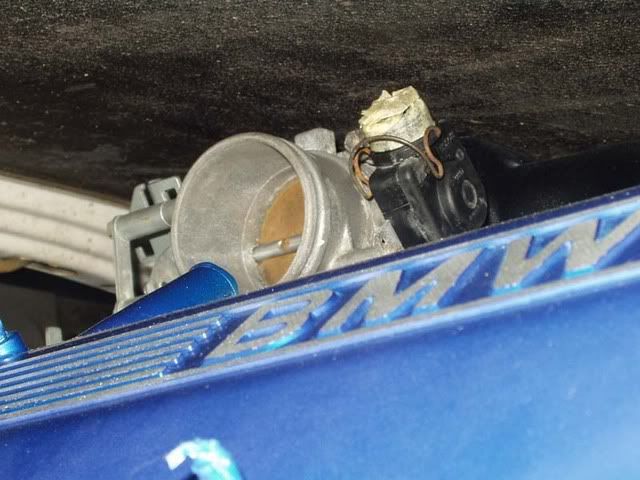
Bonnet clearance. I have since got a manual TPS so shouldnt have a problem with the bonnet clearance.
Engine Mounting Brackets finished.
I have finished wiring it all in too, will post those pics tomorrow. I have the prefacelift chrome bumper model so the wiring pics and splicing details may help someone else doing a conversion to the chrome bumper model.
Re:
Posted: Sat Aug 05, 2006 5:56 pm
by Andy335Touring
Nice progress mate, which rad are you using ?
Re:
Posted: Sat Aug 05, 2006 8:32 pm
by ed325i
Looking good! What happend to the fly by wire TB ? Them engine mounts look good two.
ED
Posted: Sat Aug 05, 2006 11:31 pm
by m10man
which rad are you using ?
E28 535i with a Davies Craig 16 inch electric fan.
What happend to the fly by wire TB ?
I couldnt find a pedal setup anywhere, got tired of chasing so just converted back to the cable setup. Bummer really, I would have like to kept the fly by wire setup.
Posted: Tue Aug 08, 2006 2:23 am
by devinwwu
m10man wrote:Just found out all I need is the potentiometer for the throttle pedal for it all to work. The third temp sensor is part of the fly by wire.
how easy is this to fit into the e30. i have an e34 535i that has electronic throttle and would like to keep it rather than have to get a new tb... I have the entire 535i car and all wiring and pedal assembly but i need to know if this will fit or if it needs a different one
thanks very much just found this site today and am VERY impressed thus far
Posted: Mon Aug 21, 2006 1:34 pm
by m10man
how easy is this to fit into the e30. i have an e34 535i that has electronic throttle and would like to keep it rather than have to get a new tb... I have the entire 535i car and all wiring and pedal assembly but i need to know if this will fit or if it needs a different one
It will all work apparently, you will problably just need to modify your E34 pedal setup to fit into the E30. As I couldnt find a pedal setup I dont know what mods are needed. It has been done though.
Posted: Mon Aug 21, 2006 1:48 pm
by m10man
Here is the wiring for early chrome bumper models.
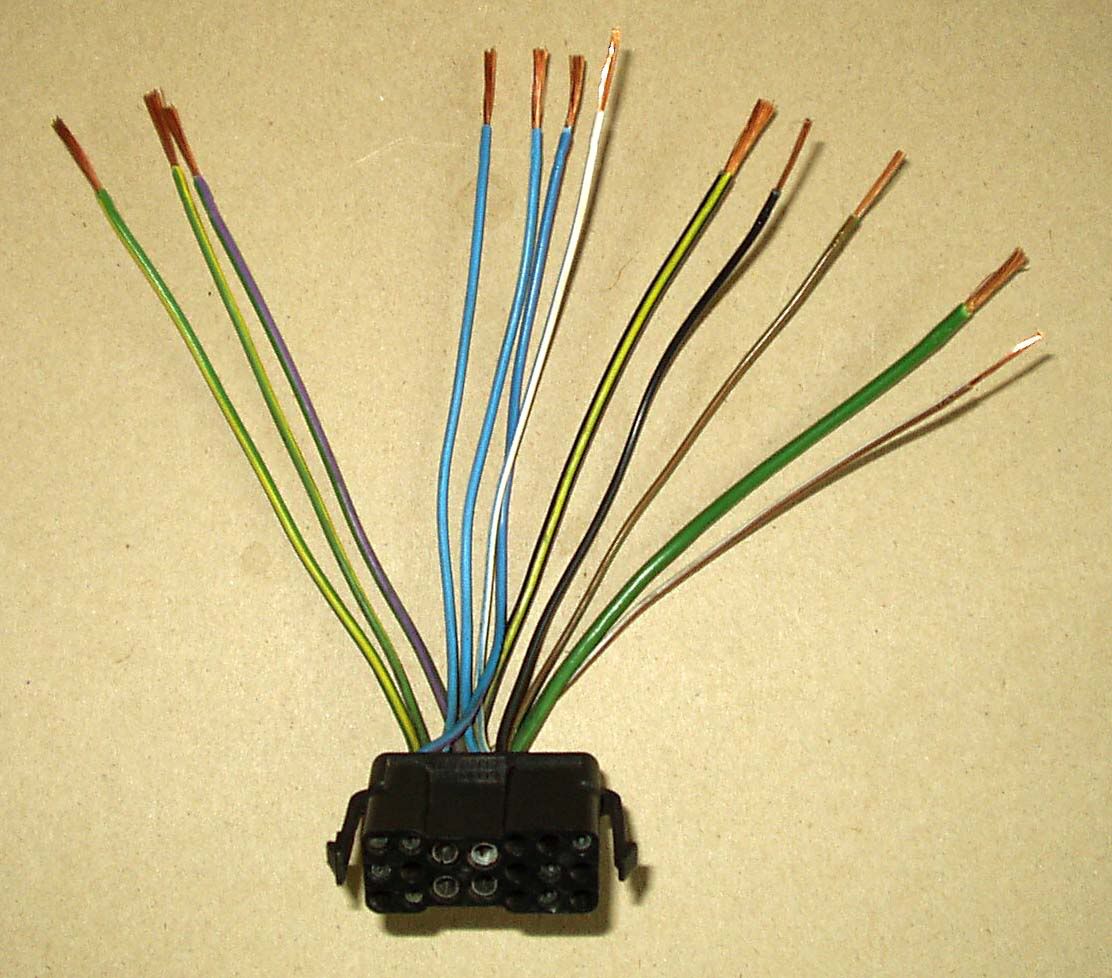
This is an early C101 plug. Later model chrome bumper models had a round plug but the wires are almost all the same.
1 (Blue) = Alternator Charge Indicator
4 (Brown/Violet) = Temp Gauge
6 (Green/Yellow) = Idle Speed Control
7 (Violet/Red) = Fuel Pump Relay
8 (Black/Yellow) = Ignition/Starter
9 (Black) = Tacho (on early instruments clusters without econo gauge)
10 (Green) = Coil positive
15 (Blue/White) = Oil Level to Check Control
16 (Brown/Green) = Oil Pressure Gauge
17 (White/Blue) = Service Interval Lights
The connections for the M30 engine plug are:
E30 8 (Bl/Yl) connects to M30 18 (Bl/Yl) = ign/starter
E30 10 (Gn) connects to M30 7 (Gn) = Coil positive 15
E30 7 (Vi/Rd) connects to M30 13 (Gn/Vi) = fuel pump relay
E30 1 (Bu) connects to M30 1 (Bu) = Alternator Charge
E30 4 (Br/Vi) connects to M30 4 (Br/Vi) = Temp gauge
E30 16 (Br/Gn) connects to M30 5 (Br/Gn) = Oil pressure
E30 17 (Wh/Bu) connects to M30 11 (Wh/Gn) = Service Interval lights
E30 9 (Bl) connects to M30 9 (Bl) = early tacho with no econo gauge
Posted: Mon Aug 21, 2006 1:59 pm
by m10man
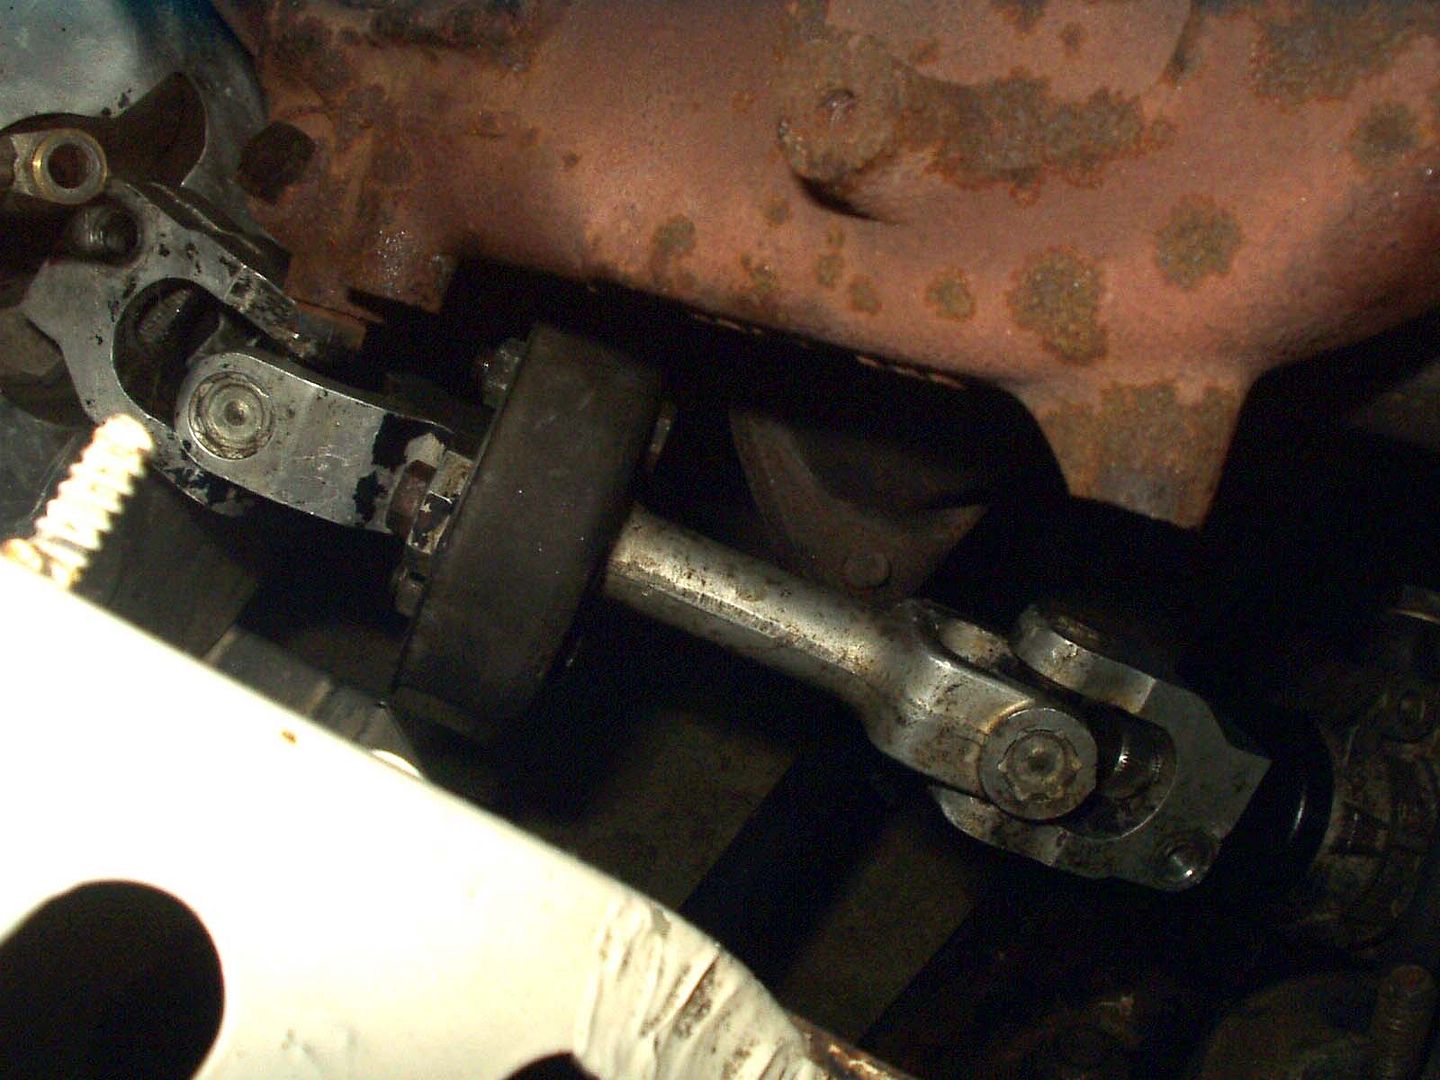
Tail Shaft is done.
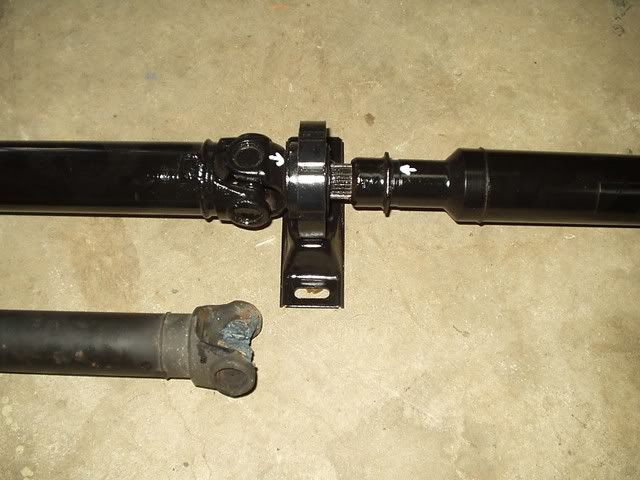
As you can see I had the centre uni joint replaced and had the front half of the E30 323i shaft knuckle mated with the front of the 535 shaft and then had it shortened. Also put a new centre support bearing in and had it all balanced. Interestingly the 323i shaft was the right lenght - shame it didnt have the bigger coupling attachment.
The 323i gear lever bracket is also the right length.
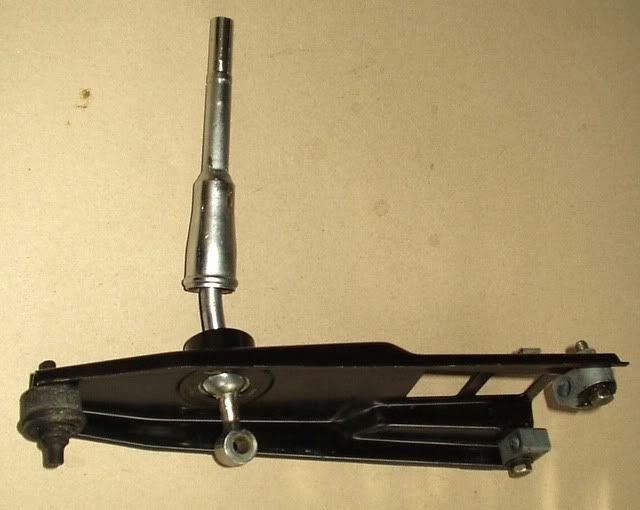
I had the bottom of my shifter extended by 15mm to make it a shorter shift. Cheaper alternative to buying a short shift kit - an you keep the OEM BMW quality. The shift feels nice a short now.
The ECU in place.
Adjusting the valve clearances before putting the valve cover, AFM etc back on.
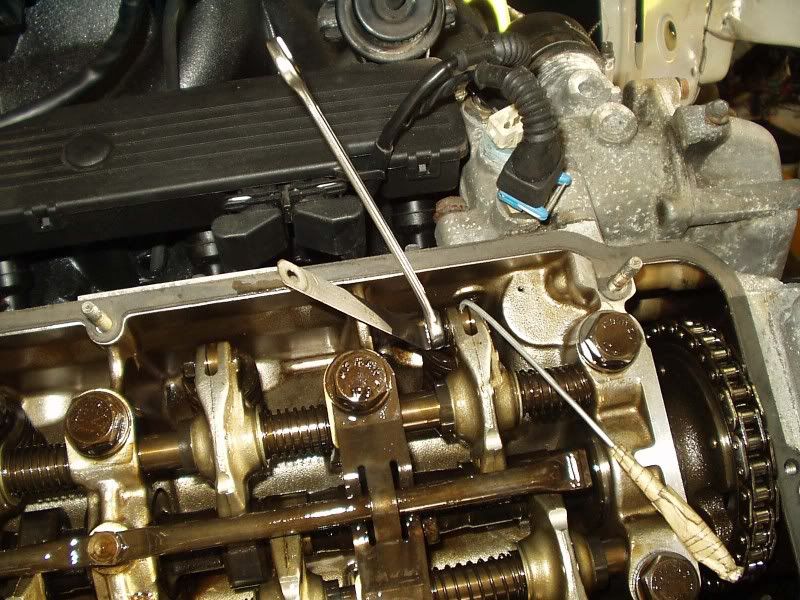
I was give a tip for the clearances - 6 thou for the inlet and 8 thou for the exhaust - apparently works the best.
Where did you other guys connect the vacumn hose for the Charcoal Cannister? I dont seem to have a spare connection.
Re:
Posted: Tue Aug 22, 2006 12:39 am
by Andy335Touring
Nice progress mate, it looks nice and clean in side the head.
The clearances make sense as the exhaust valves will get hotter so will expand more.
Do you need the canister to pass emmisions tests ?
My early E34 535 didn't have one fitted, do you have to use a kat ?