Page 1 of 2
Rear End & Underbody Restoration
Posted: Fri Feb 22, 2008 8:52 pm
by Taylor325i
What started off as replacing my knackered fuel lines has turned into a major drama and I've decided to take advantage of the car being SORN for the winter and just do what needs doing under there. As it turns out quite a bit more than I expected.

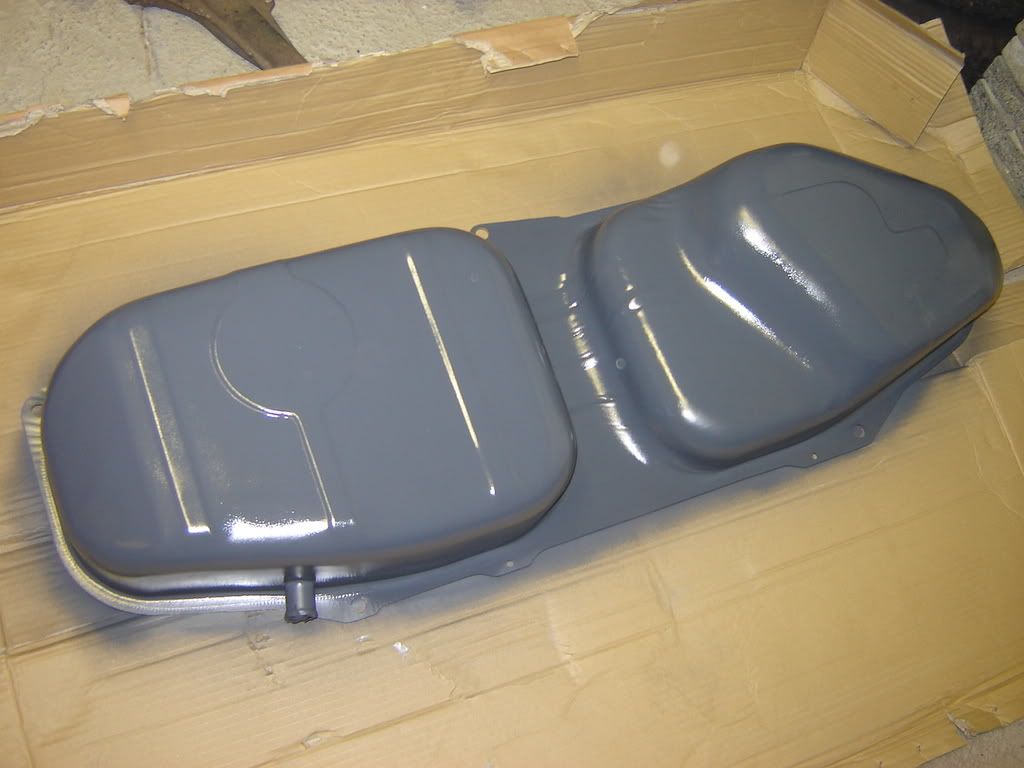
I knew my fuel tank and diff were leaking so I got a new tank from GSF and I still have the LSD from my old 325i Touring.
Work begins Sat 9th Feb.
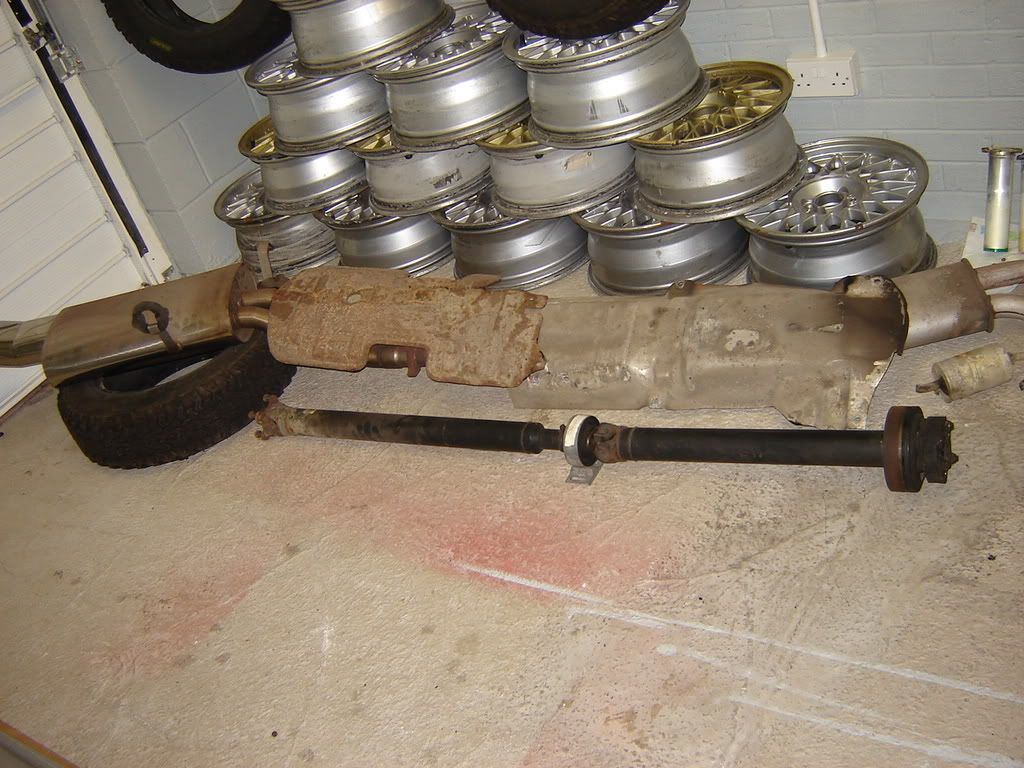
Exhaust, heat shields and propshaft out.
Leaky open diff to be replaced with 3.91 LSD.
Fuel tank out but I snapped one of the fixing bolts above the rear beam so this is why the rear beam now needs to come out so that I can drill and re-tap.
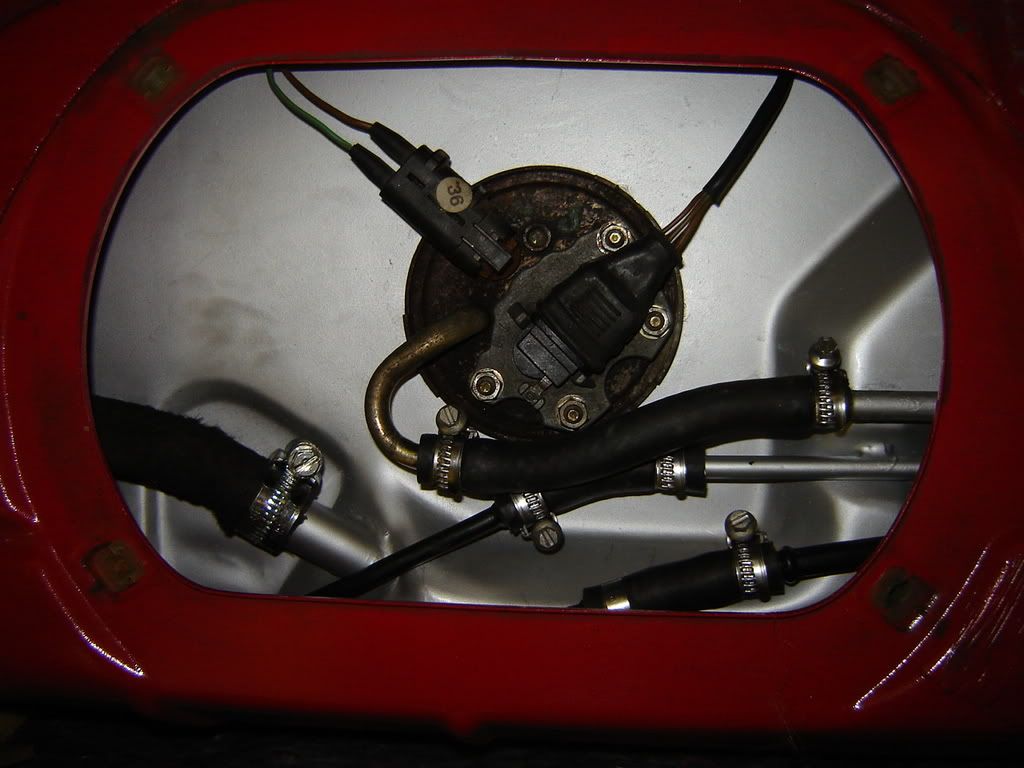
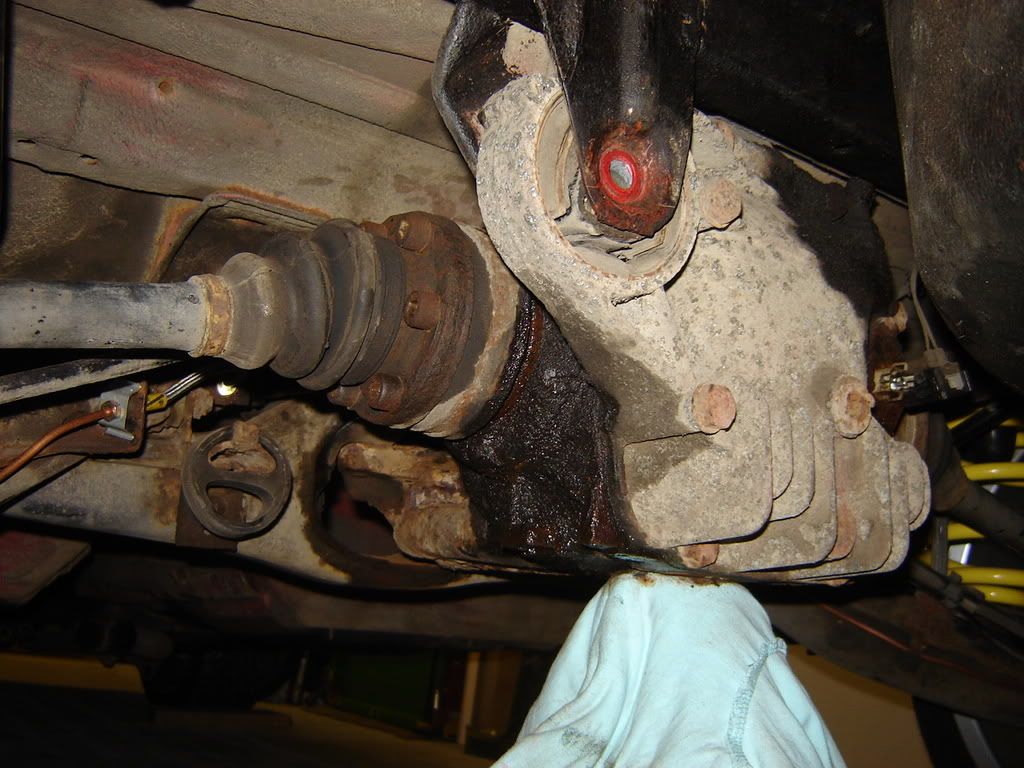
Diff out.
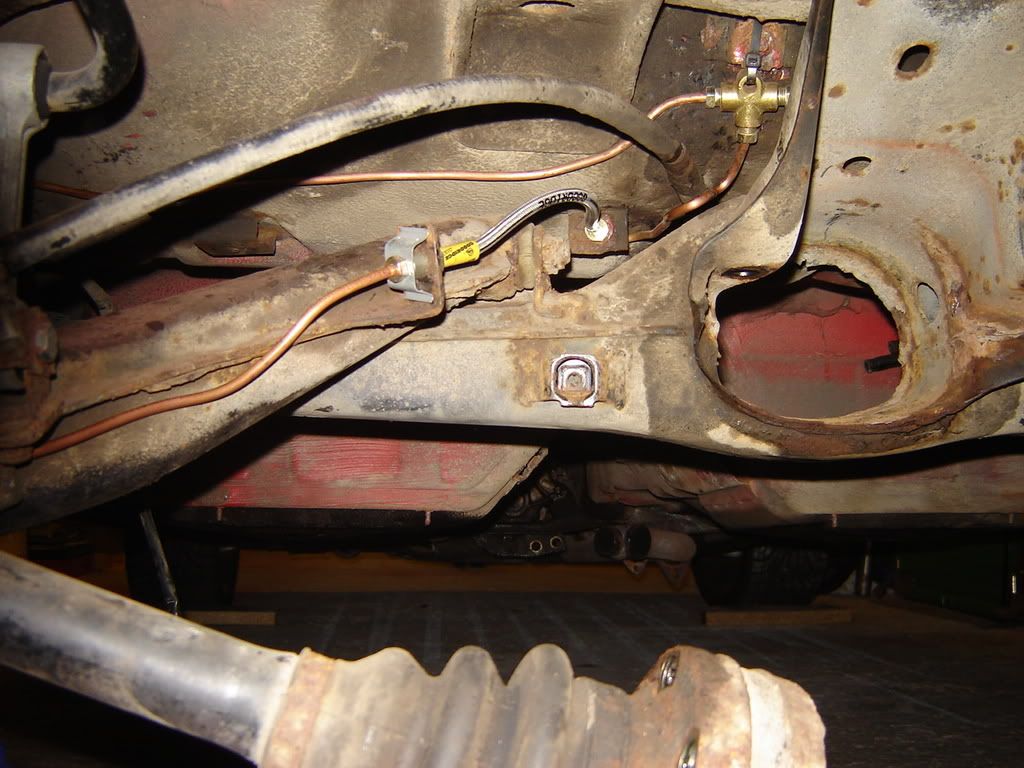
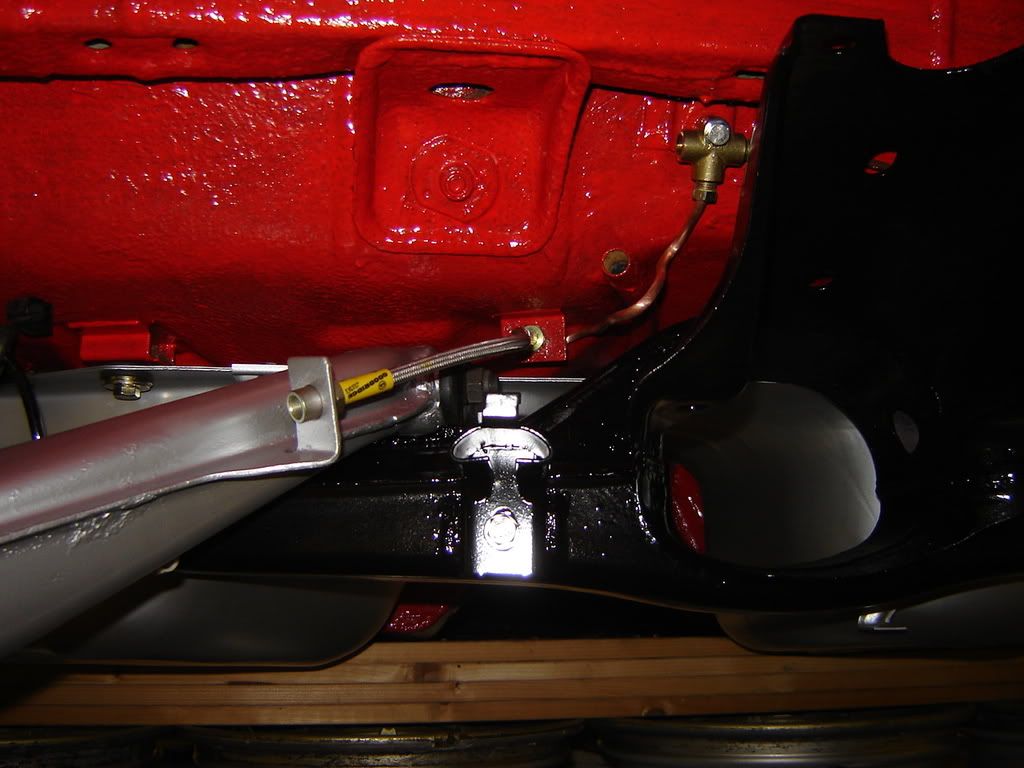
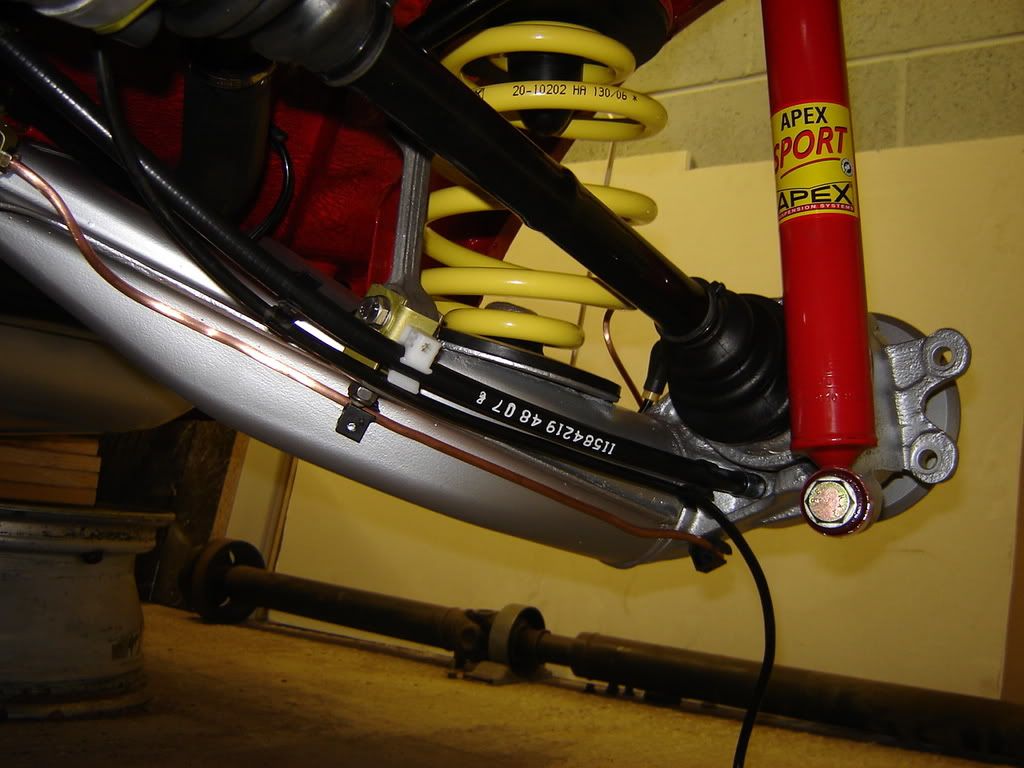
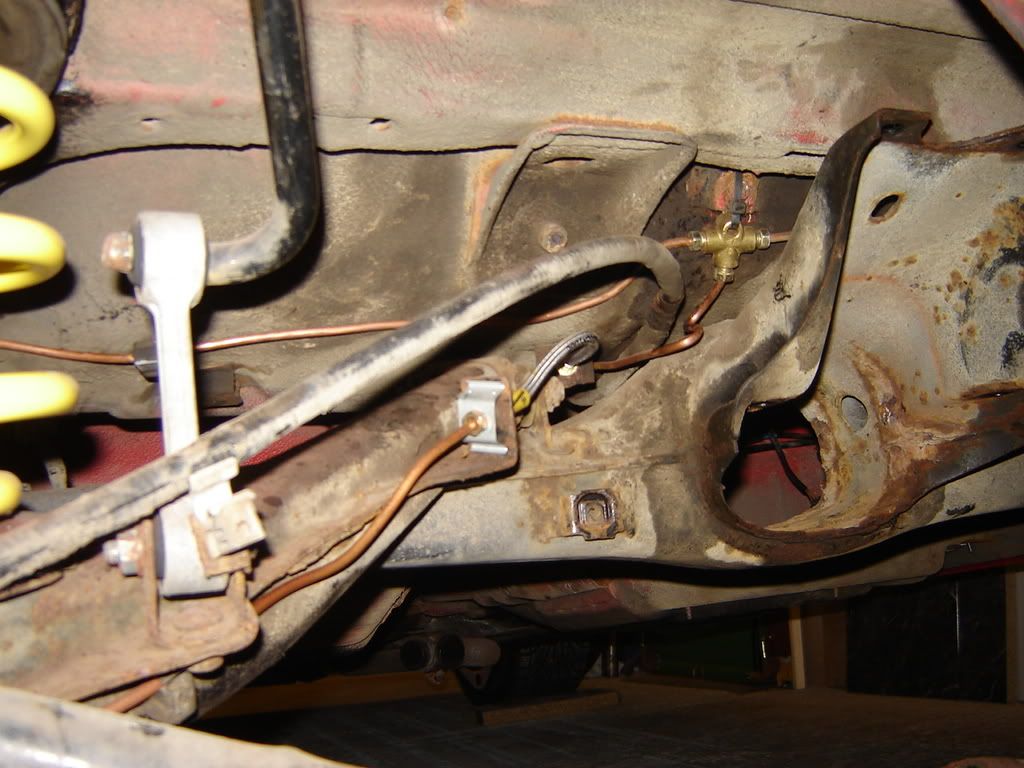
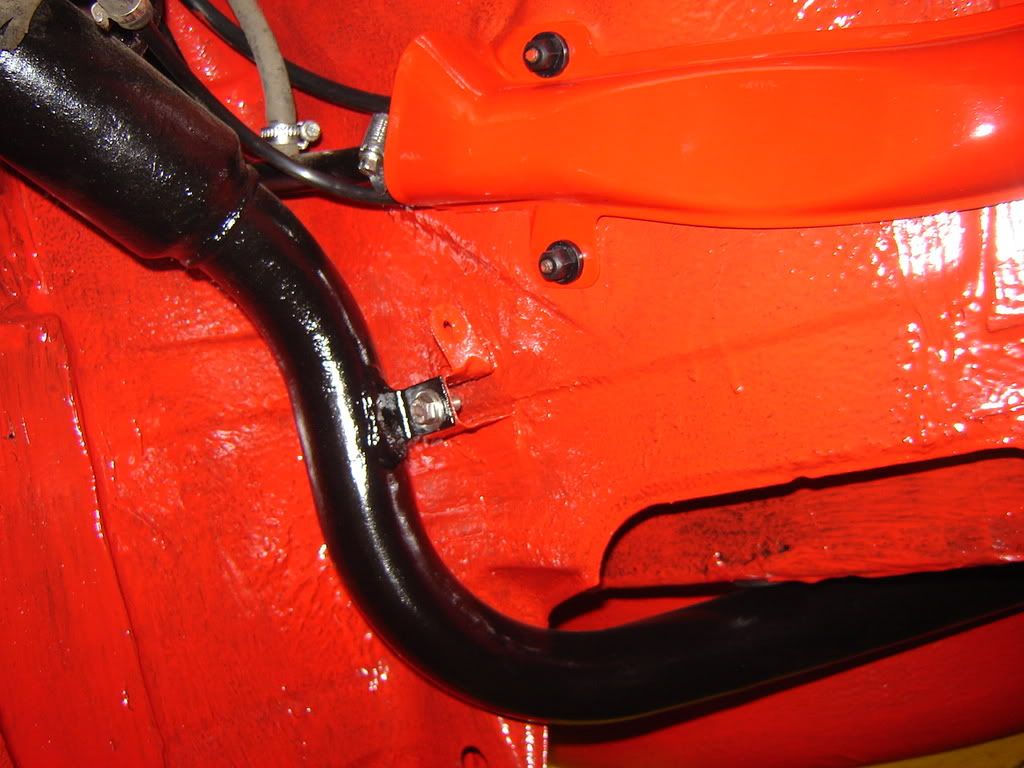
I also need to sort the fixing for the brake line T piece from last year (currently held with a good 'ol tie wrap).
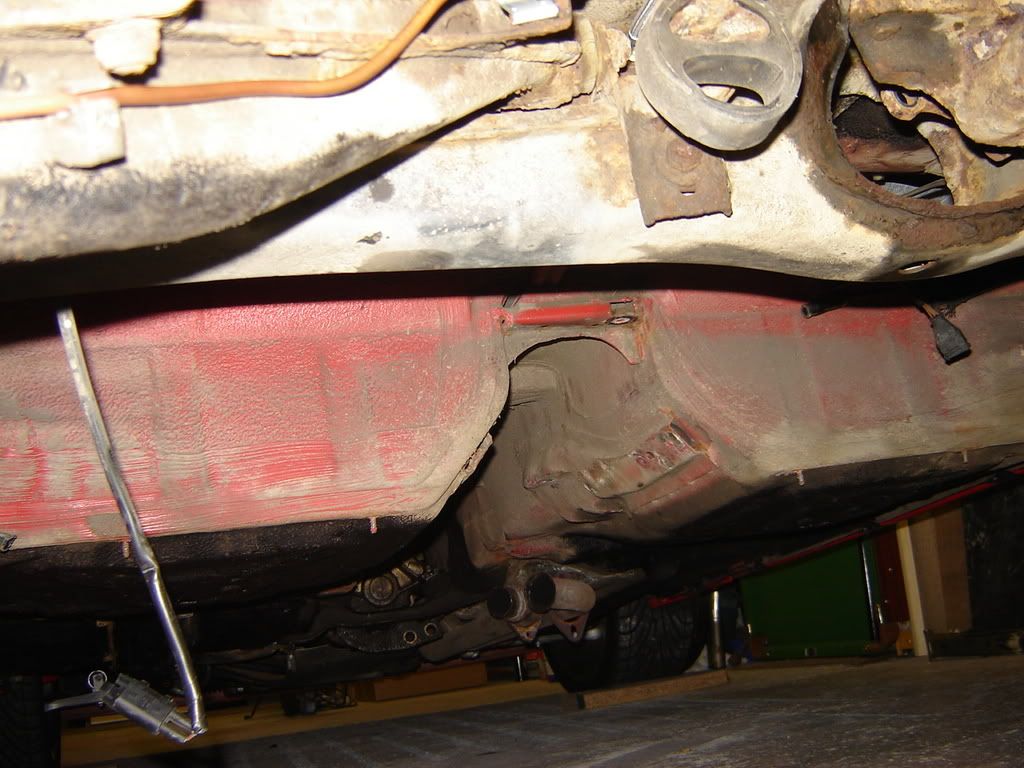
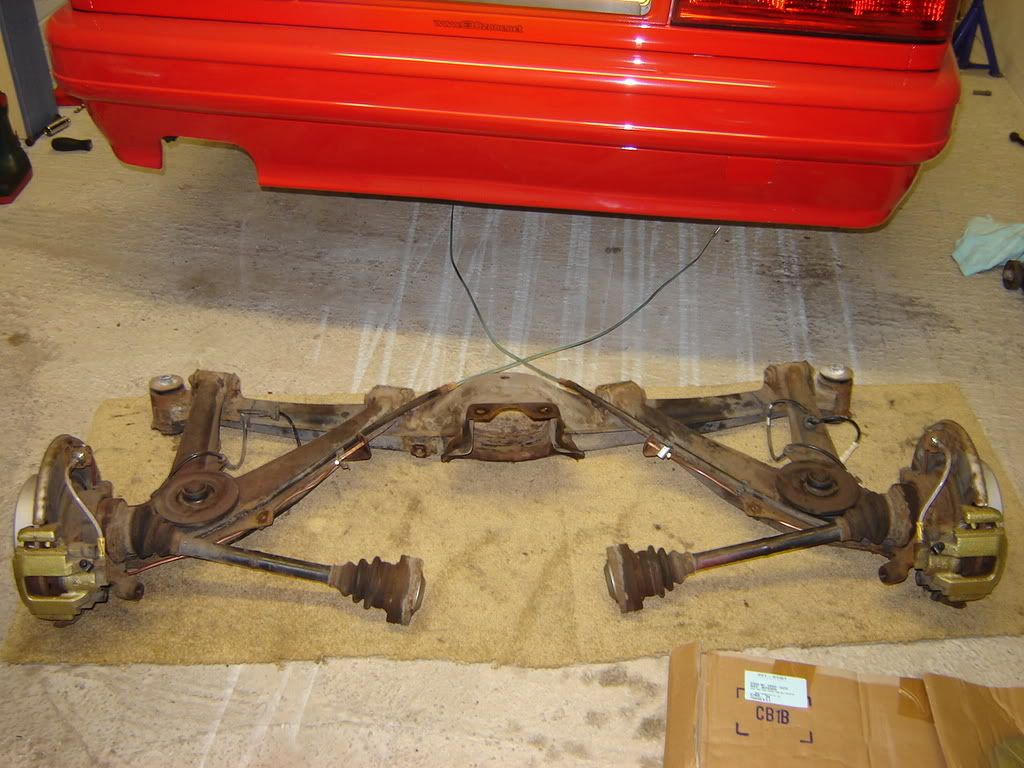
And finally rear beam out.
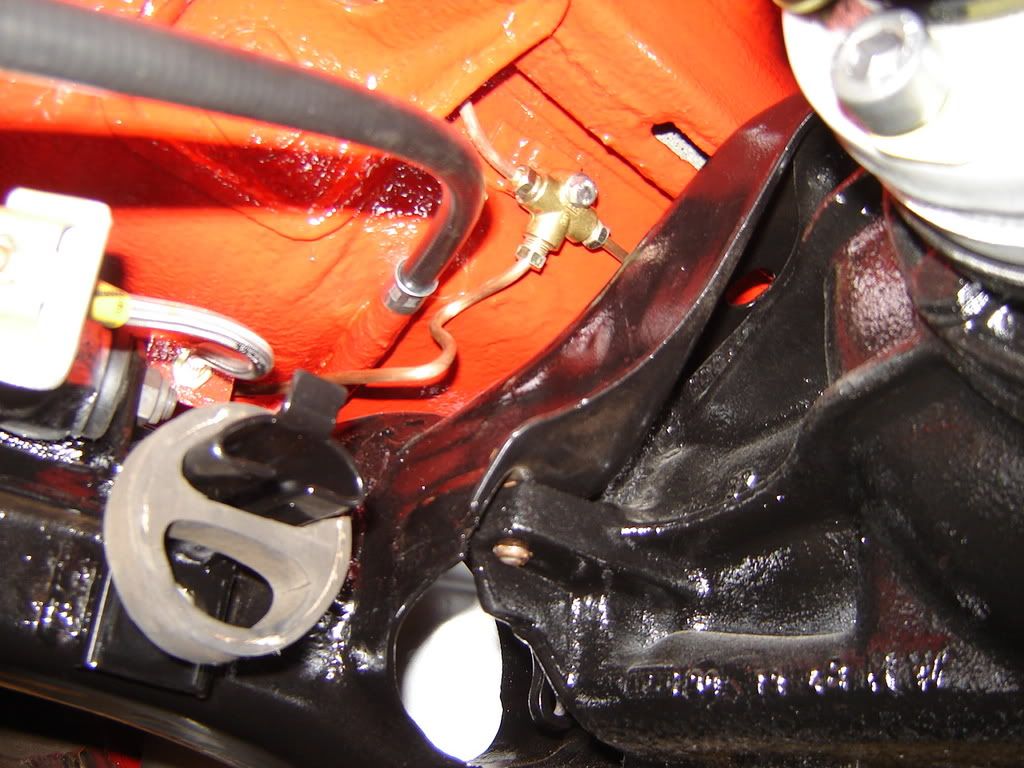
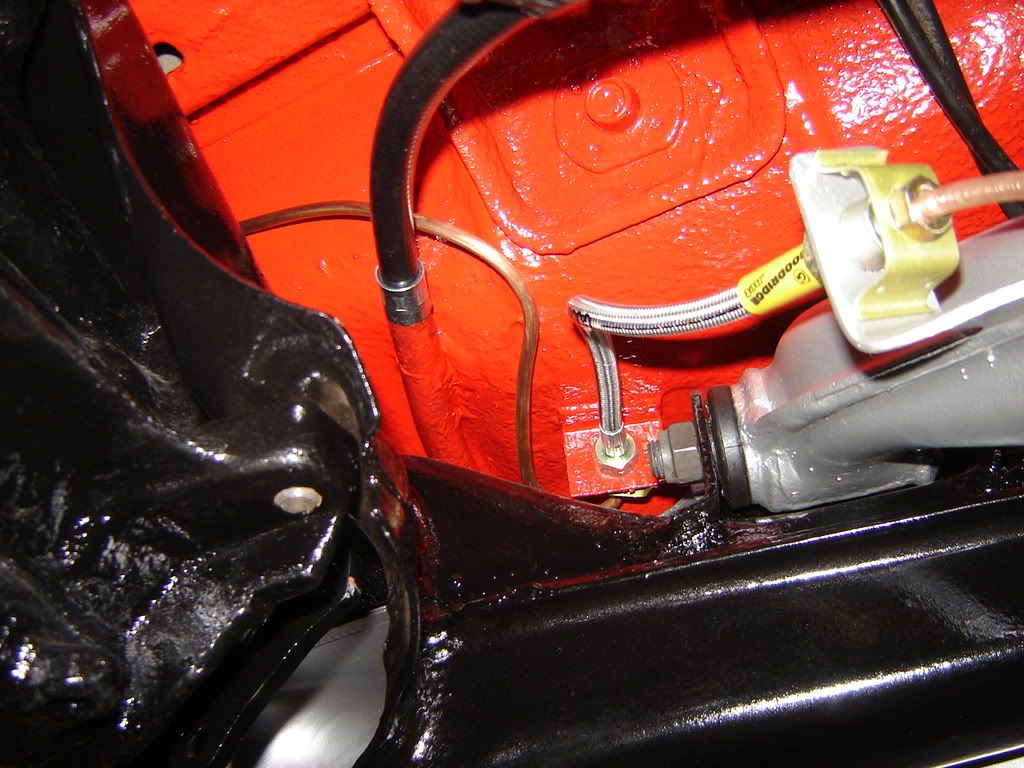
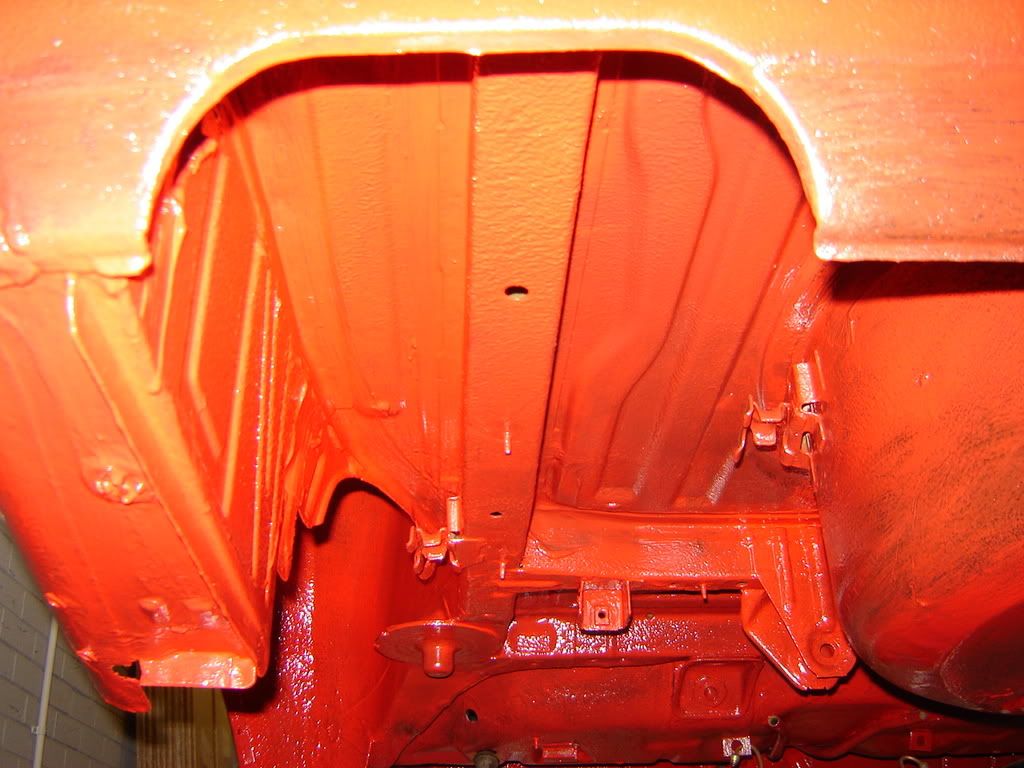
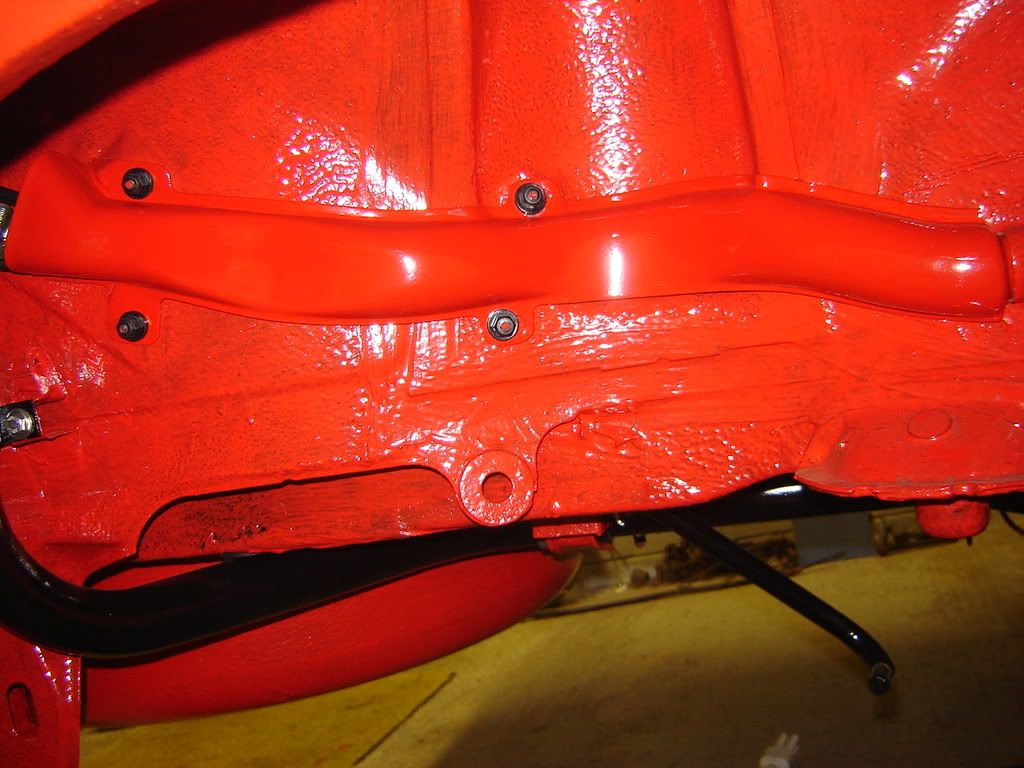
The areas of the chassis that I couldn't get to with all the parts fitted when I was doing the underseal last year will now be taken care of.
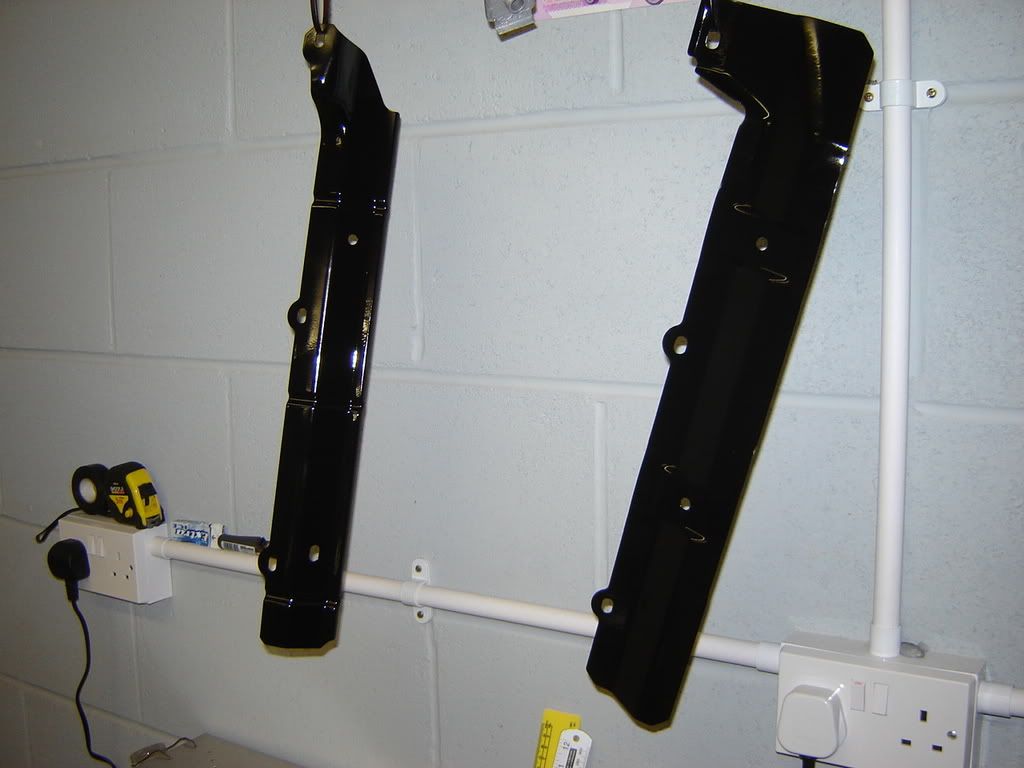
The alloy heat shield which goes under the prop tunnel will be cleaned up and re-used but the steel one which goes above the backbox is only good for the bin so I'm going to make a copy using alloy sheet.
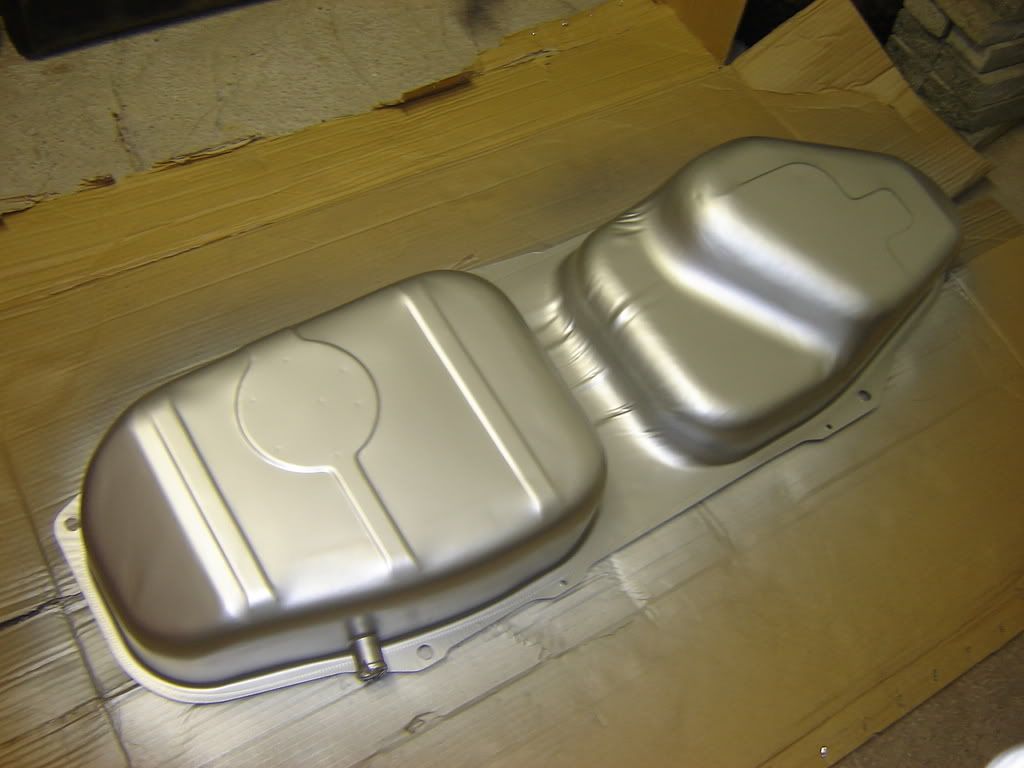
New fuel tank which will get a couple of coats of paint on top of the manufacturers coat before it's installed.

New fuel tank protection plates painted and ready to fit.
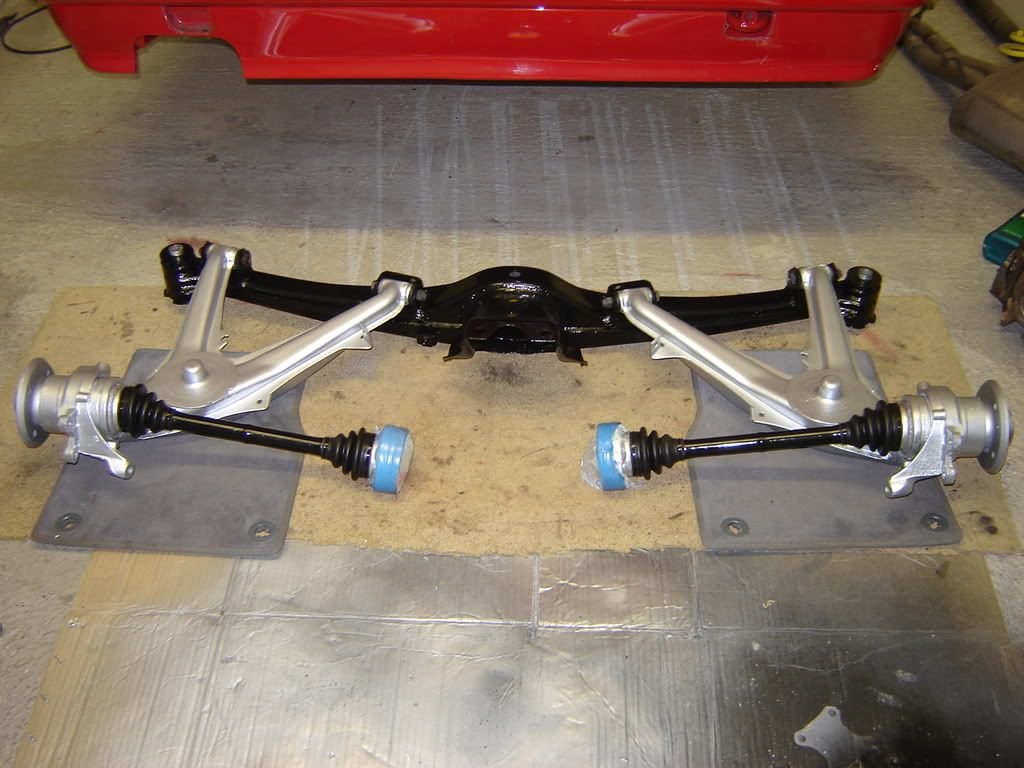
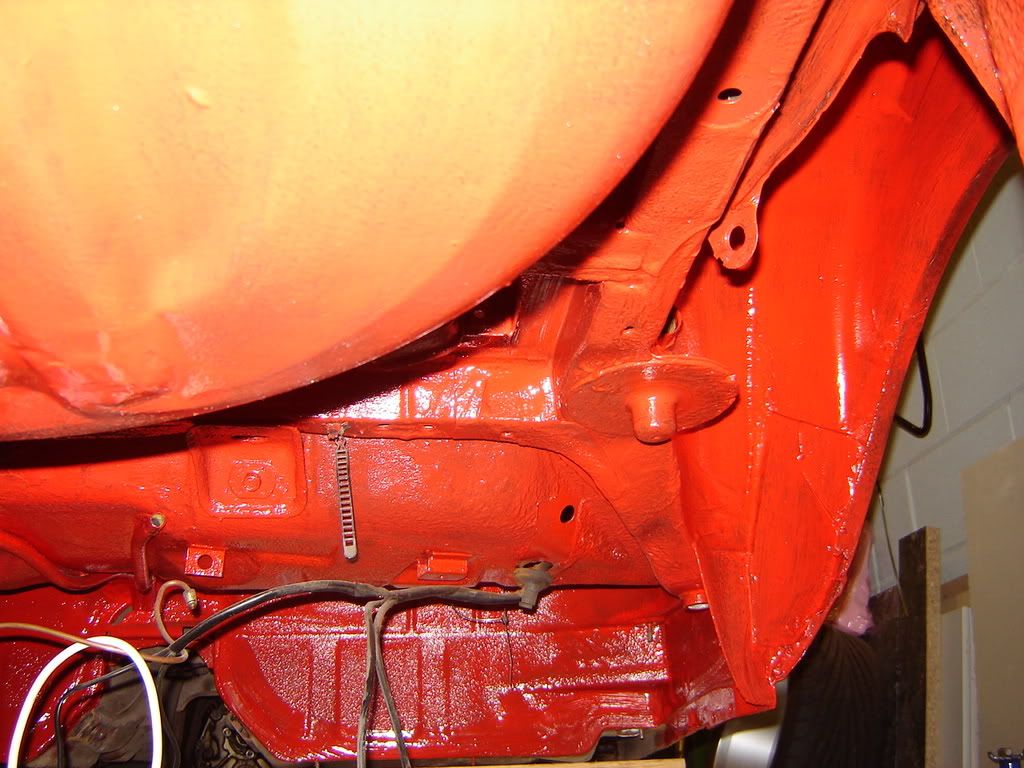
That's pretty much where I am at the moment. The next stage will be pretty soul destroying cleaning up the rear beam, trailing arms, new diff etc. There's also a few minor bits of surface rust on the chassis that I need to deal with but hope fully all the boring stuff will be done by the time my new goodies arrive from the genuine parts dept.

Taylor.
Re: Rear End & Underbody Restoration
Posted: Fri Feb 22, 2008 9:23 pm
by aceraf
Love these restoration jobs...making it all look mint!

Wish i had a garage like that to work in

Quite a few spare wheels
Re: Rear End & Underbody Restoration
Posted: Fri Feb 22, 2008 9:25 pm
by Alex
Good luck with it
you should sell them wheels and get some extra dosh $$$$$$$$$$
Re: Rear End & Underbody Restoration
Posted: Fri Feb 22, 2008 9:30 pm
by eko
Theres something very satisfying about removing the rear beam and associated parts/paibting the underbody etc.
Not the cleanest of jobs but the results are well worth the effort put in.
Done a few in the recent past and will be doing the next in a couple of weeks,kind of looking forward to it now the weather is getting better(no luxury of dry garage here
).
Cracking job mate,keep us updated

Re: Rear End & Underbody Restoration
Posted: Fri Feb 22, 2008 9:59 pm
by shedrool83
Great job your doing there wish i had the space and ability to attempt this.Keep up the good work.
Re: Rear End & Underbody Restoration
Posted: Sat Feb 23, 2008 10:16 am
by Simon13
the heat sheild above the back box is £7 from bmw, howcome you bought a 55 litre tank? Look it from the pictures anyway!
Nice work keep it up!
Re: Rear End & Underbody Restoration
Posted: Sat Feb 23, 2008 10:23 am
by jack148
What a good job your doing there. Would like to in a position to do the same to mine. Be interesting to see how many hours you take to complete the job. If you don't mind me asking what level of expertise are you at?? Is this a DIY job, is what I'm getting at.
Re: Rear End & Underbody Restoration
Posted: Sat Feb 23, 2008 2:42 pm
by E30BeemerLad
this is exactly what's going on with my touring at the moment, started off with a diff swap and now it's replace all lines and bushes and general tidy up. But at least you know future MOT's are gonna be nothing to worry about

Re: Rear End & Underbody Restoration
Posted: Sat Feb 23, 2008 2:54 pm
by jbh
imgoing to be doing exactly the same thing very soon just got my car back from the body shop after getting a rear qtr fitted im gettin the inner arches done next then it will be the strip down, clean, paint and replace pipes and bushes on the underside of the car

Re: Rear End & Underbody Restoration
Posted: Mon Feb 25, 2008 7:03 pm
by Taylor325i
Simon13 wrote:the heat sheild above the back box is £7 from bmw, howcome you bought a 55 litre tank? Look it from the pictures anyway!
Nice work keep it up!
I know the heatshield isn't expensive but I've already made up a replacement for the one that goes under the fuel tank out of alloy sheeting and just thought I'd continue the theme with the backbox one. It's wierd why BMW decided to use a mixture of steel and alloy ones anyway.
Tank is definately 63 litre - must just be the angle that I took the photo.
jack148 wrote:What a good job your doing there. Would like to in a position to do the same to mine. Be interesting to see how many hours you take to complete the job. If you don't mind me asking what level of expertise are you at?? Is this a DIY job, is what I'm getting at.
I'd say that I'm a competent diy mechanic. I'm an electrician to trade but I've always done as much work on my cars as possible. Does make a big difference having a garage though. It's a diy job if you've got the confidence (and the correct tools). It's only nuts and bolts and remembering how to put it all back together.
Taylor.
Posted: Tue Apr 08, 2008 7:24 pm
by Taylor325i
A wee update -
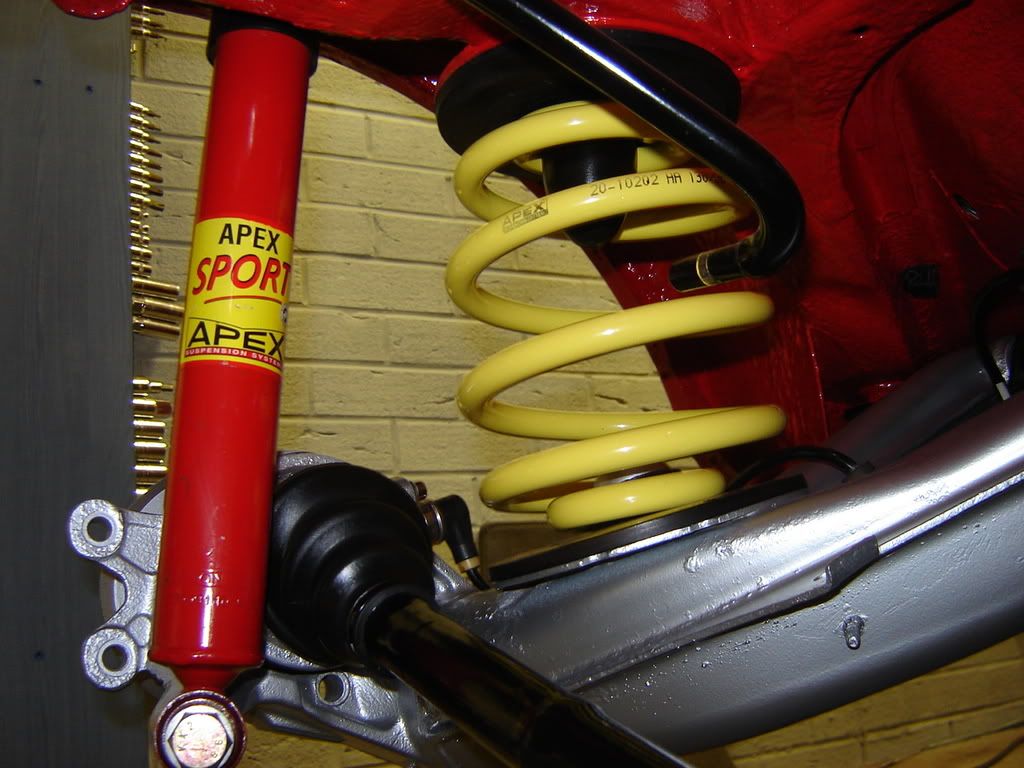
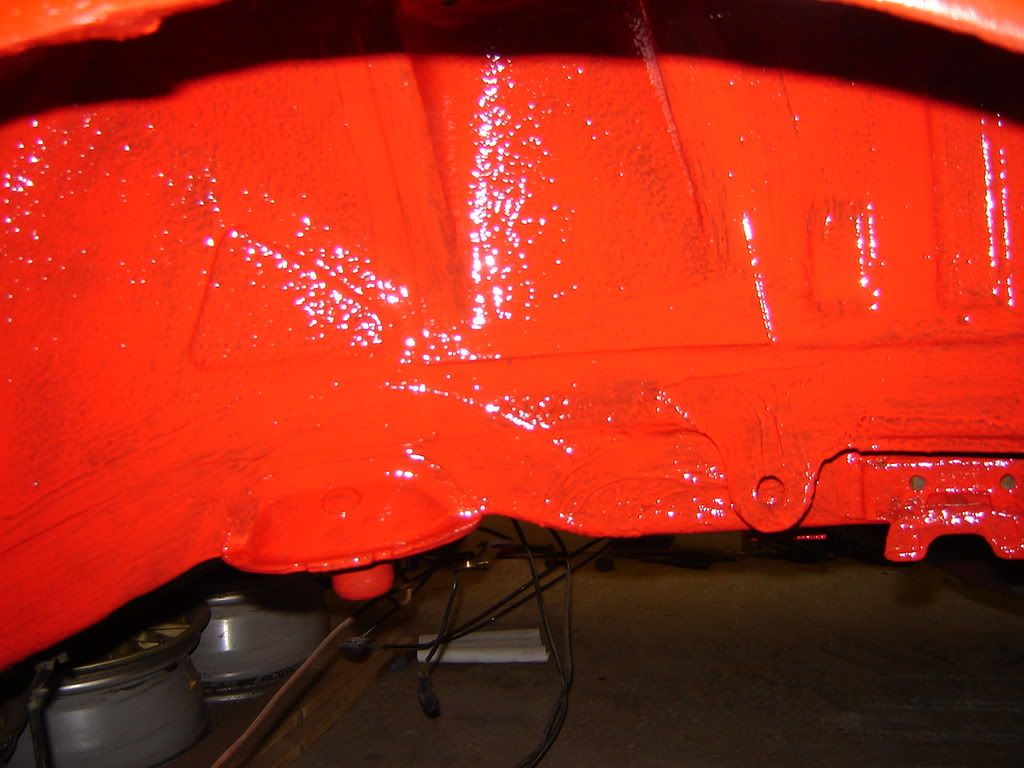
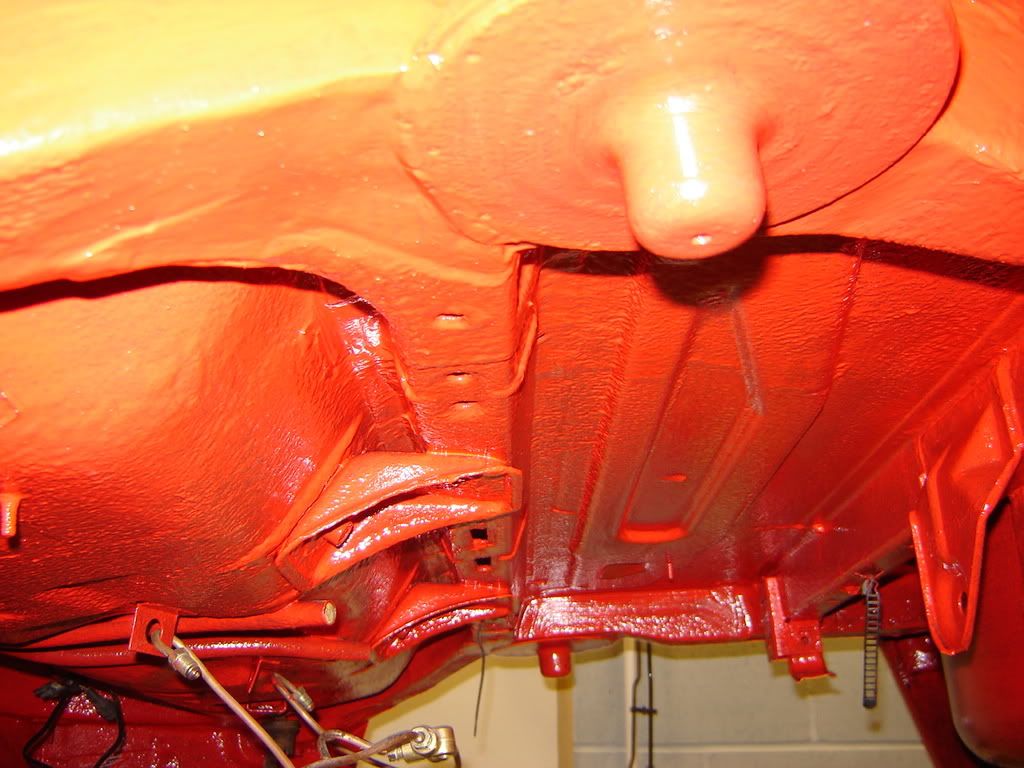
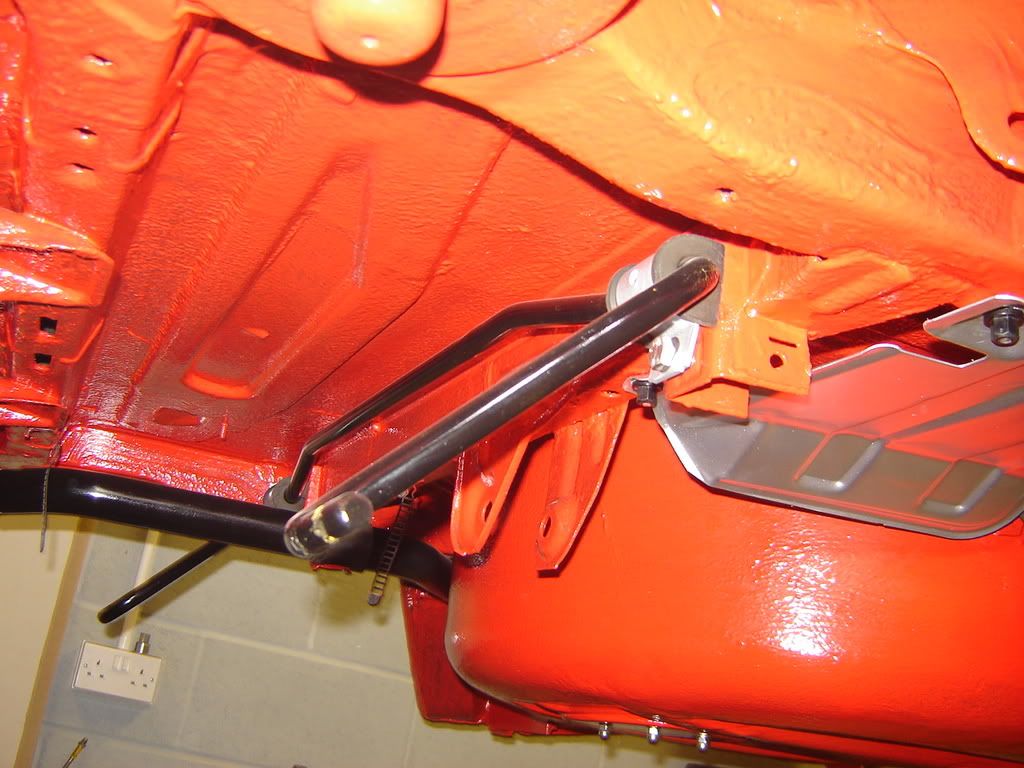
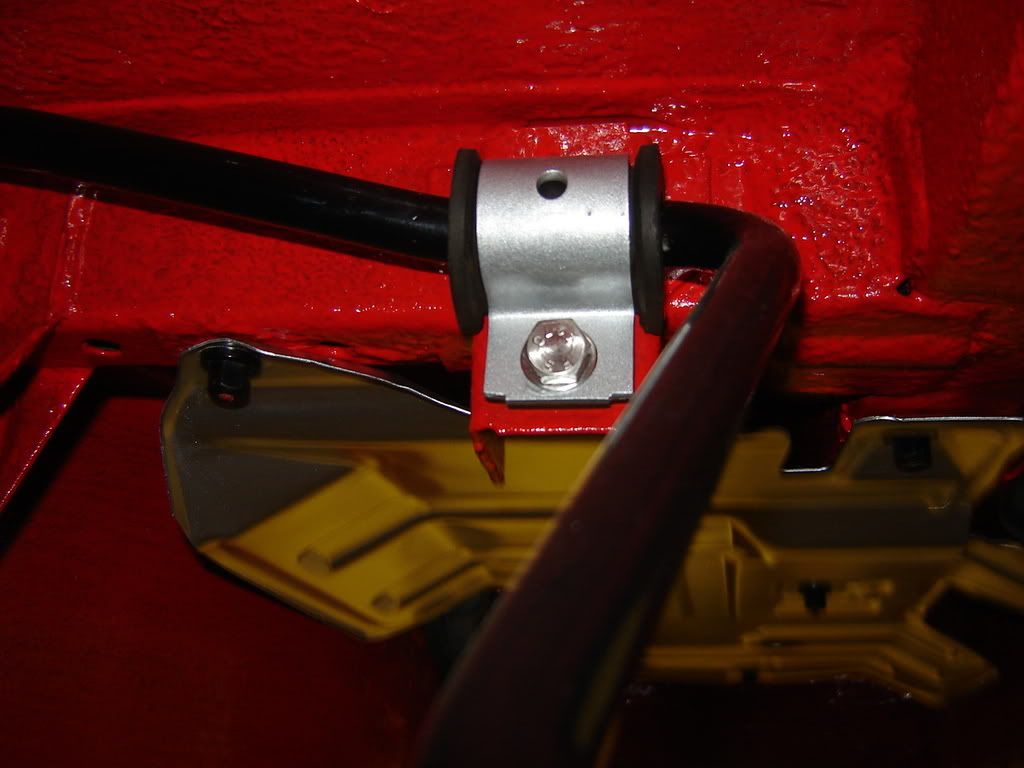
Getting there slowly but surely. Underbody is all painted up ready for re-assembly. Took 3 coats of paint
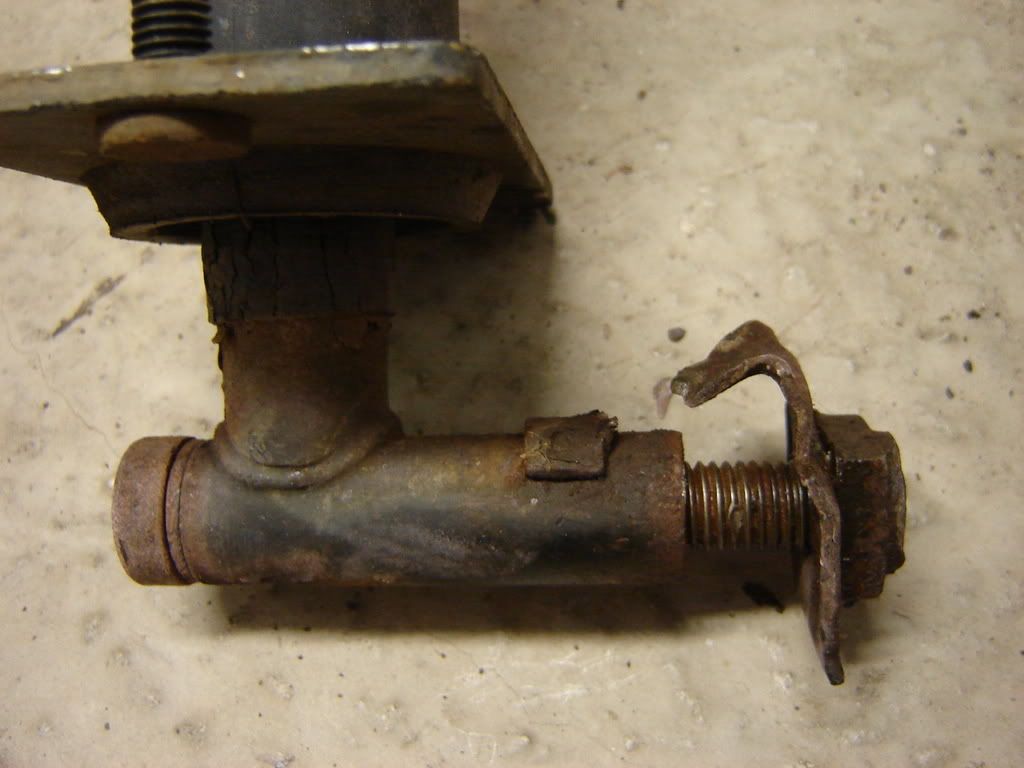
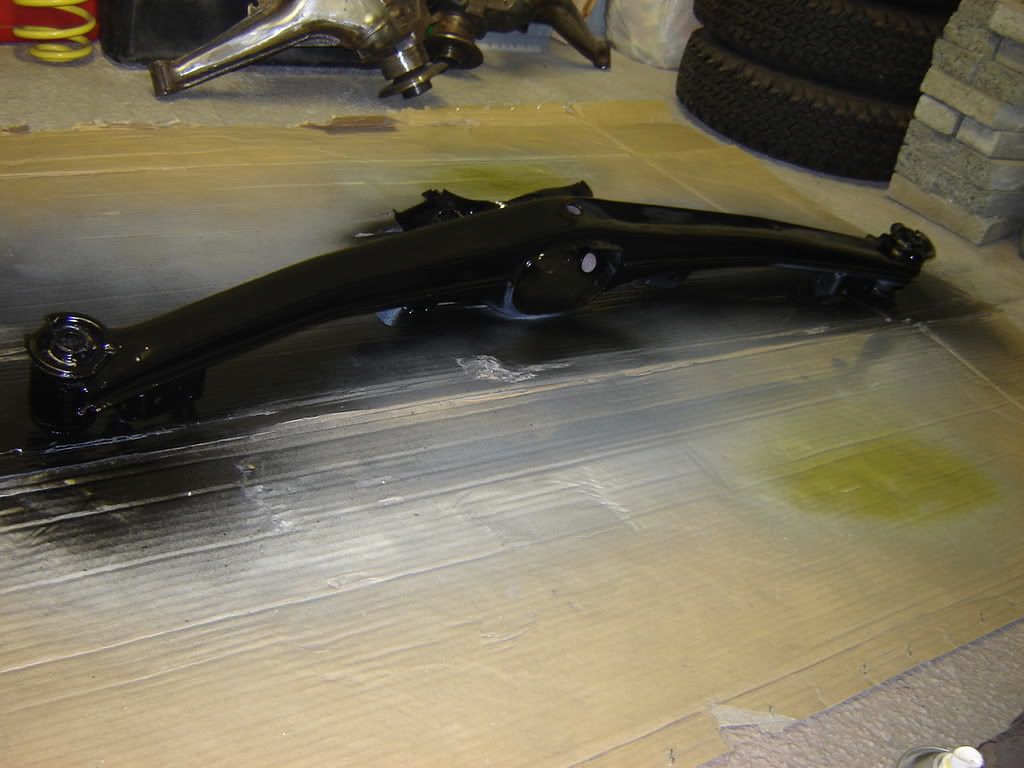
Rear beam is in primer awaiting a few top coats of gloss black. One of the trailing arms is all rubbed down (doing the other one later) ready for primer. I have all necessary new parts painted as required and ready to fit. Fuel filler pipe and ARB have had a refurb. Had to order a new pair of handbrake cables yesterday - when I stripped them off the trailing arms I noticed that there were only 2 strands of wire holding on the ends - so they should arrive Thu/Fri. So should be able to make a start refitting things back together for the weekend.

This happened while removing rear bumper

I have given the bracket to a mate to weld for me.
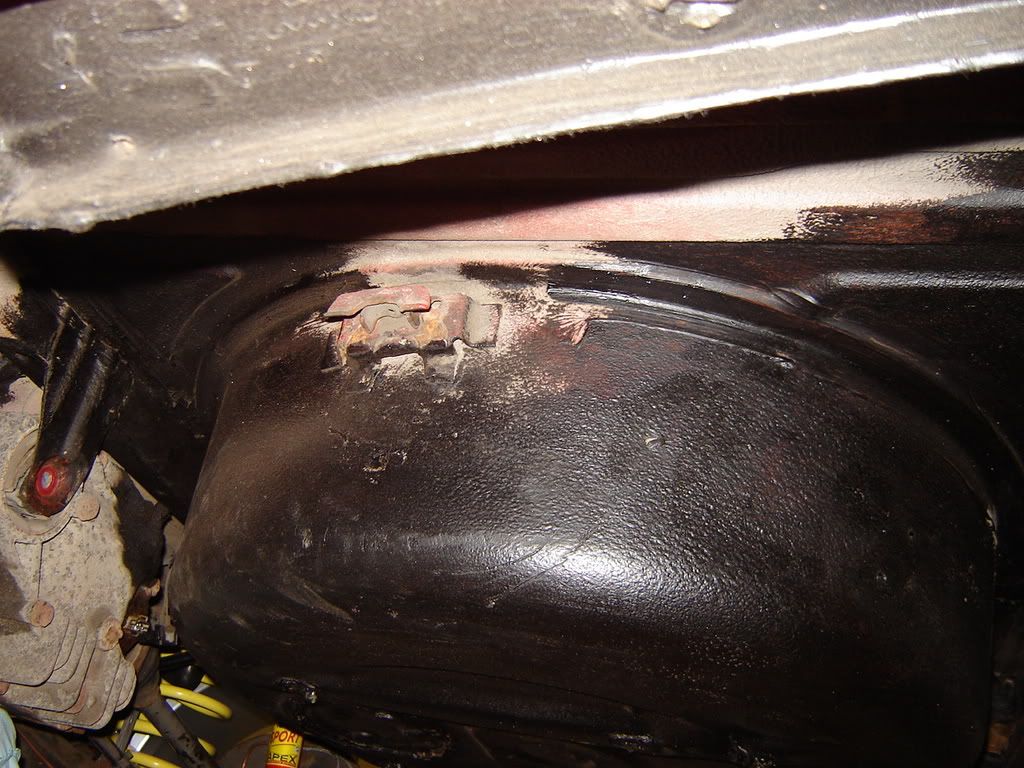
I also found this soon after I started
Luckily this was the only rot I found.
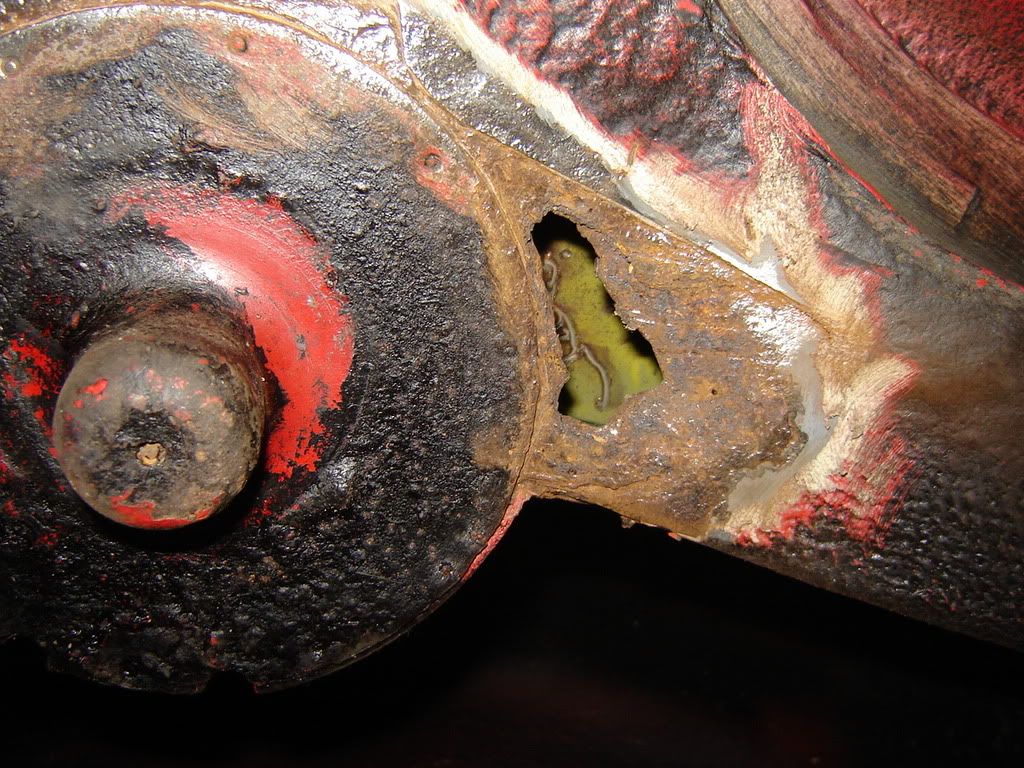
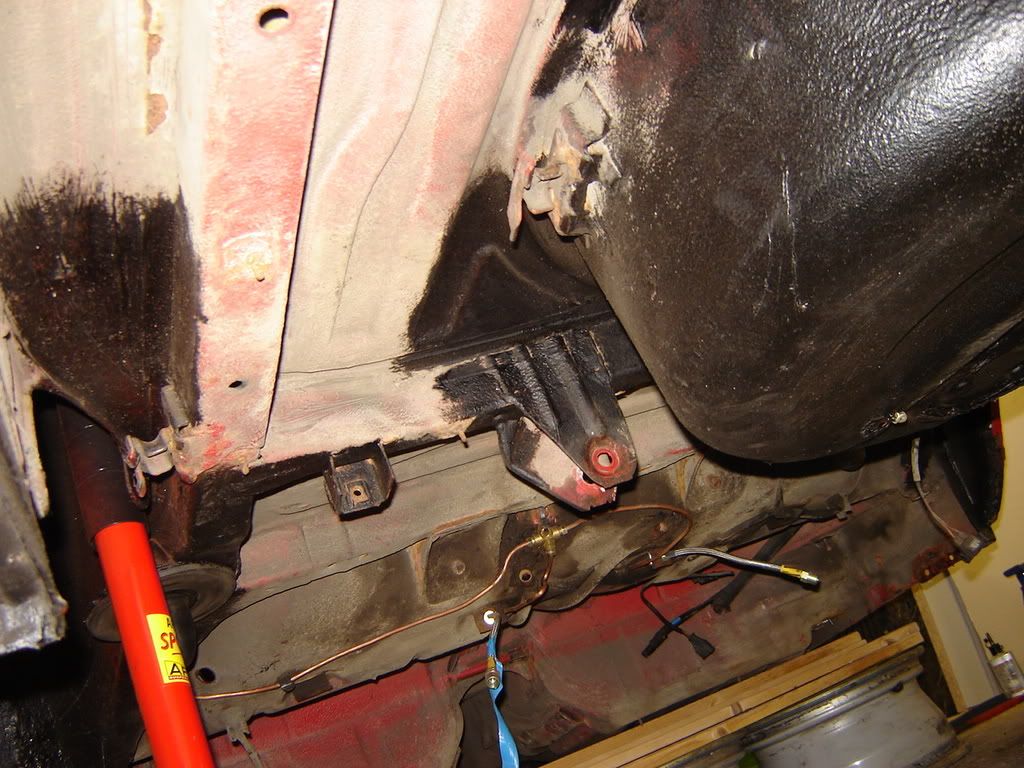
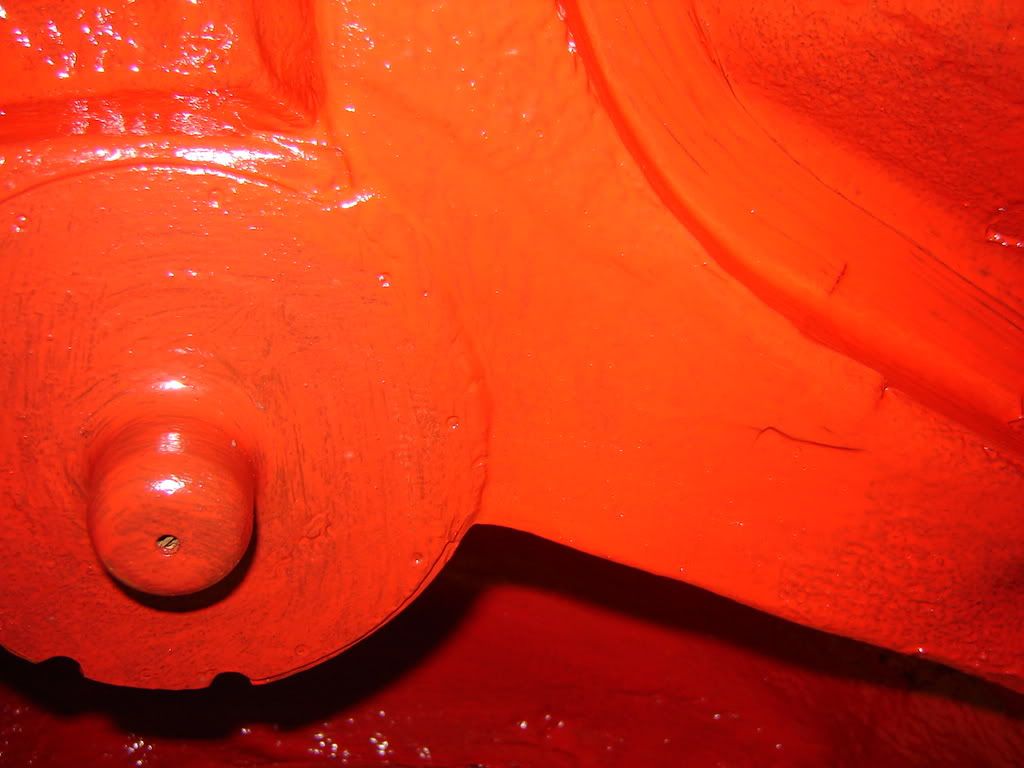
And it now looks like this. Got a mate to weld in a plate and I went to town with the grinder.
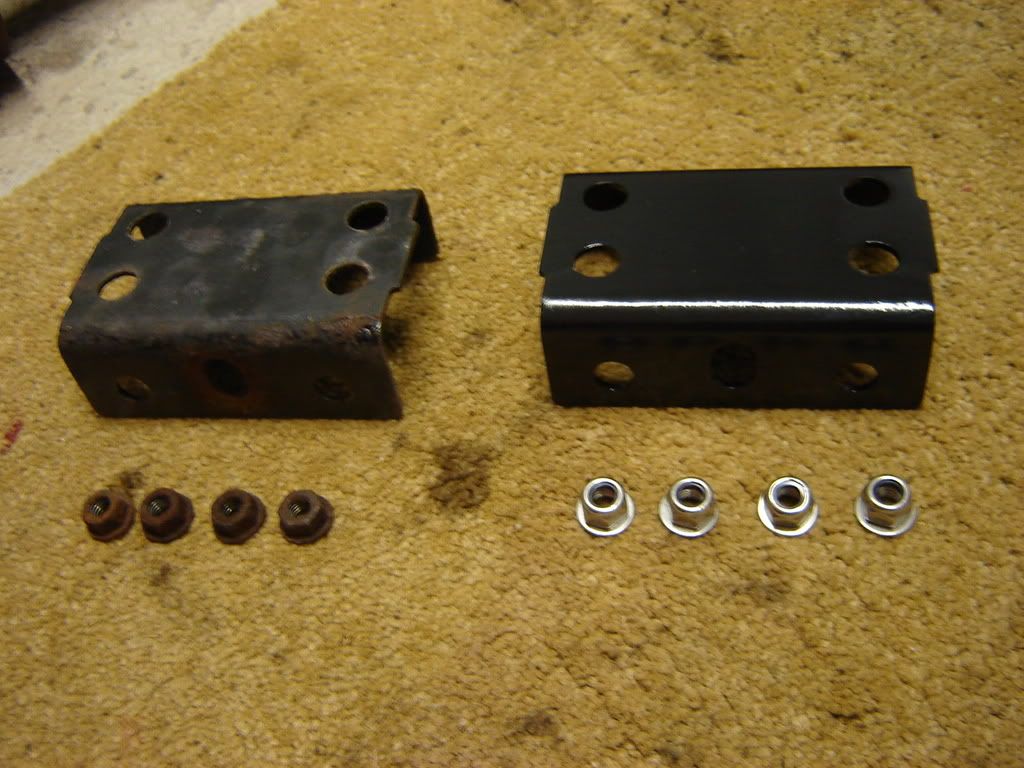
Bumper fixing plates before and after
Bike racks have other uses

Bits everywhere
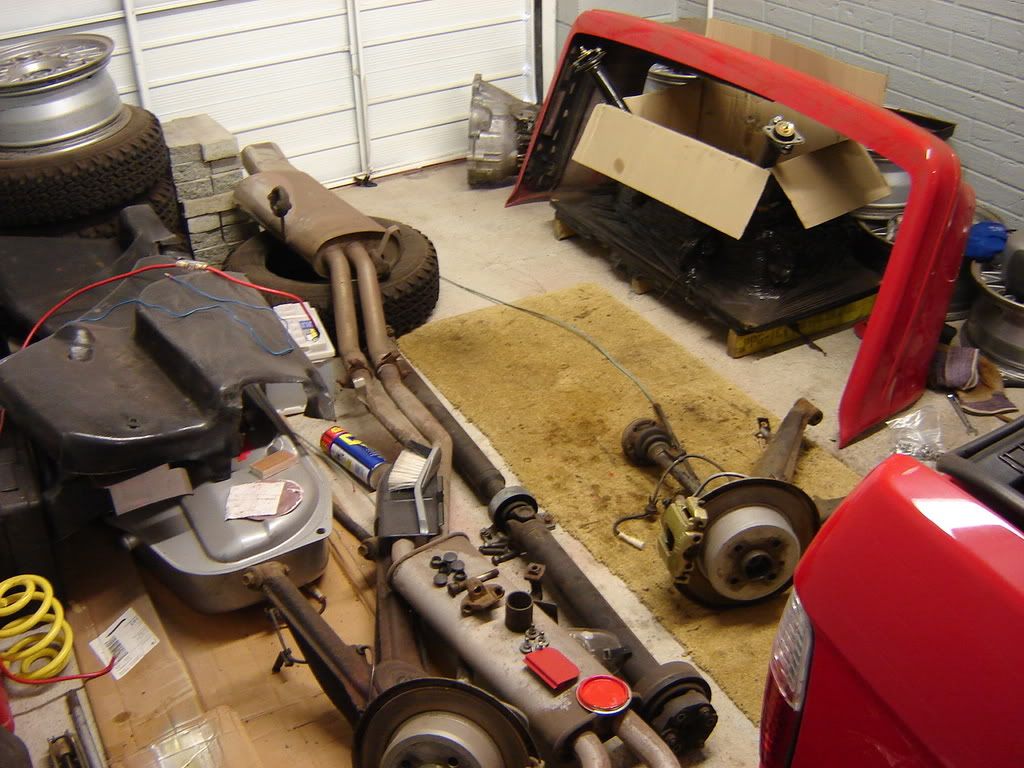
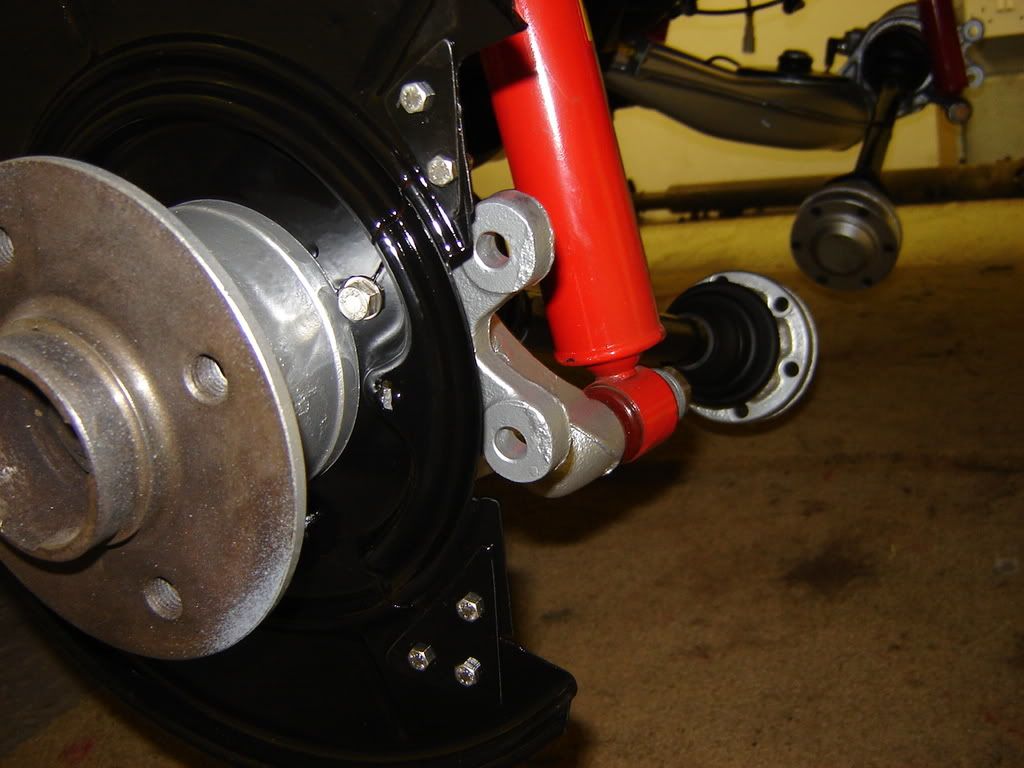
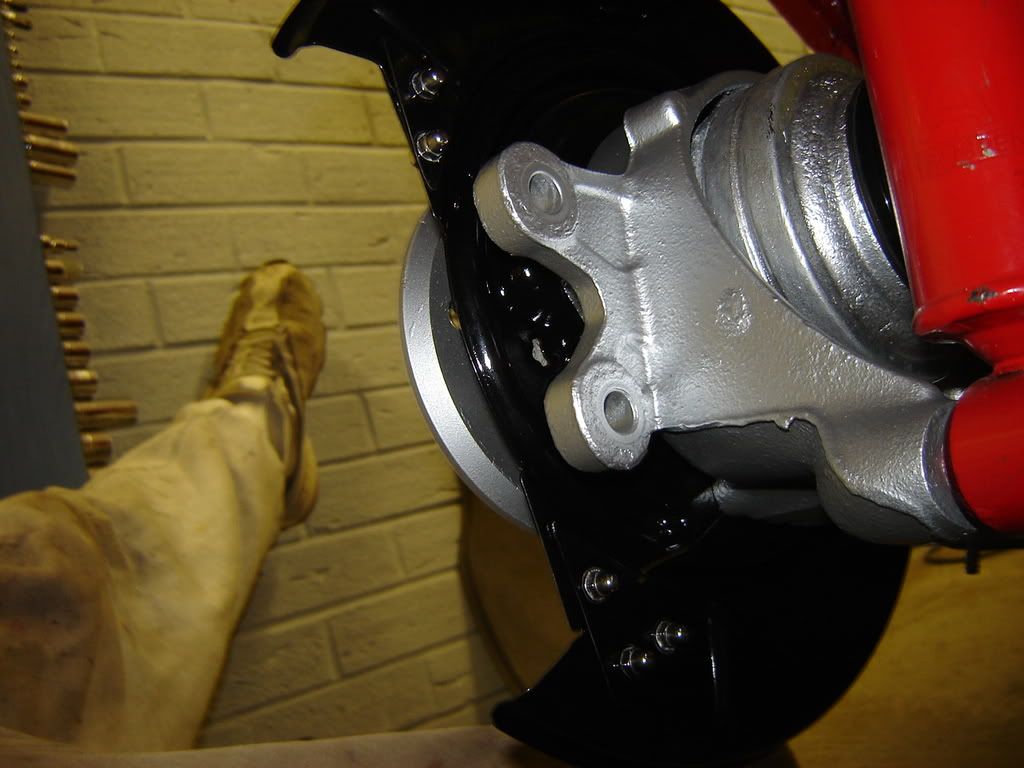
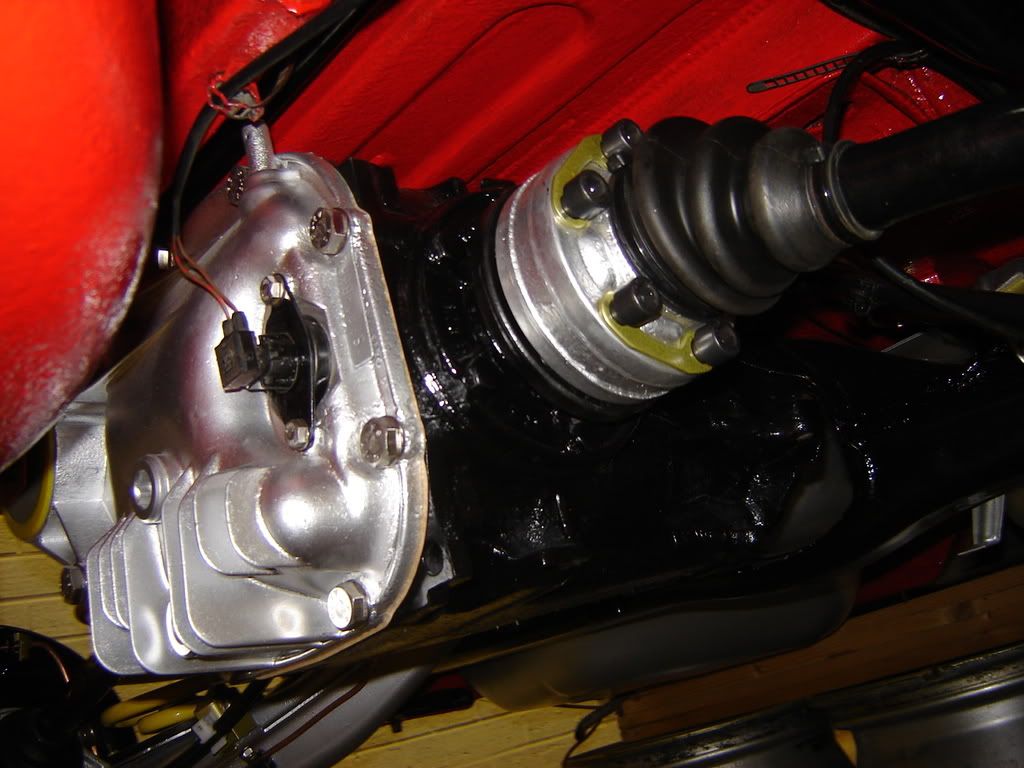
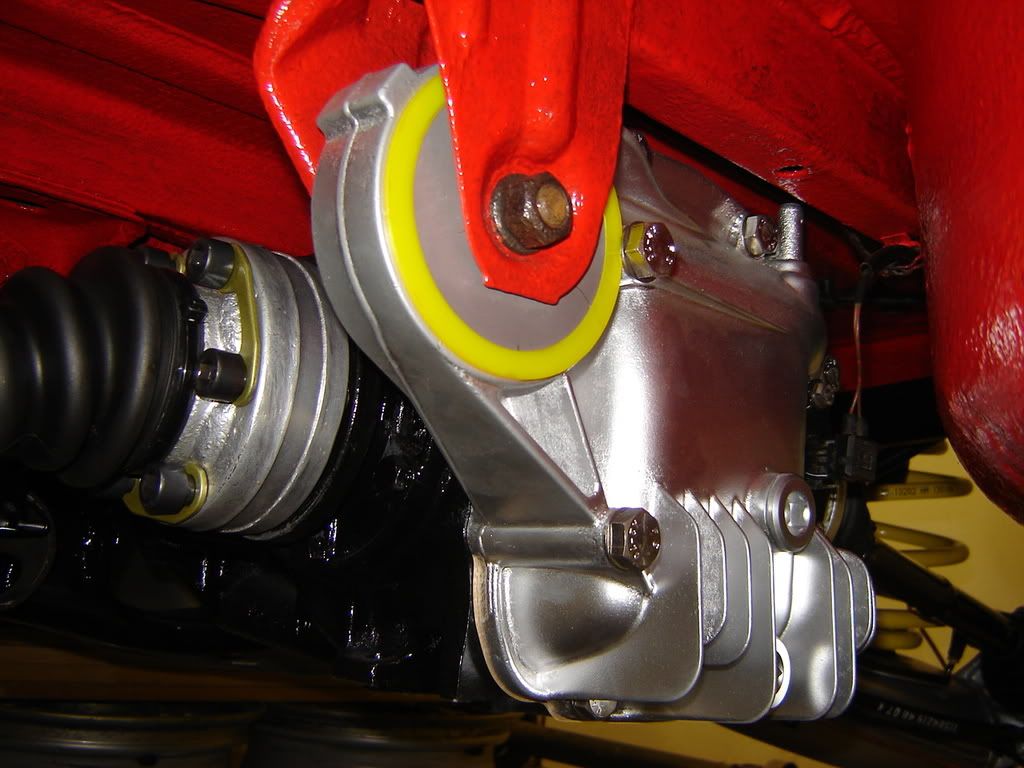
A few pics underneath
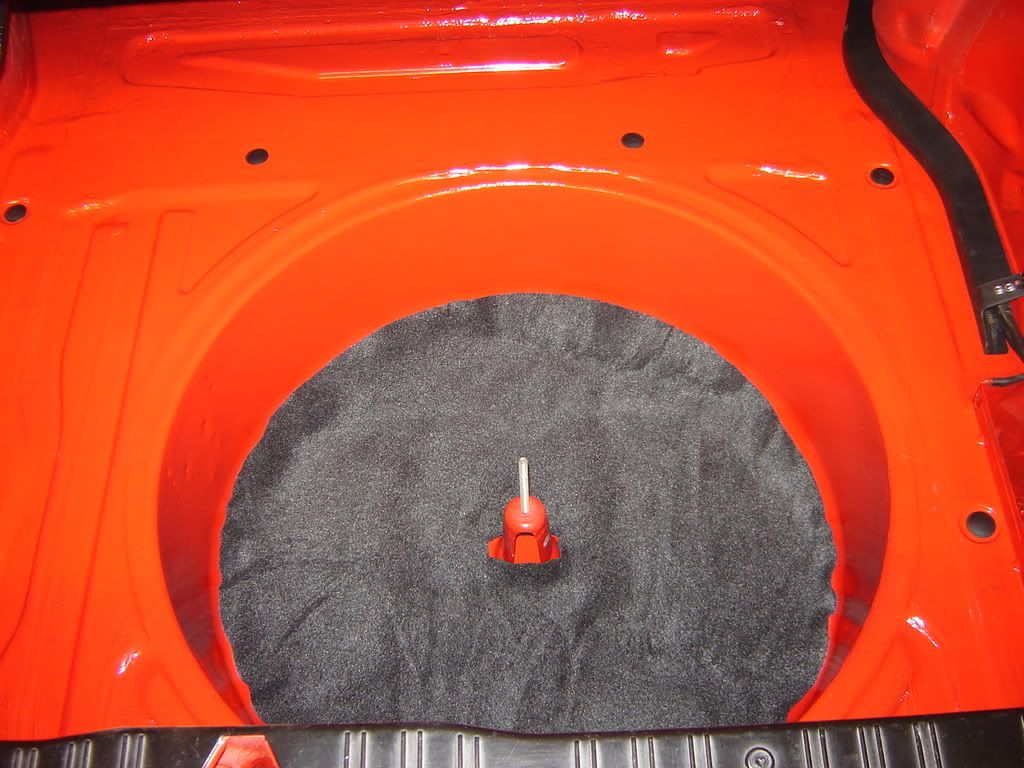
Also gave the boot a freshen up while it's all apart.
More to follow soon.
Taylor.
Posted: Tue Apr 08, 2008 8:27 pm
by baboon5151
looking good bud going to be doing soon.luckily i have a spare sport to strip down for all the parts to be refurb,d im saying luckily but on other hand i wrote my doner car off so not so lucky really.nice work keep it up,need to keep these classics on the road.
Re:
Posted: Tue Apr 08, 2008 10:25 pm
by oze30
How many rims?
nice work. Makes me wish I had a garage so I could get to all those places and sort it out too!
Re:
Posted: Tue Apr 08, 2008 11:10 pm
by whipsey
my convertable is about to have the full strip down and rebuild treatment. Did you strip all the underseal off the bottom first before you put fresh on and what did you use?
Re:
Posted: Tue Apr 08, 2008 11:42 pm
by Jhonno
All those nice BBS laying about, and you have them horrid 17's on

Like what you are doing tho!! Got off lightly with the old e30 rust issues!
Re:
Posted: Wed Apr 09, 2008 6:13 pm
by Taylor325i
whipsey wrote:my convertable is about to have the full strip down and rebuild treatment. Did you strip all the underseal off the bottom first before you put fresh on and what did you use?
I left as much of the original underseal as possible. Any areas which had cracked/split (mostly around various exhaust hanger/brake line brackets) were taken back to bare metal and then coated with red oxide primer(Hammerite) & some stonechip primer(Waxoil). Then 3 coats of Red Hammerite smooth.
Jhonno wrote:All those nice BBS laying about, and you have them horrid 17's on
Like what you are doing tho!! Got off lightly with the old e30 rust issues!
Haha. I know. I'm gonna refurb my 15" BBS wheels which were originally on this car. That's the next priority then I need to get some sticky Toyo R888's for them.
Taylor.
Re:
Posted: Wed Apr 09, 2008 6:48 pm
by Jhonno
Posted: Wed Apr 16, 2008 11:38 pm
by Taylor325i
More Pics.
New vent pipes cover plate
Refurbed fuel filler pipe
New fuel tank - 2 coats of primer
2 coats of paint
And fitted with new bolts, spacers, grommets, etc

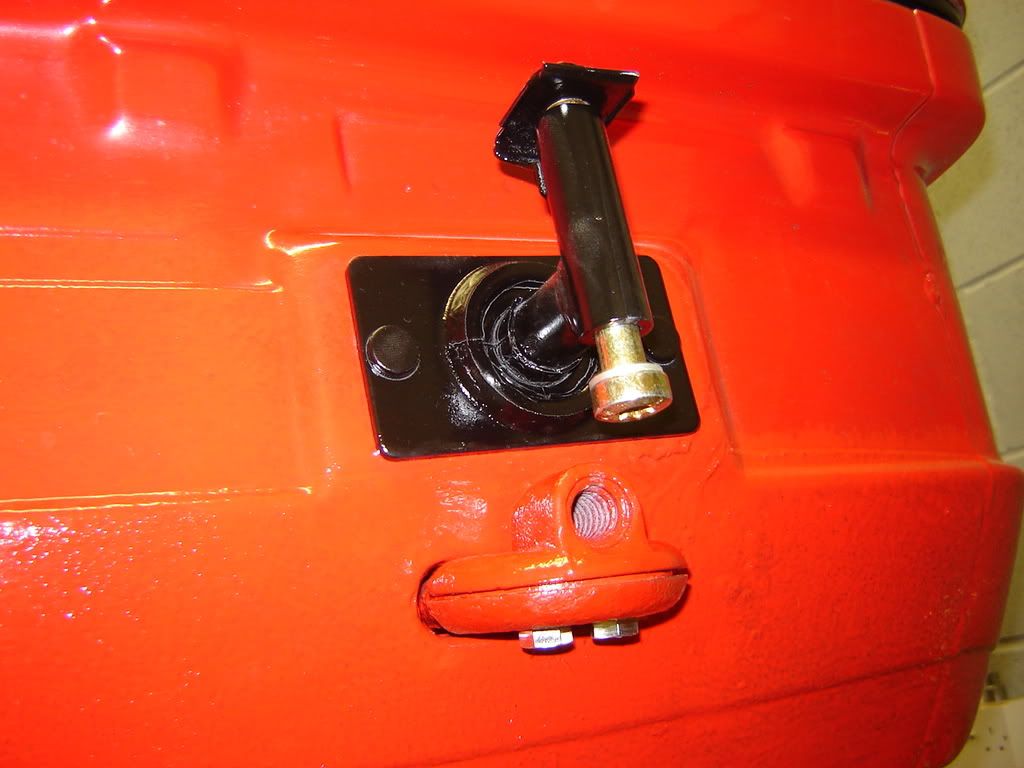
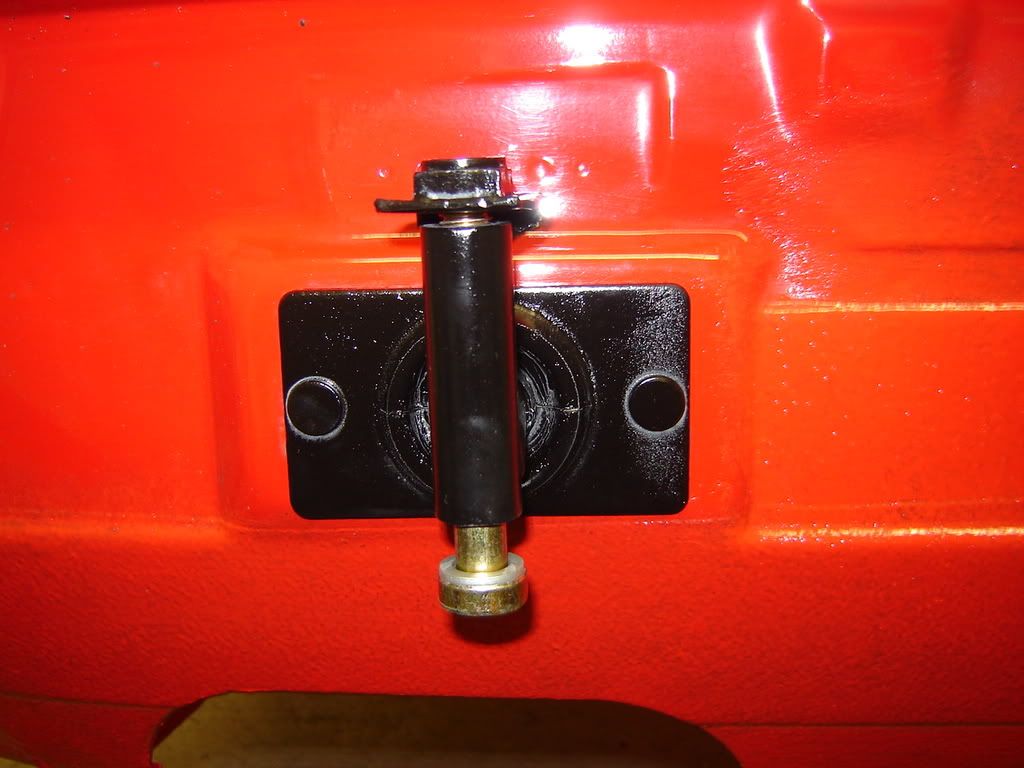
Refurbed bumper brackets with new bolts
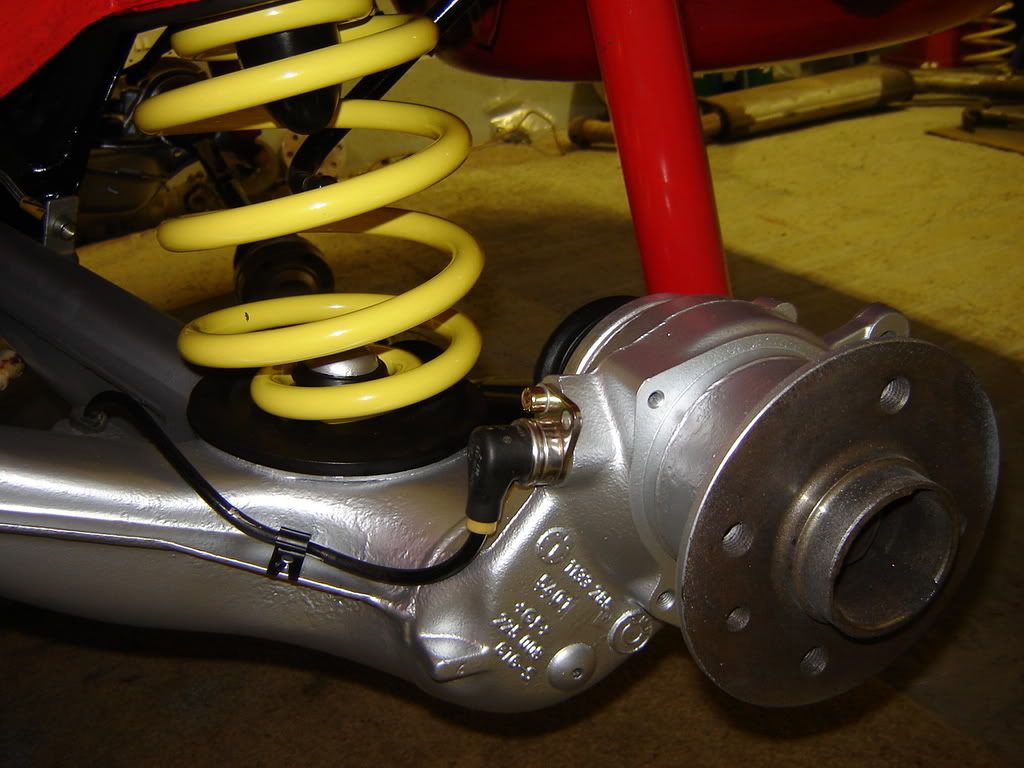
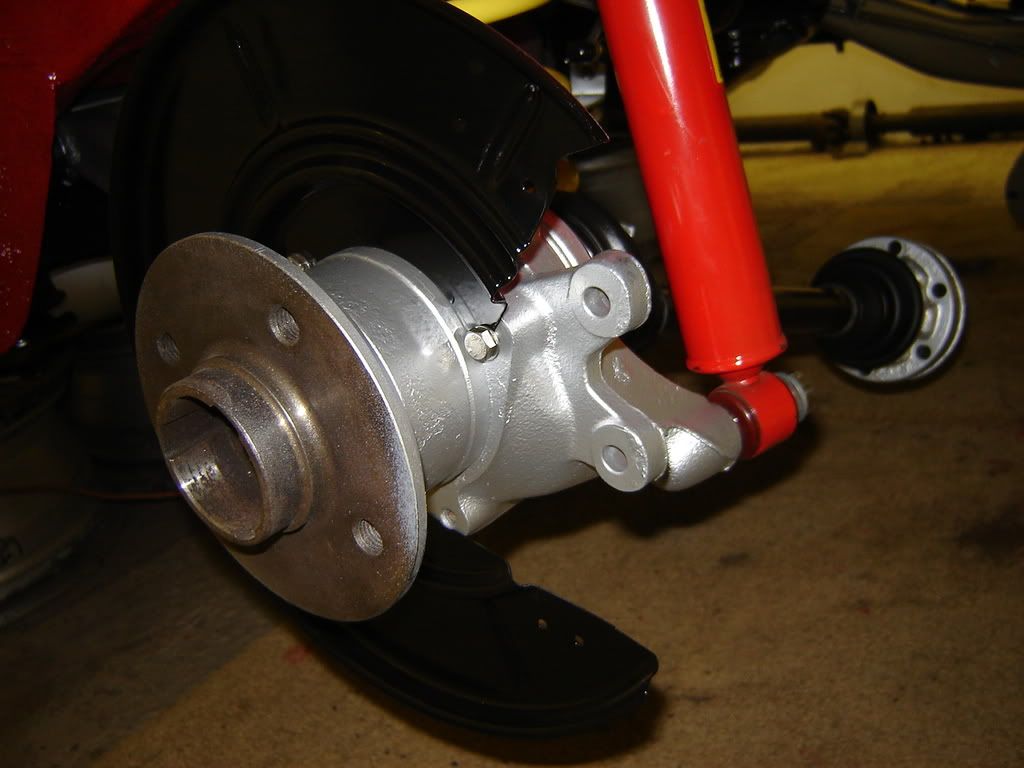
Refurbed ARB with new bushes and brackets
Rear beam - 2 coats primer
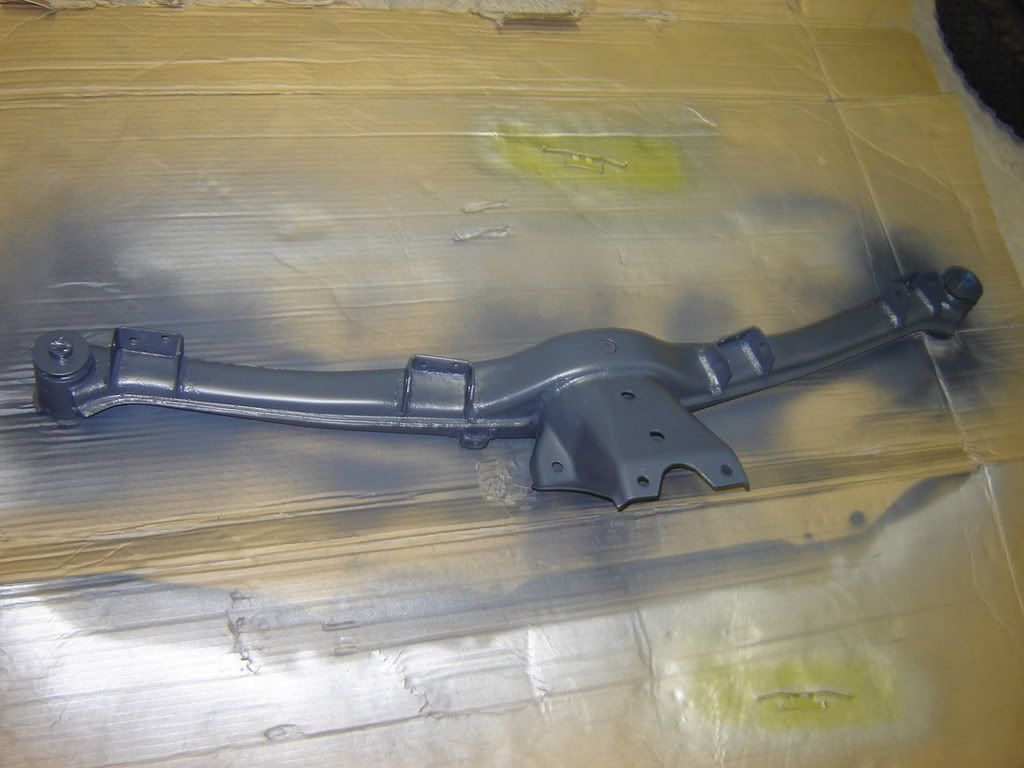
2 coats paint
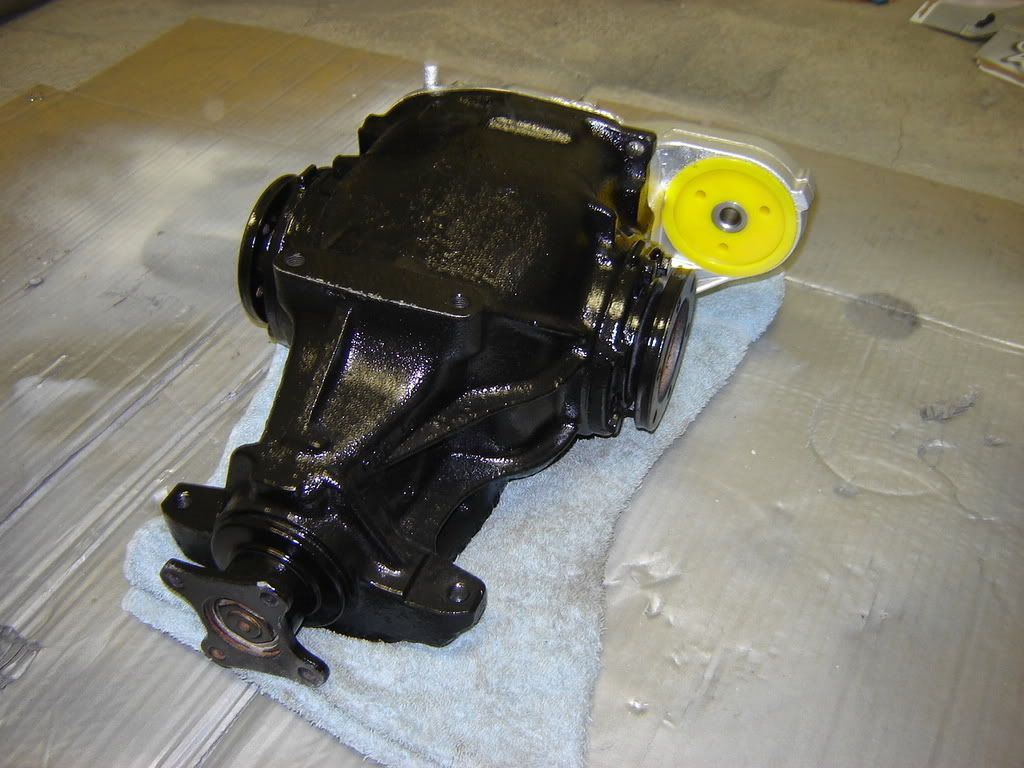
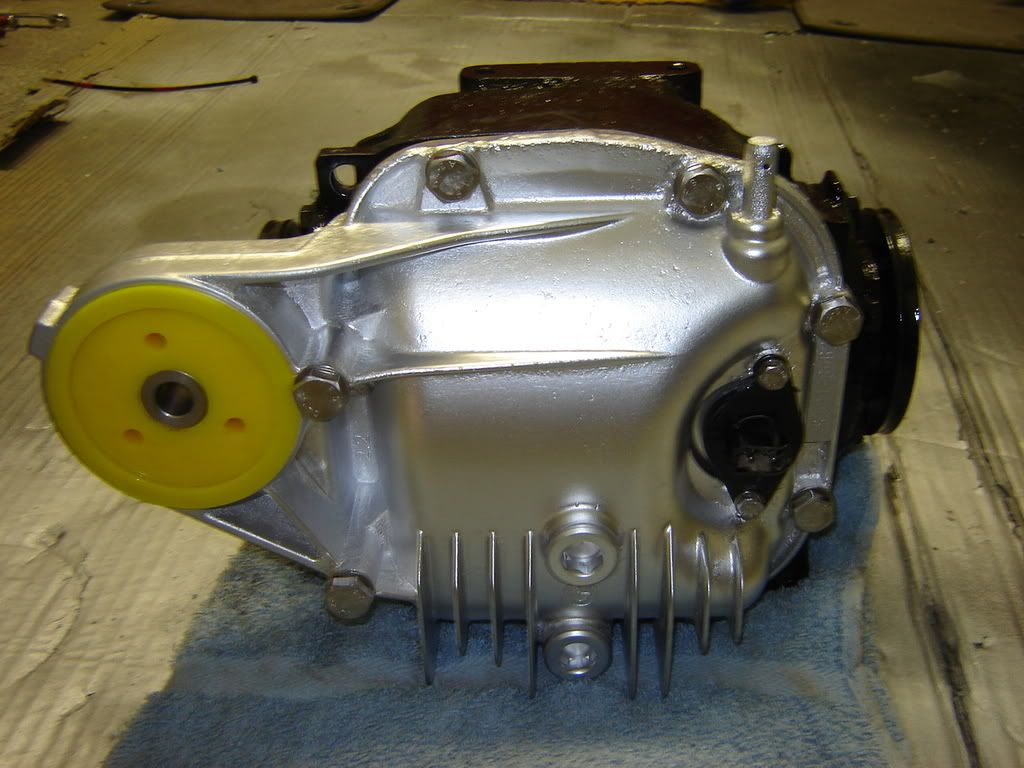
Diff cover

Still to paint the diff casing and the trailing arms. Hoping to get them done tomorrow and get everything rebuilt over the weekend. Hoping to get the car back on the road for Monday.

Taylor.
Re:
Posted: Wed Apr 16, 2008 11:58 pm
by bss325i
Top work!
Re:
Posted: Thu Apr 17, 2008 12:04 am
by Scruffymurphy
I love the attention to detail. Well done.
Re:
Posted: Thu Apr 17, 2008 11:08 am
by Jindmahi
Looking Good!
Posted: Mon Apr 21, 2008 1:01 am
by Taylor325i
Re:
Posted: Mon Apr 21, 2008 11:40 am
by capri_rob
Very impressive ! You have much more patience than I have !
Re:
Posted: Mon Apr 21, 2008 11:06 pm
by stonesie
Thats a credit to you that, it's gonna make the MOT tester do a double take

Way more patiance than ive got too, im happy if mine just works how it should

Re:
Posted: Mon Apr 21, 2008 11:25 pm
by citizensnips
just a quicky, your using a lot of new parts, where do you get them? . Do you order them online or go somewhere local. I ask because i want to replace a lot of bits like you have when i do my rebuild an di dont want to be forever held up waiting for parts
Re:
Posted: Tue Apr 22, 2008 12:16 am
by Taylor325i
citizensnips wrote:just a quicky, your using a lot of new parts, where do you get them? . Do you order them online or go somewhere local. I ask because i want to replace a lot of bits like you have when i do my rebuild an di dont want to be forever held up waiting for parts
Are you doing a complete rebuild or are you doing things in stages like me? I've bought most of my new parts from Zimmerbimmer (Just click on Forum at the top of this page and scroll down to the Genuine Parts Department). I made a list of parts that I knew I was going to need to order as I was dismantling and ordered them as soon as possible. I started to refurbish/clean parts that were re-useable while waiting on my new parts to arrive. As for any stainless steel hardware that I've used I buy it at a local tool place who don't insist that you buy items in bulk.
Taylor.
Re:
Posted: Tue Apr 22, 2008 9:38 am
by citizensnips
thank you for the advice, i'm doing a complete rebuild, i'm renting the workshop space so want to get it done in a one go
Re:
Posted: Tue Apr 22, 2008 11:46 am
by Karan
great job
what paint/underseal have you used and how did you prep etc. I would love to do this on mine soon
Re:
Posted: Fri Apr 25, 2008 5:49 pm
by Taylor325i
Karan wrote:great job
what paint/underseal have you used and how did you prep etc. I would love to do this on mine soon
I left the original underseal on - I dealt with any damaged areas by taking it back to bare metal, treating with red oxide primer then stonechip primer then 3 coats hammerite.
Taylor.
Posted: Fri Apr 25, 2008 6:47 pm
by baboon5151
hell of a job your doing there.i dont think i would want to take it out and get it all dirty with our awfull weather.
Posted: Fri Apr 25, 2008 7:06 pm
by Taylor325i
baboon5151 wrote:hell of a job your doing there.i dont think i would want to take it out and get it all dirty with our awfull weather.
Don't worry car only goes out on dry days.

Taylor.
Re:
Posted: Mon Apr 28, 2008 9:22 pm
by keiserwill
Hi Mate, proud of your work? shes looking a bit good now! I've just started on inner arches and obv' need to remove bits of the fuel filler system, now i've seen your thread, i'm fully sold!! but i do have a stack of questions for you that you might not have time to answer, since theres probably a few others like me, i wonder if you might publish the list of parts and sundries you consumed during the work (if you can be arsed, would be most appreciated), as i'm nervous of attacking all this on the blind.
The other q's:
1.How did you drain your fuel (if you did)? my plug won't be coming out, i'm nervous of drilling it, and i'm not sure how to siphon both parts of the tank?
2.you've replaced all the hard brake and fuel lines? where did the fuel lines come from?
3.how did you support the rear of the car when you took the beam off? (specific if u can)
4.did you have to do anything before removing the fuel lines from the fuel pump? other than depressuring the injectors?
5.what sort of alloy are you using to make your heatsheilds etc....
I'm sure there were lots more but, i think you'll be doing me a big favour if you can help me on any of the above.
Cheers
Will
Re:
Posted: Mon Apr 28, 2008 9:58 pm
by E30BeemerLad
to drain the tank mate i'd take the fuel pipe off at the engine end and get a can ready and then crank it over, don't know how long it would take though.
Re:
Posted: Mon Apr 28, 2008 10:41 pm
by keiserwill
27litres siphoned out the rear side flexible tube with some marathon shaking, so i spose thats most of it, but won't there be some in the smaller part of the tank? (how does the fuel pump draw on this?)

Re:
Posted: Tue Apr 29, 2008 7:15 pm
by Taylor325i
keiserwill wrote:Hi Mate, proud of your work? shes looking a bit good now! I've just started on inner arches and obv' need to remove bits of the fuel filler system, now i've seen your thread, i'm fully sold!! but i do have a stack of questions for you that you might not have time to answer, since theres probably a few others like me, i wonder if you might publish the list of parts and sundries you consumed during the work (if you can be arsed, would be most appreciated), as i'm nervous of attacking all this on the blind.
The other q's:
1.How did you drain your fuel (if you did)? my plug won't be coming out, i'm nervous of drilling it, and i'm not sure how to siphon both parts of the tank?
2.you've replaced all the hard brake and fuel lines? where did the fuel lines come from?
3.how did you support the rear of the car when you took the beam off? (specific if u can)
4.did you have to do anything before removing the fuel lines from the fuel pump? other than depressuring the injectors?
5.what sort of alloy are you using to make your heatsheilds etc....
I'm sure there were lots more but, i think you'll be doing me a big favour if you can help me on any of the above.
Cheers
Will
I'll answer your questions now and do a list of parts at a later date -
1. Remove fuel pump and senders( 1 sender each side of a 325i) not sure on other models but I think if you only have one sender then there is a connecting pipe between the 2 parts of the tank. I syphoned the fuel out of the hole where the fuel pump lives. Any fuel that is left in there can be drained out after the tank is out.
2. Fuel pipes were ordered from Zimmerbimmer (Original BMW parts department). Brake lines are standard copper ones (available most motor factors).
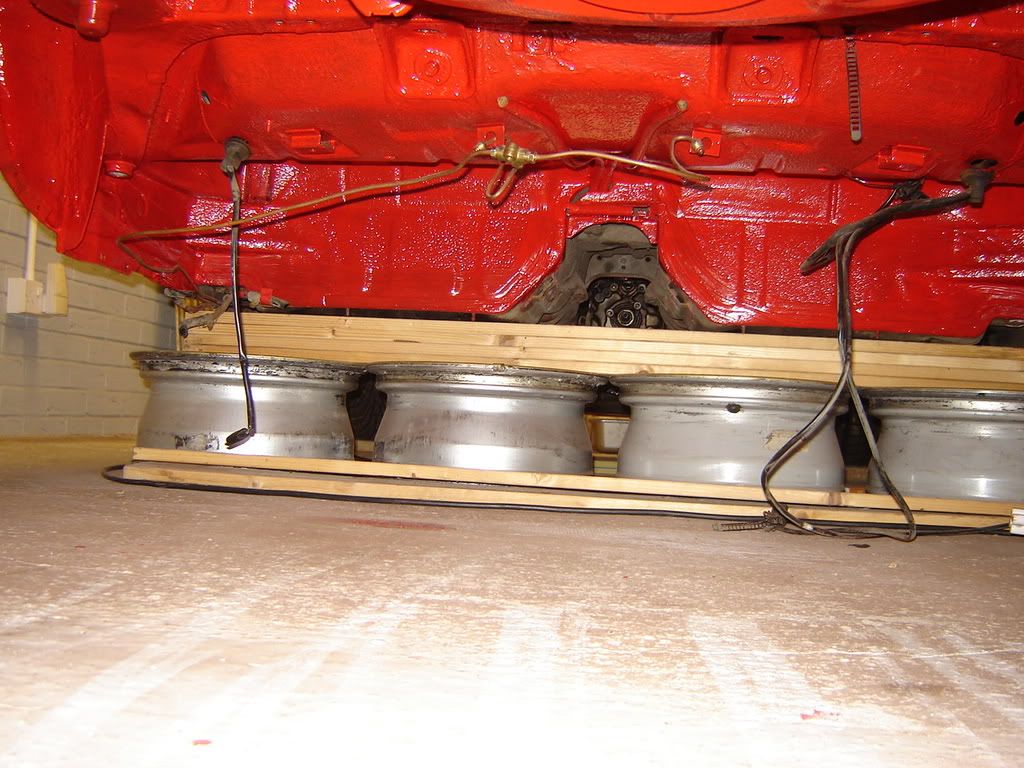
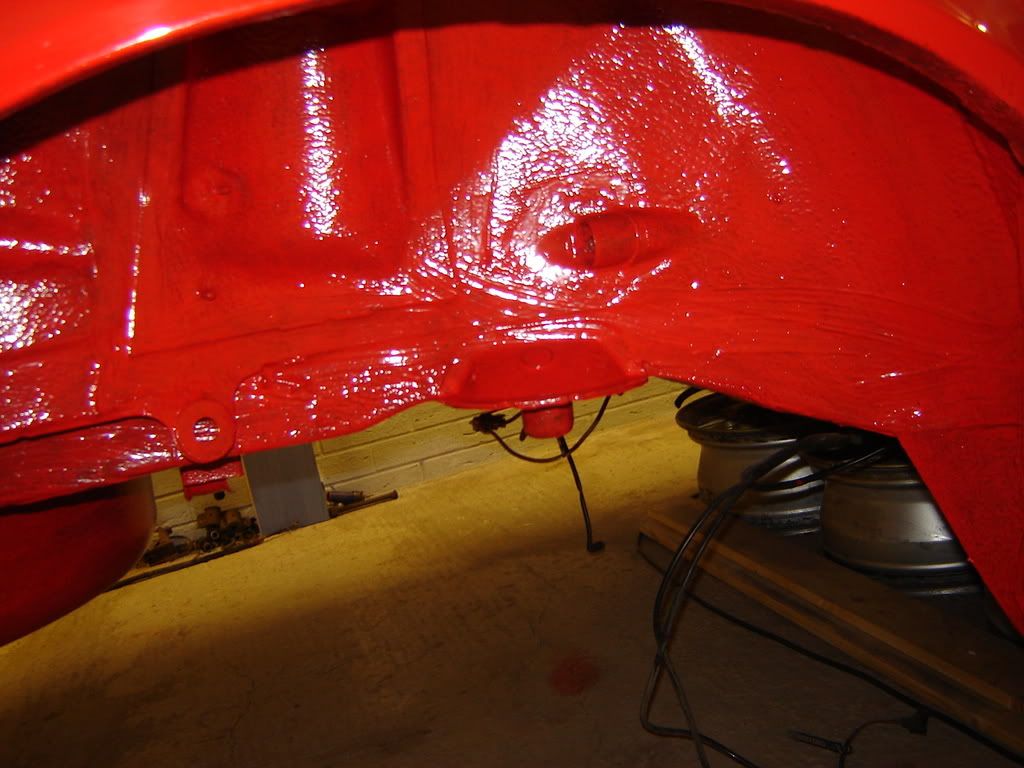
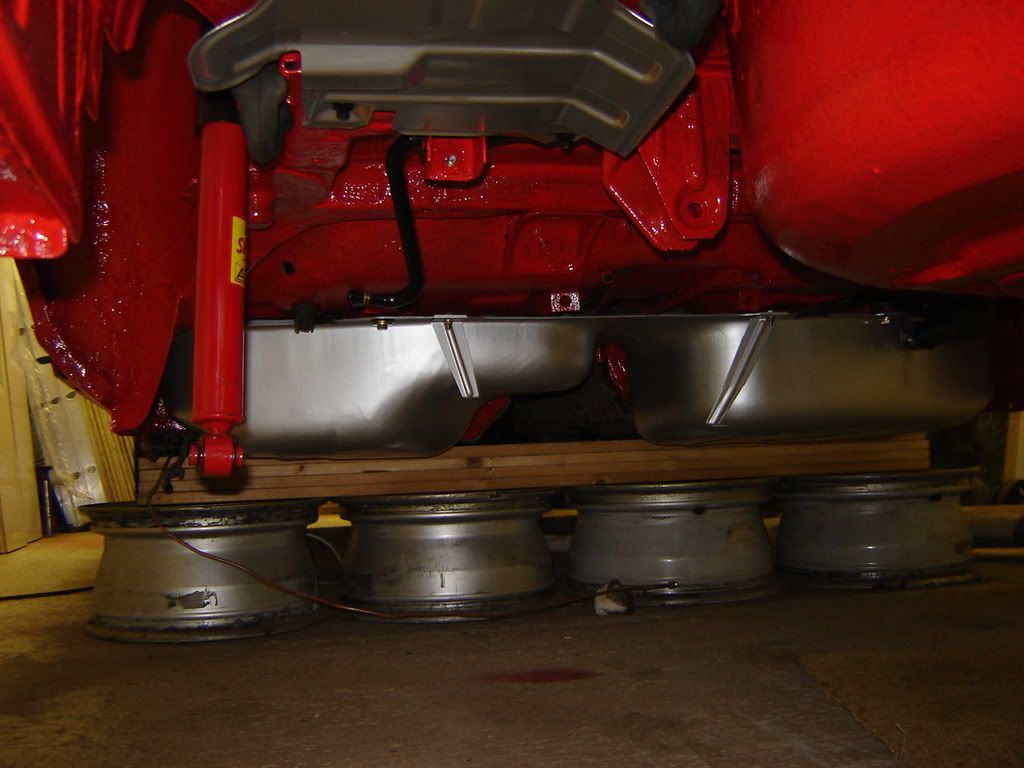
3. To support the car I put 4 old alloy wheels in a line from side to side under the rear footwells with a few planks of wood on top for the car to sit on. These protuded slightly out past the sills so that the weight was evenly spread. You should be able to see this in some of the pics. Be very carefull where you place your supports as you could damage the floor of the car.
4. Remove the fuel pump relay and then crank the engine over a couple of times and then remove the fuel filler cap. Remember to then disconnect your battery.
5. I was gonna use some 1mm thick alloy sheet which I got at a metal fabricators but I changed my mind and just fitted genuine BMW ones.
Hope this helps mate and good luck!
Taylor.