'87 Black with a hint of rot - Front end Re-Build
Posted: Mon Nov 03, 2014 10:28 pm
I had always wanted an E30, but always thought I would wait until I had finished university and had the money to buy a good one and also the money to look after one properly too.
However, in 2011 I spotted a good one (or so I thought so) up for sale with 80k on the clock for £1800. So I bought it. I figured that it if I waited any longer to buy one that they would become too expensive to find a good one and I was in a situation at the time where I didn't need to drive everyday so it wouldn't get abused too much either.
After buying the car I did a bit of work on it cleaning a few areas up and putting the alloys on it, but other than that I just washed it, repaired it when needed and most of all enjoyed it.

I enjoyed it so much, that when I had to enter the real world and start working and commuting I just couldn't bring myself to sell it. Seeing as it had just clicked over 100k and started to get a bit shabby from spending the last three years outside I decided the best thing to do was to buy another car to use as the daily driver and then to start to slowly improve the condition of the old girl.
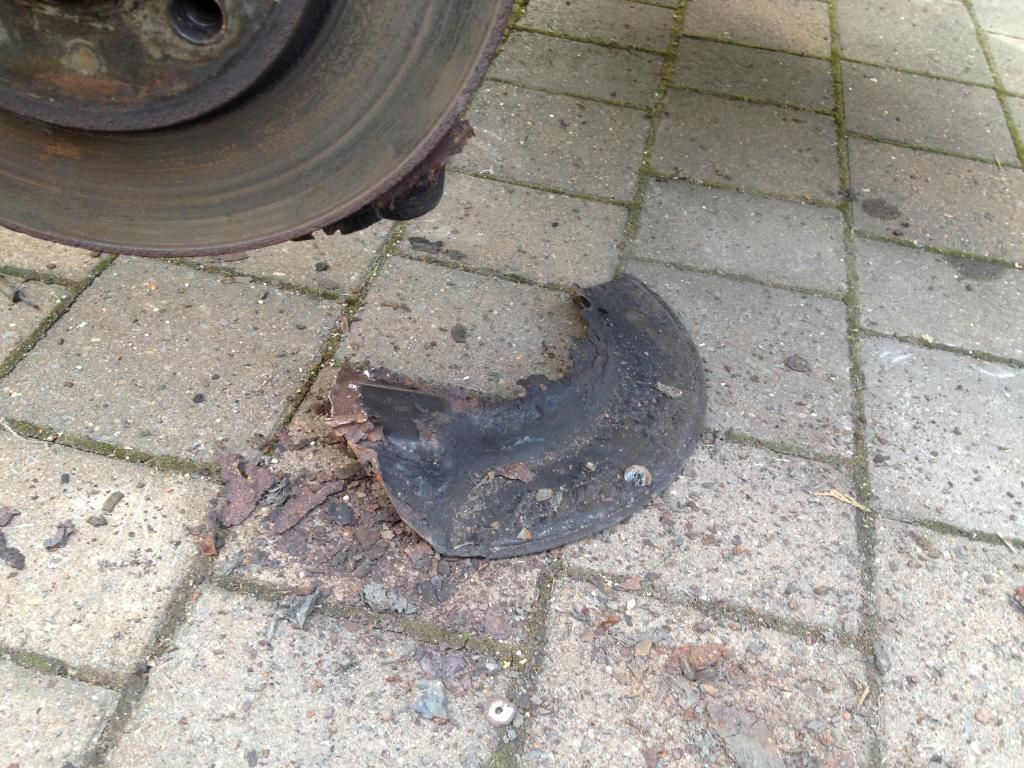
I knew the front end needed a bit of attention as the front valance had started to rot on the corners and there was some rot starting on the front wings behind the bumper. As well as that, one of the brake disc shields had rotted through so I figured I may as well repair the rust on the panels and strip the suspension to replace the tatty bits and give everything else a good clean.
This soon turned into a lot bigger job than I first thought.
So the first job was to remove the front bumper to see what the little bit of rot on the wings was really like.

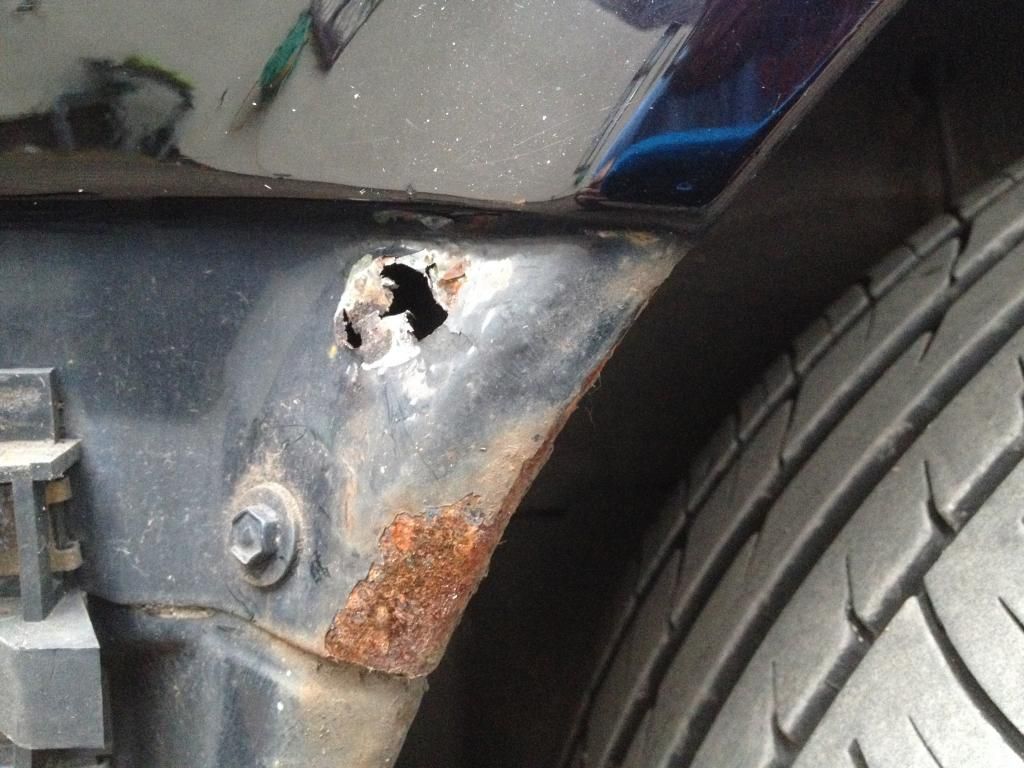
At this point I found a hole, and from this point on it all got a lot more serious.
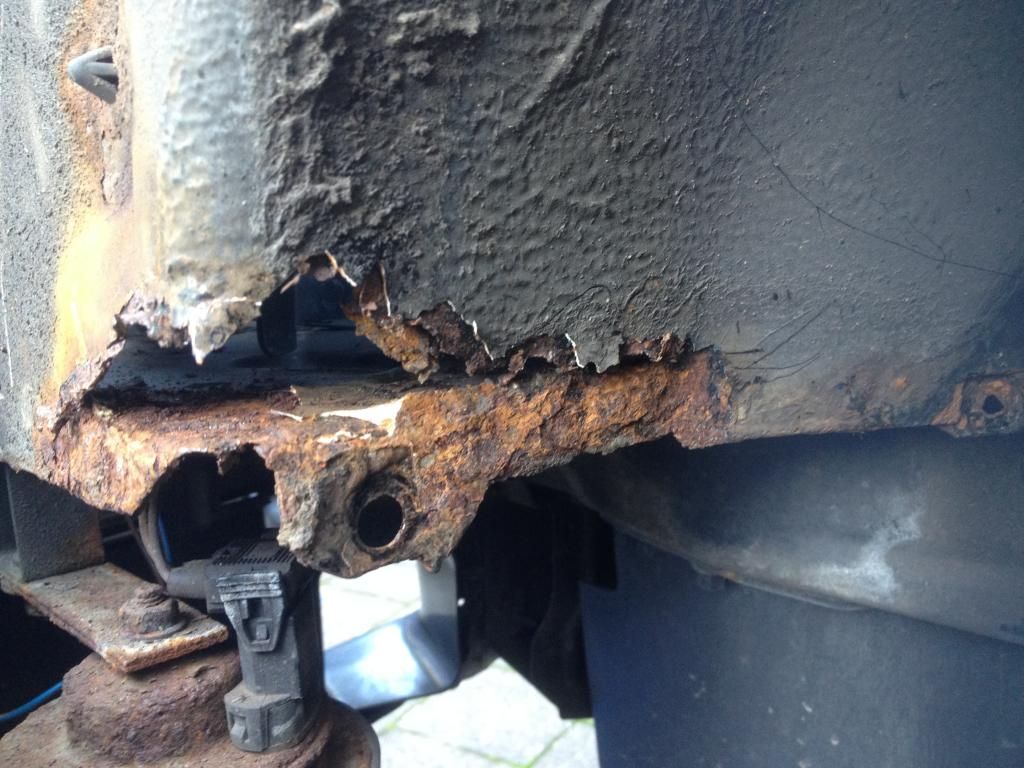
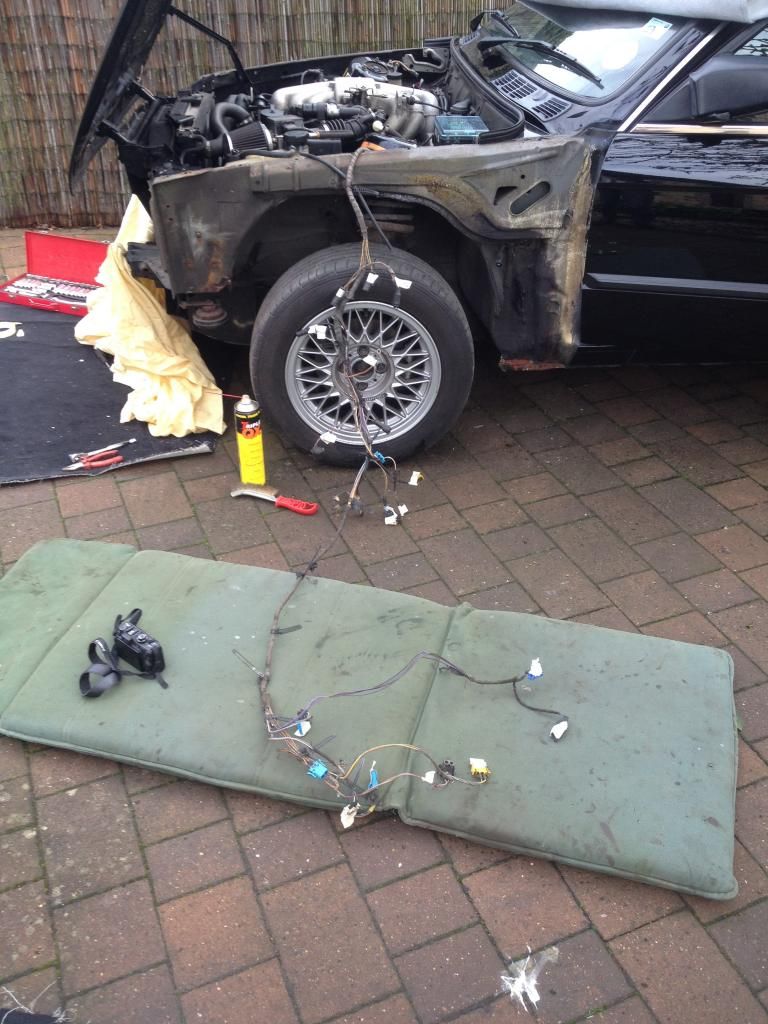
Still not too phased I thought it was best to remove the wings and have a good look at everything hiding away. Easier said than done when it turned out that the front wings had been welded on!! It appears that at some point the area just behind the front wheels had been repaired, but rather than remove the wings to repair them the job had been done in situ resulting in them being welded to the car.

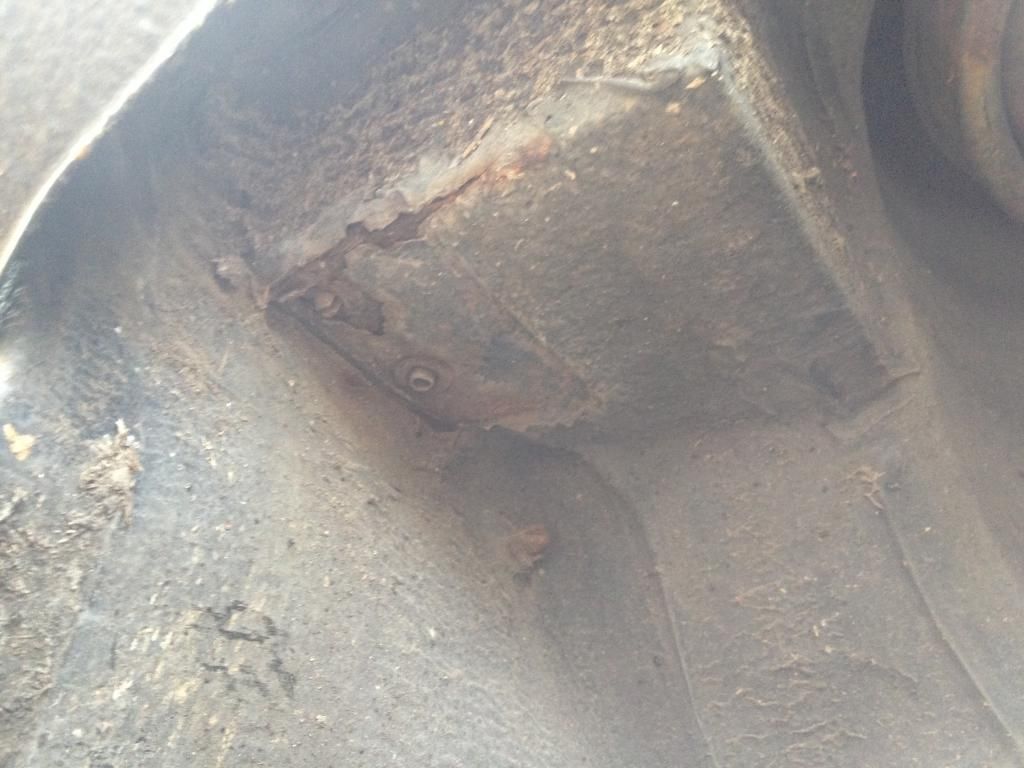
With the bodywork removed the time came to give everything a good stabbing with the screw driver to see to what extent the rot had set in. I was not too happy.

No going back now then.
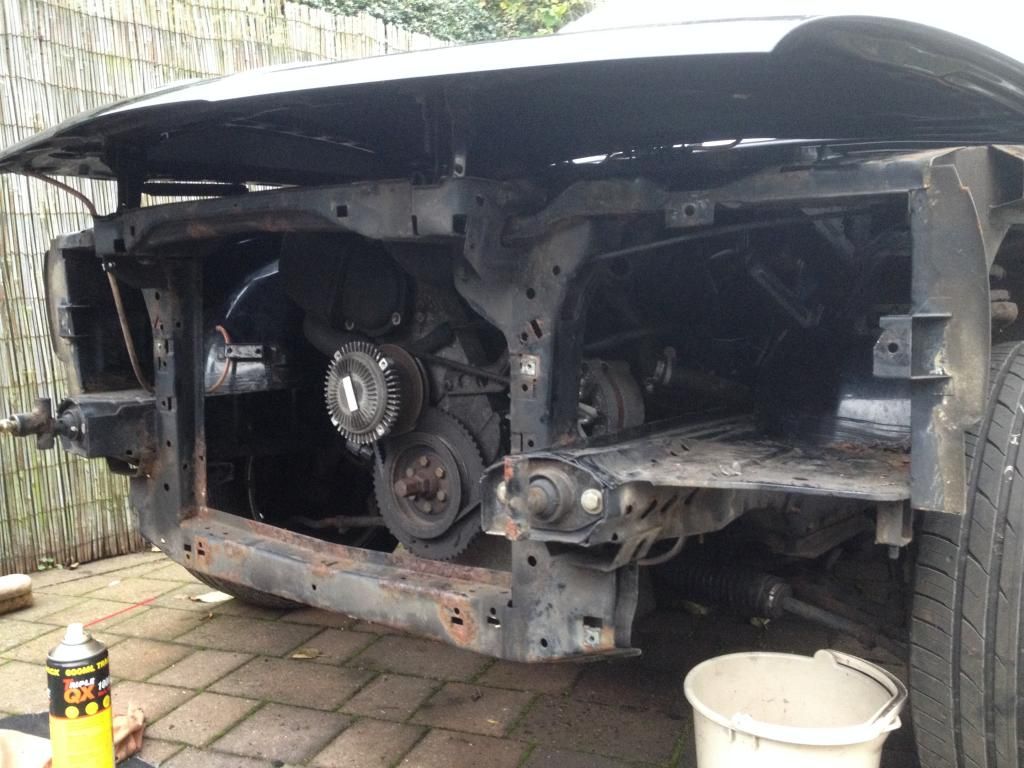
Because I don't want to become one of those people who begins a project but then never gets around to finishing it, I decided that I will repair/restore the front end of the car ready for driving it again in the Spring. And then next winter I may do the rear end etc. A rolling restoration if you like. So a plan was made and I cracked on with stripping the front end down further.

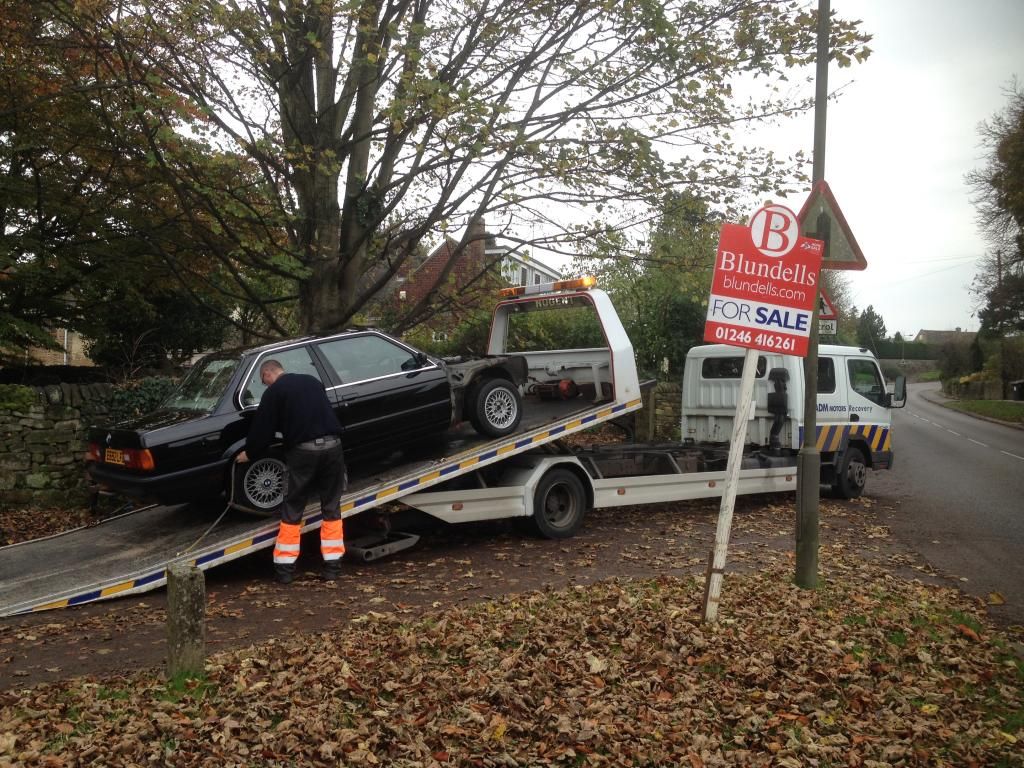
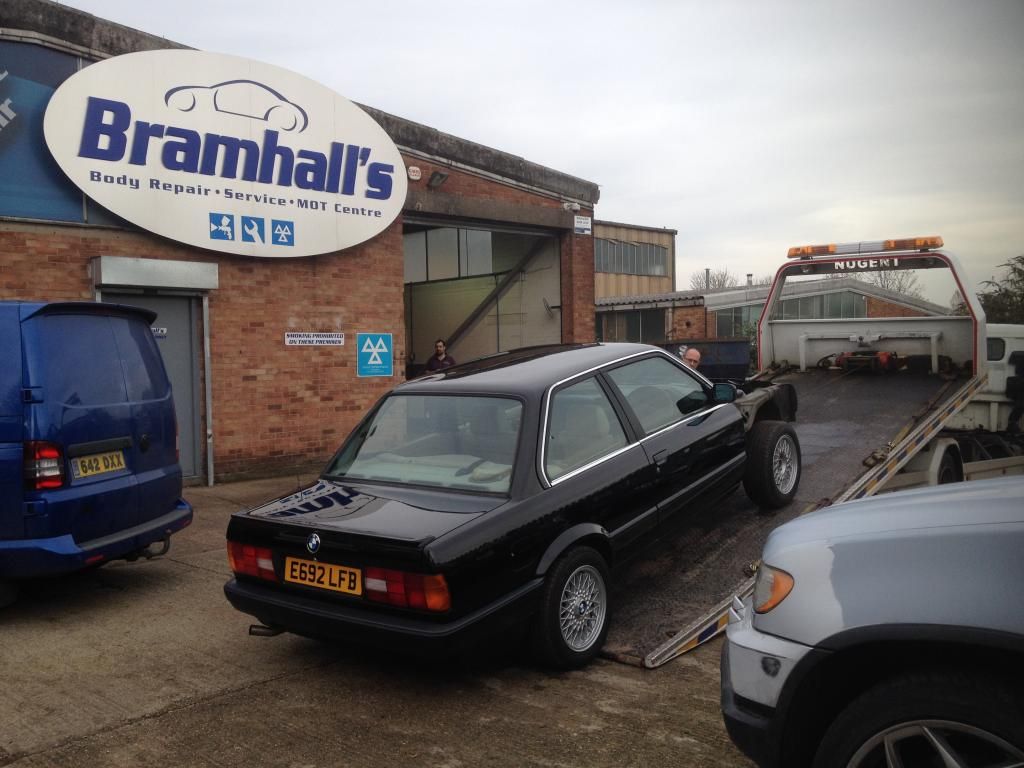
After its stripping it was off to the bodyshop for its welding to be done.
This pretty much brings me up to date as to where things are at the moment. The car is due back in 2/3 weeks, but in the mean time I have few parts to begin cleaning up and I need to plan all of the next stages to make sure I get this thing back on the road in the spring!
Dan
However, in 2011 I spotted a good one (or so I thought so) up for sale with 80k on the clock for £1800. So I bought it. I figured that it if I waited any longer to buy one that they would become too expensive to find a good one and I was in a situation at the time where I didn't need to drive everyday so it wouldn't get abused too much either.
After buying the car I did a bit of work on it cleaning a few areas up and putting the alloys on it, but other than that I just washed it, repaired it when needed and most of all enjoyed it.

I enjoyed it so much, that when I had to enter the real world and start working and commuting I just couldn't bring myself to sell it. Seeing as it had just clicked over 100k and started to get a bit shabby from spending the last three years outside I decided the best thing to do was to buy another car to use as the daily driver and then to start to slowly improve the condition of the old girl.
I knew the front end needed a bit of attention as the front valance had started to rot on the corners and there was some rot starting on the front wings behind the bumper. As well as that, one of the brake disc shields had rotted through so I figured I may as well repair the rust on the panels and strip the suspension to replace the tatty bits and give everything else a good clean.
This soon turned into a lot bigger job than I first thought.
So the first job was to remove the front bumper to see what the little bit of rot on the wings was really like.

At this point I found a hole, and from this point on it all got a lot more serious.

Still not too phased I thought it was best to remove the wings and have a good look at everything hiding away. Easier said than done when it turned out that the front wings had been welded on!! It appears that at some point the area just behind the front wheels had been repaired, but rather than remove the wings to repair them the job had been done in situ resulting in them being welded to the car.

With the bodywork removed the time came to give everything a good stabbing with the screw driver to see to what extent the rot had set in. I was not too happy.


No going back now then.
Because I don't want to become one of those people who begins a project but then never gets around to finishing it, I decided that I will repair/restore the front end of the car ready for driving it again in the Spring. And then next winter I may do the rear end etc. A rolling restoration if you like. So a plan was made and I cracked on with stripping the front end down further.


After its stripping it was off to the bodyshop for its welding to be done.


This pretty much brings me up to date as to where things are at the moment. The car is due back in 2/3 weeks, but in the mean time I have few parts to begin cleaning up and I need to plan all of the next stages to make sure I get this thing back on the road in the spring!
Dan


