Page 1 of 4
E30 325e 3/1987
Posted: Tue Mar 19, 2013 1:30 pm
by e30Passion
Re: E30 325e 3/1987
Posted: Tue Mar 19, 2013 2:25 pm
by Quaser
WOW - that is a very very clean car
if you want more power, you can do a head swap for a 320i which will release more power then a 325i if done correctly. Manual conversions can also be done easily with factory parts.
Re: E30 325e 3/1987
Posted: Tue Mar 19, 2013 3:06 pm
by tonybtonyb
A minter

Re: E30 325e 3/1987
Posted: Tue Mar 19, 2013 4:00 pm
by e30Passion
Quaser wrote:WOW - that is a very very clean car
if you want more power, you can do a head swap for a 320i which will release more power then a 325i if done correctly. Manual conversions can also be done easily with factory parts.
I know about the conversions but I've chosen to keep it original. Manual conversion is still an option but i'll injoy the automatic for now.
tonybtonyb wrote:A minter
For the price payed.. absolutely!
Re: E30 325e 3/1987
Posted: Tue Mar 19, 2013 4:37 pm
by e30Passion
Re: E30 325e 3/1987
Posted: Tue Mar 19, 2013 4:40 pm
by Rav335uk
Wow, that looks like very clean for the year.

Re: E30 325e 3/1987
Posted: Tue Mar 19, 2013 4:54 pm
by e30Passion
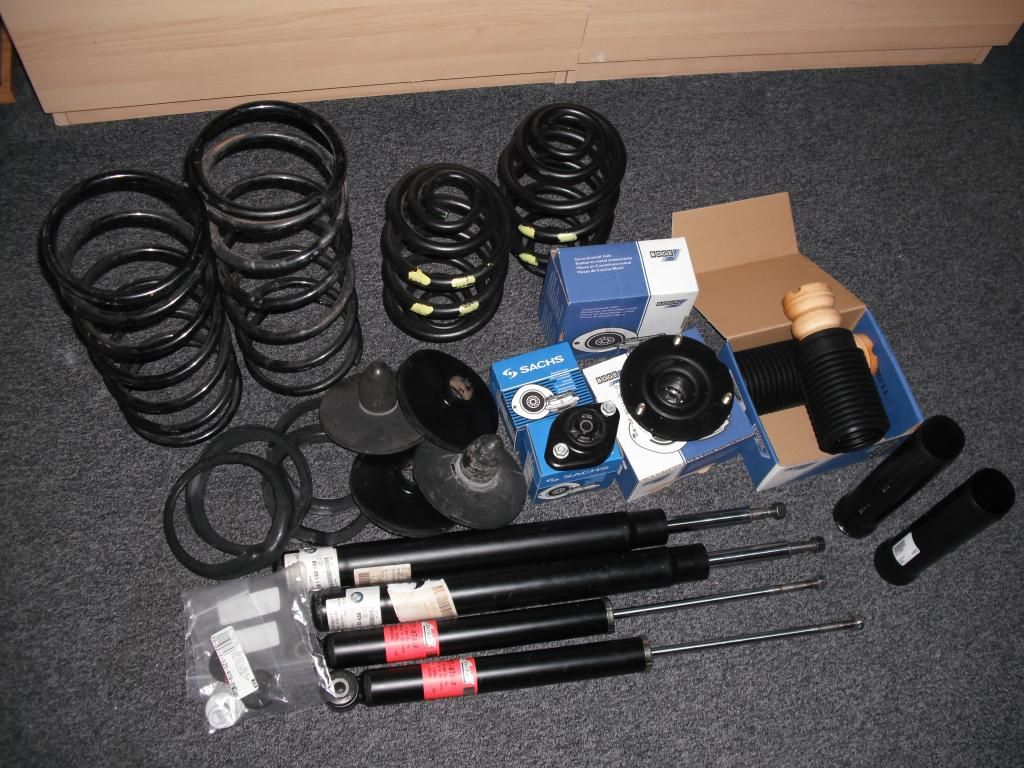
Then i did a suspenion overhaul because the car was lowered when i bought it which felt like riding a bike with no tires and caused problems with the many speedbumps in this place. I decided on a set of OEM Boge Turbo gas-struts with stock springs. The improvement was shocking to say the least!
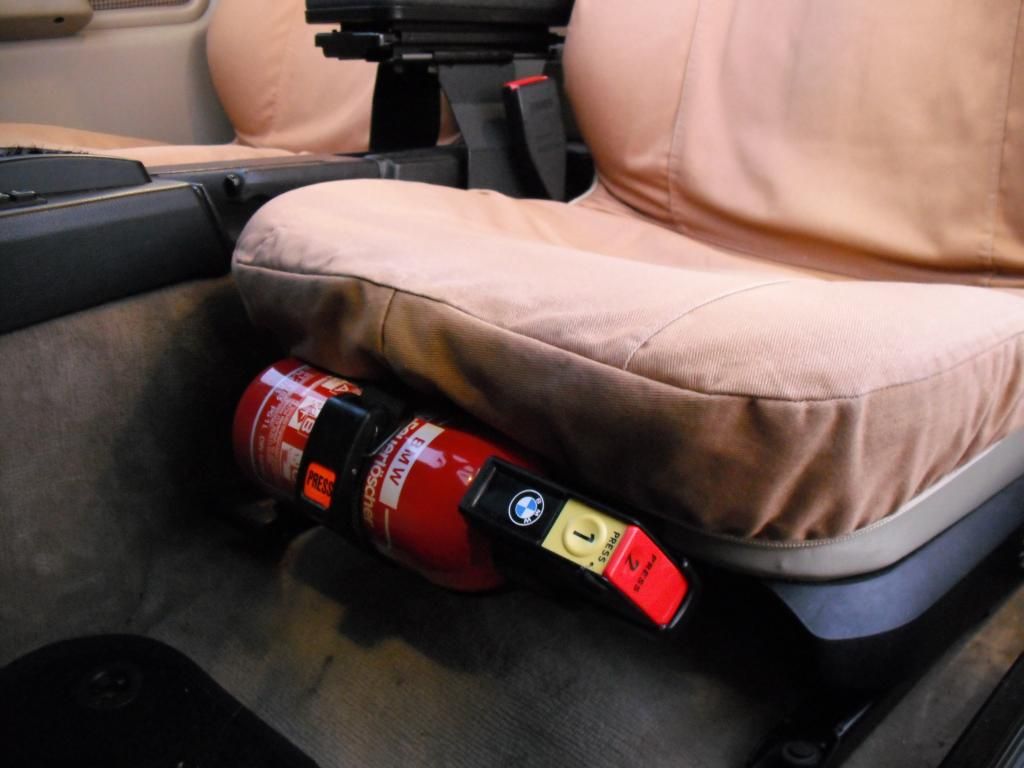
Added a fire extinguisher.
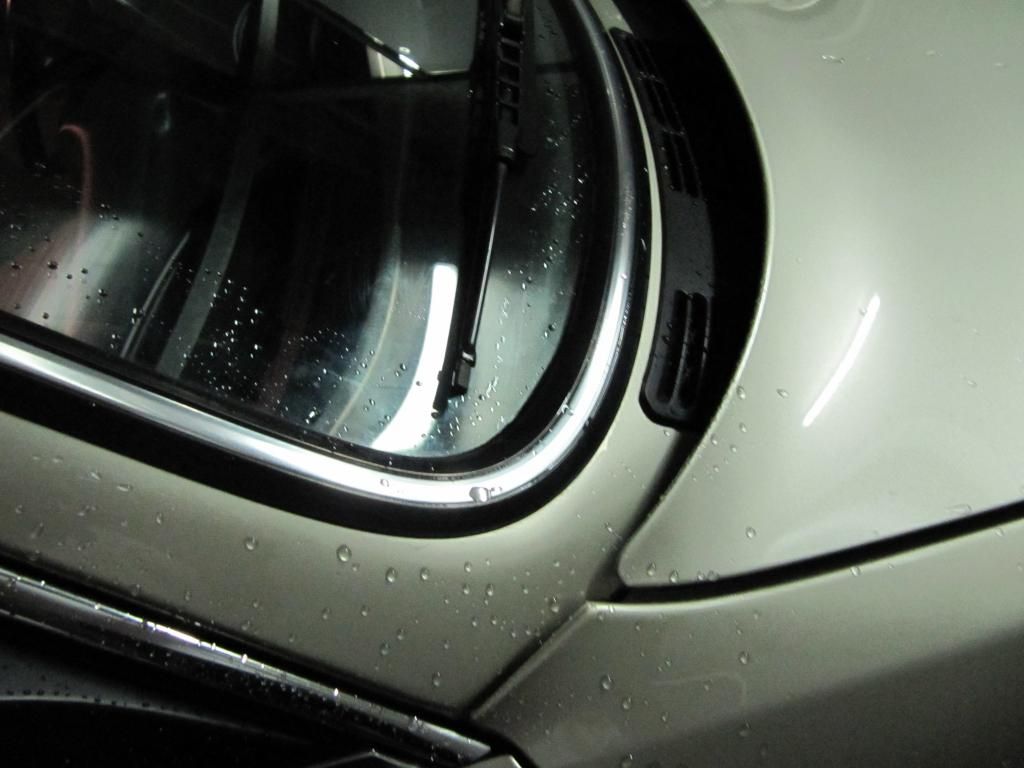
New plastic chrome lining round front and rear windows. Horrible job without the proper tools!
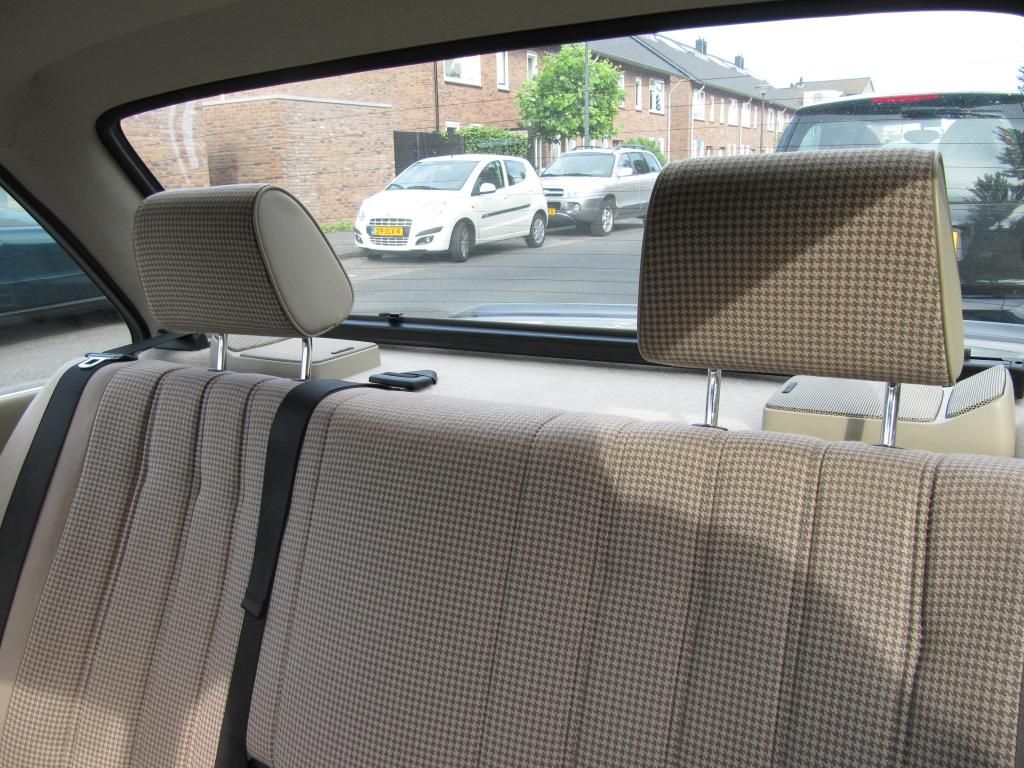
Some matching rear headrests which took me ages to find. The keen eye spots the also added sunblind on the shelf.
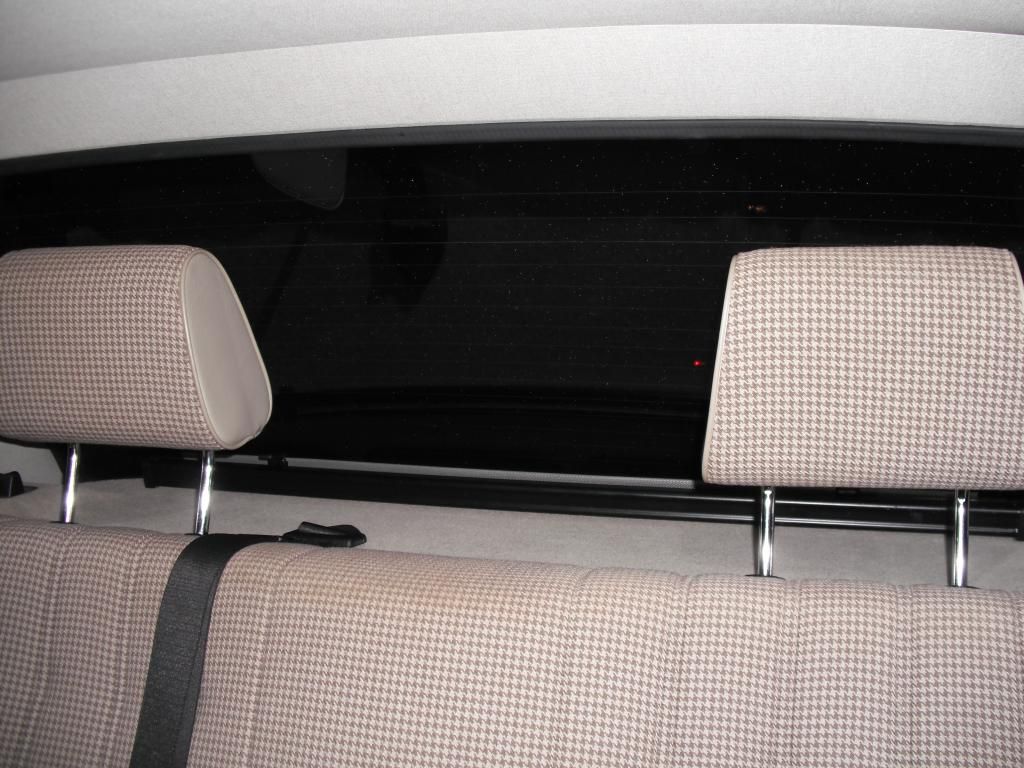
I absolutely hated the looks of these.. couldn't stand them every time i got in.
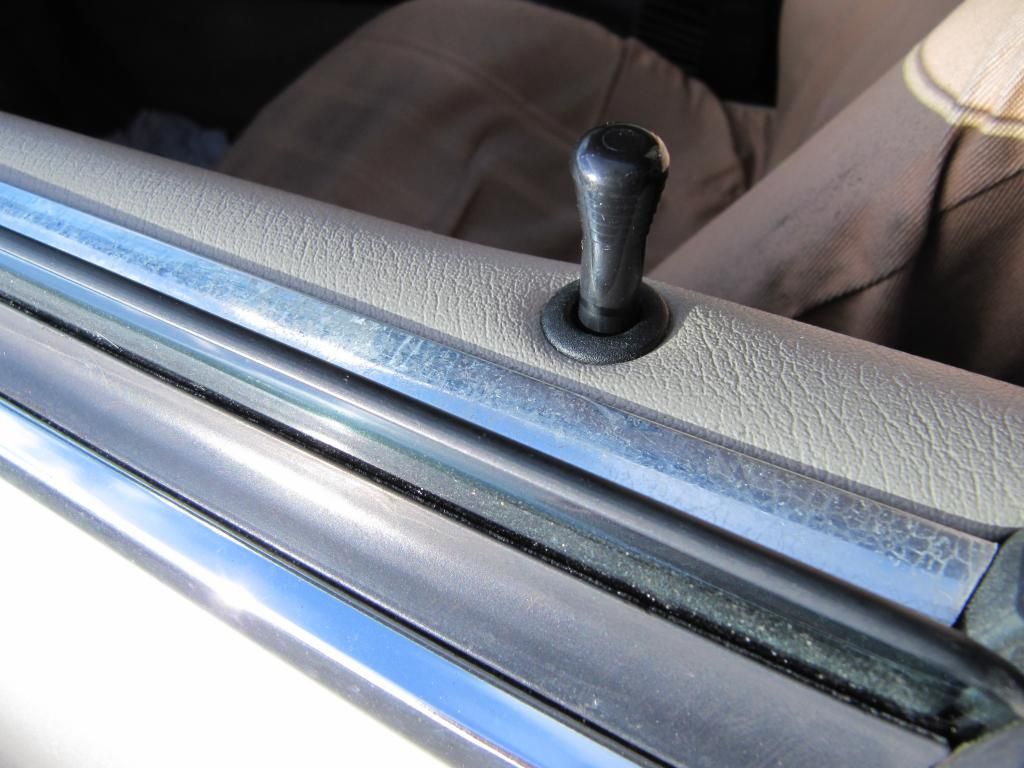
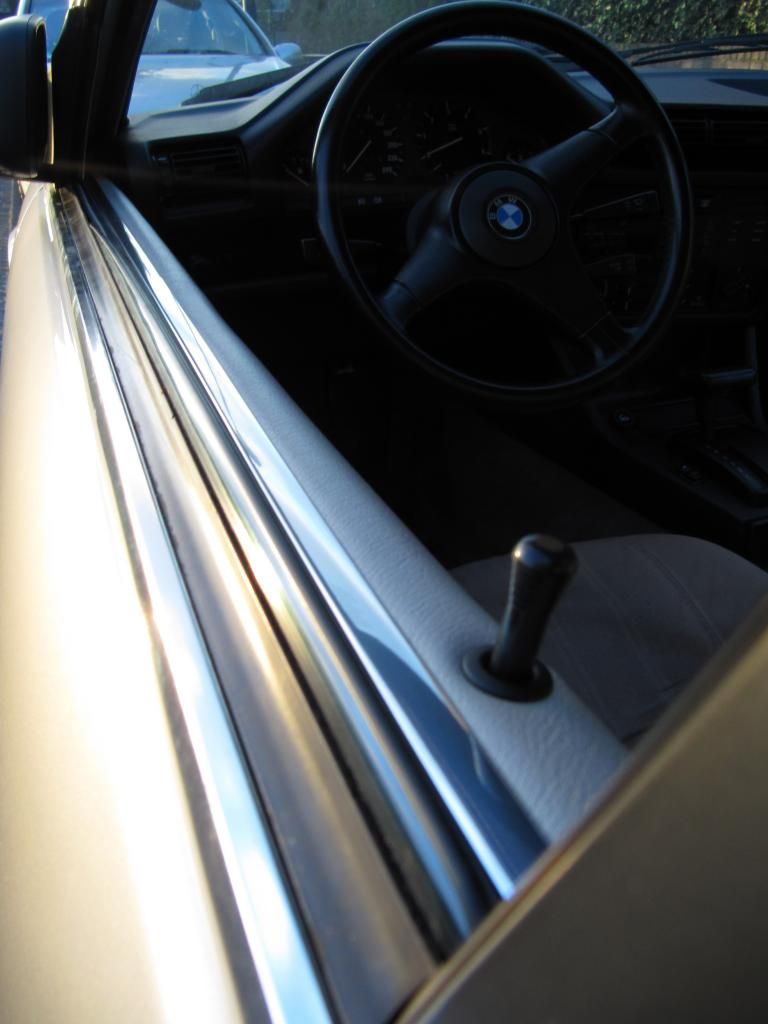
So i installed some new chrome linings with inner rubber seal. 140 Euro's both sides...
AUCH!
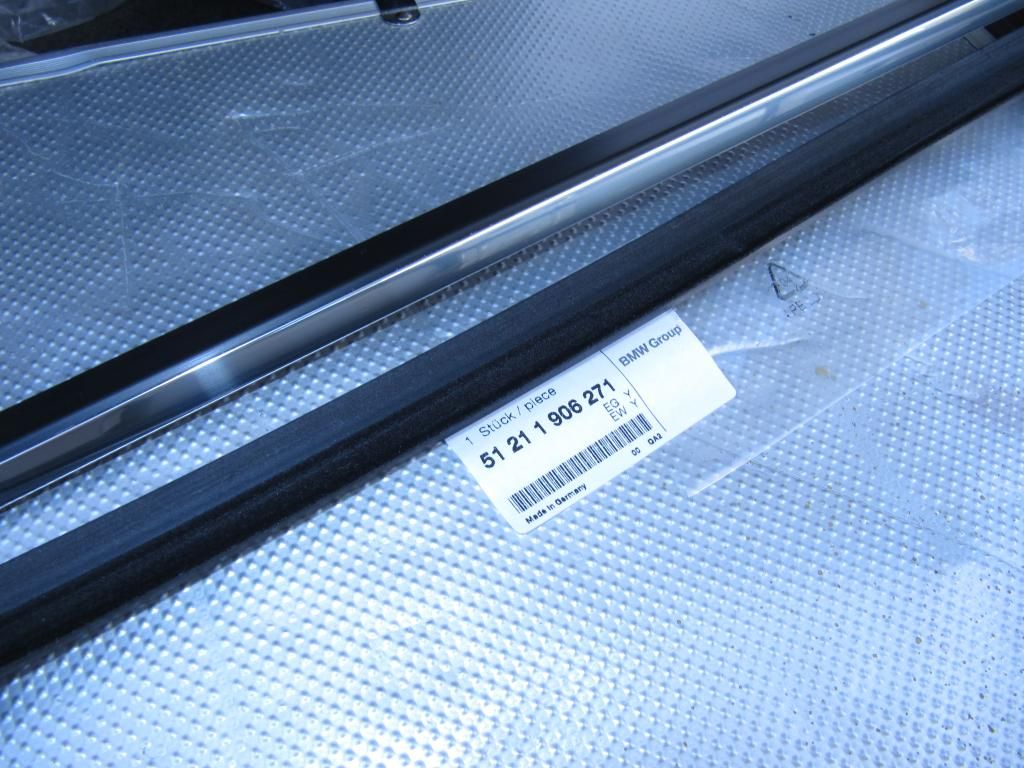
Very expensive indeed but these little things make all the difference.

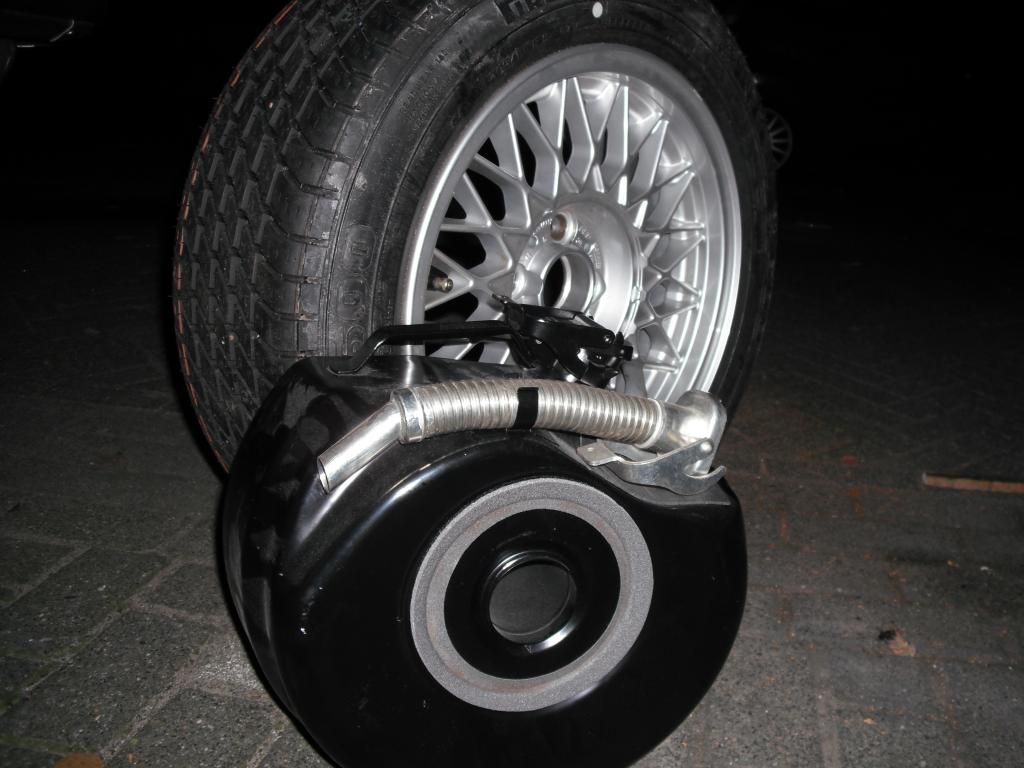
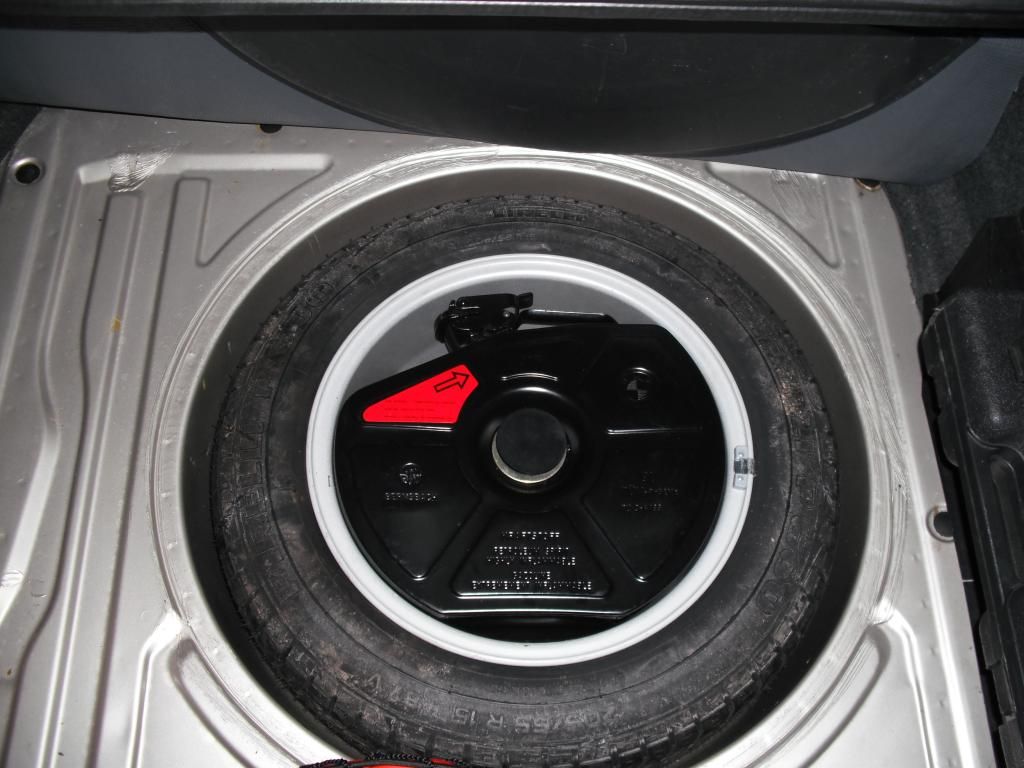
A brandnew 15''BBS spare and fueltank.
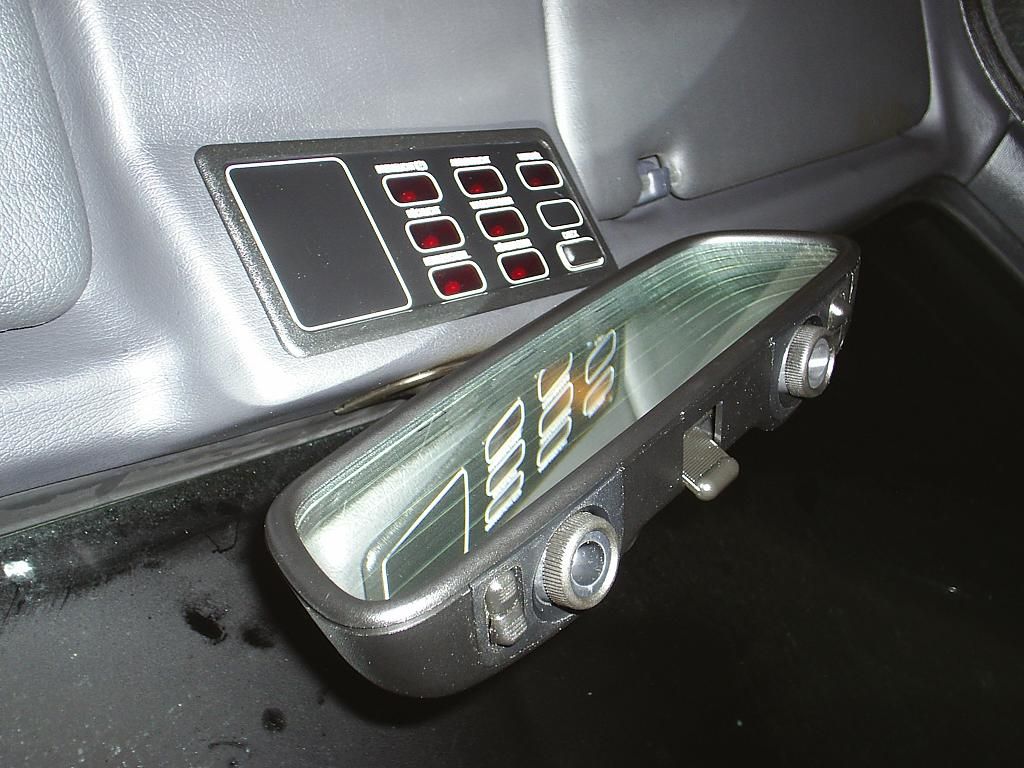
Installed interior maplights with the original kabel running down the a-pillar to a connector behind the left speaker. Nice feature!
Re: E30 325e 3/1987
Posted: Tue Mar 19, 2013 5:09 pm
by e30Passion
Re: E30 325e 3/1987
Posted: Tue Mar 19, 2013 5:23 pm
by Kedge
Very nice looking car
Those headlights were an absolute bargain!!!
Re: E30 325e 3/1987
Posted: Tue Mar 19, 2013 5:26 pm
by Cloggy Saint
Is it an import? It's unusual to have 3 digits together on the kenteken on such an old car.
Re: E30 325e 3/1987
Posted: Tue Mar 19, 2013 5:31 pm
by e30Passion
Then i got sick and tired of that stock radio and the terrible sound quality that came with it so i got something a bit more sophisticated. I had to have CD and it had to be a genuine BMW headunit as a modern christmas tree in the dash looks horrid IMO.
That presented a limited choice of 3 headunits as far as i know.
1. Electronic CD1
2. Electronic CD2
3. e36 CD43 which fits the SS wireloom's adapterkabelset.
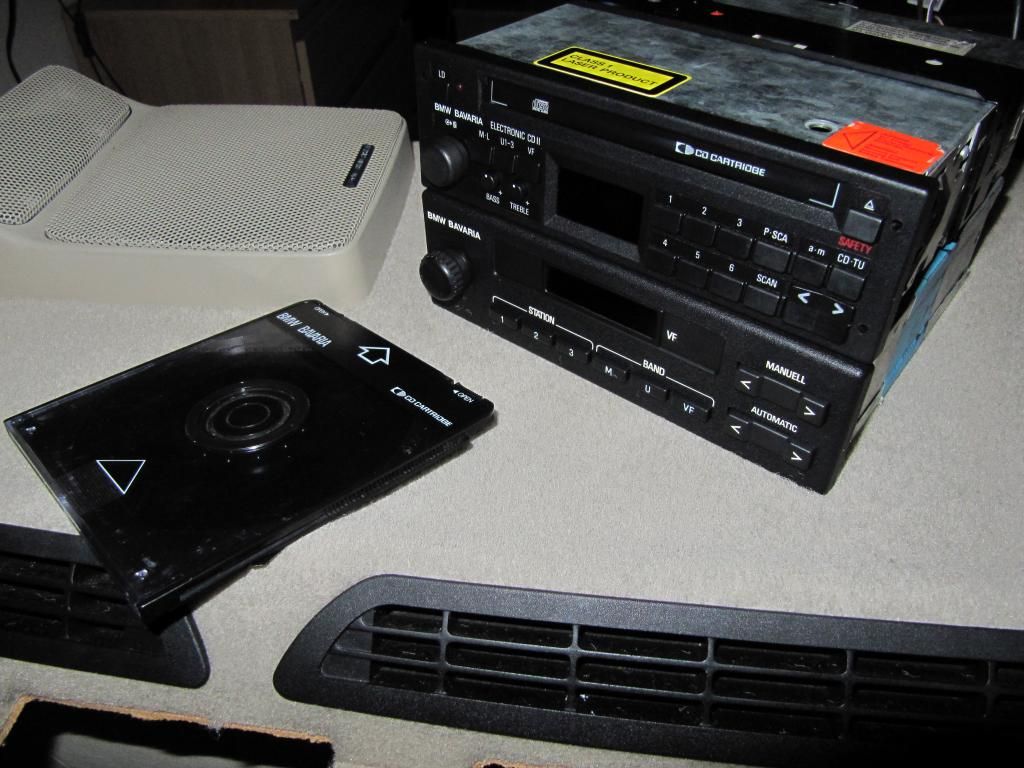
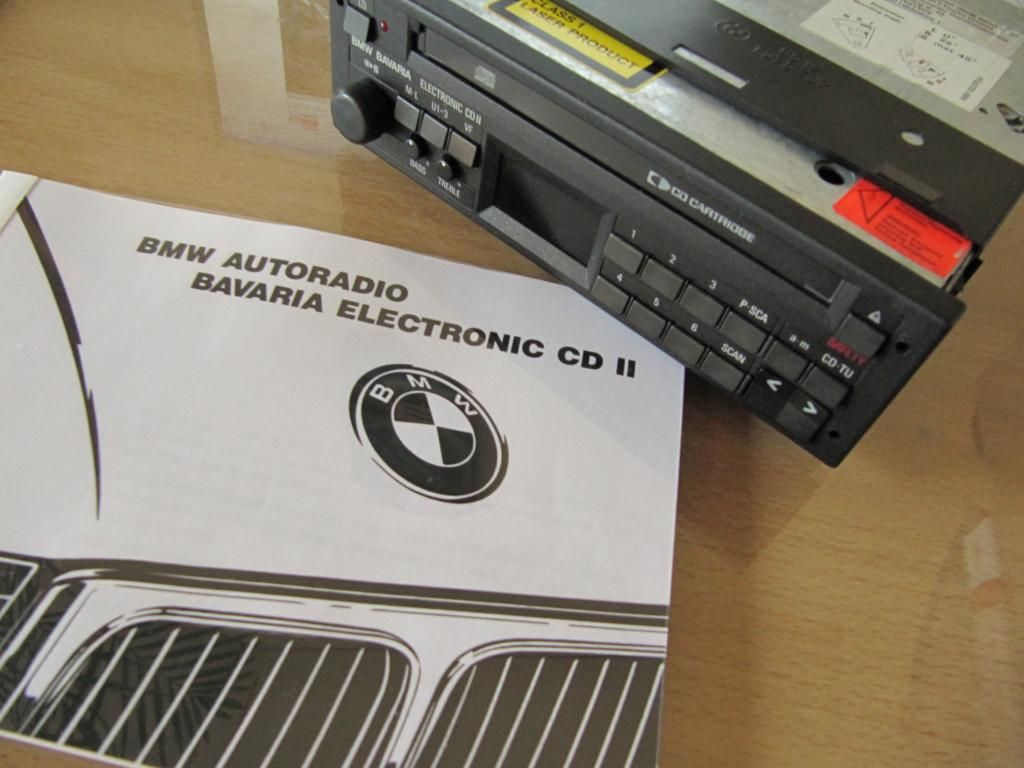
I chose the cool looking Bavaria Electronic CD2 made by Blaupunkt for the 80's optional BMW Sound System.
Top unit in.. bottom one out!

Other stuff you need to install a BMW Sound System.
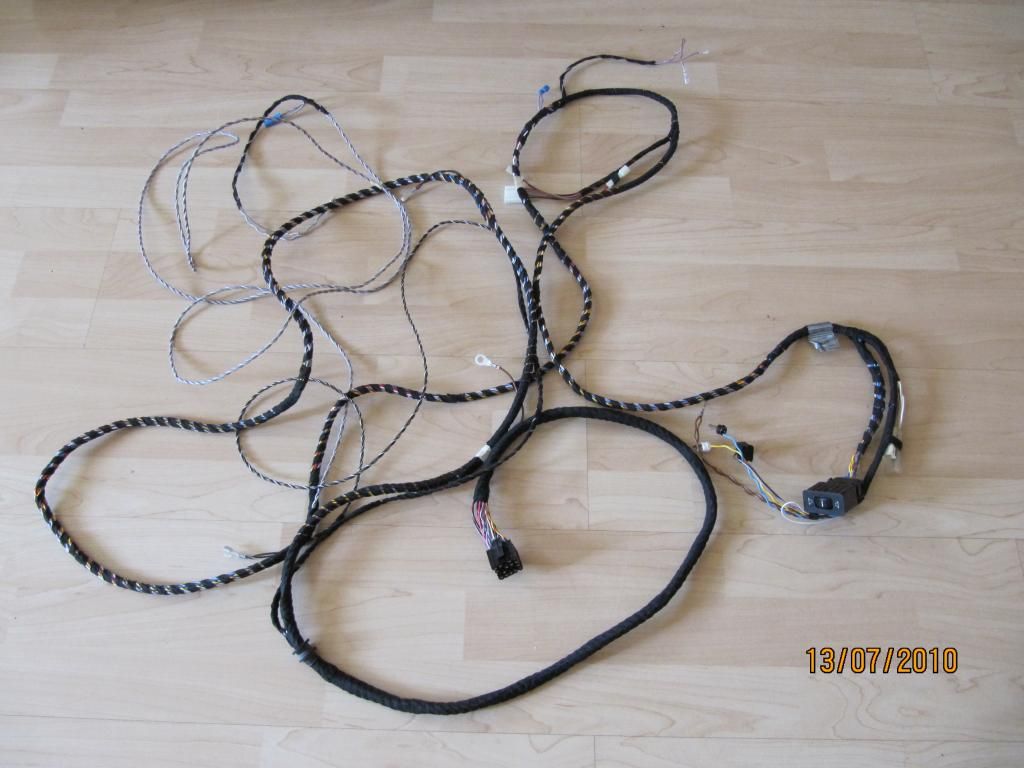
- SS Wireloom. (61121381719) Note the balance switch!
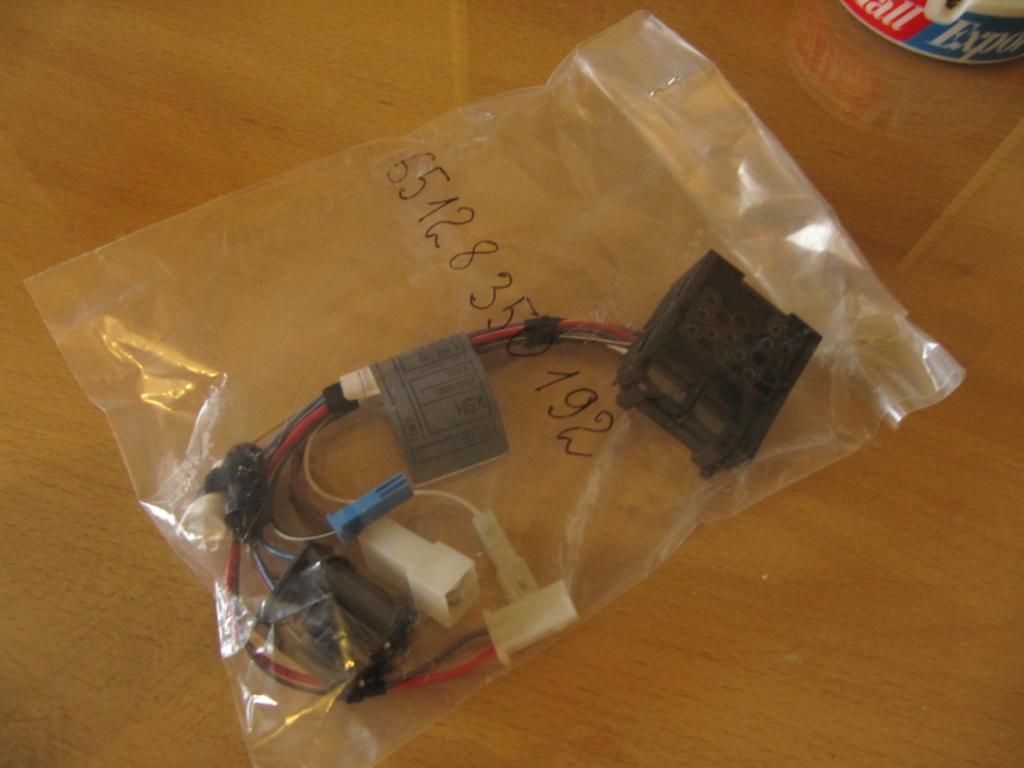
- Adapterkabelset (65128350192)
This kabelset deletes the balance switch to adjust volume front to rear as the CD2 has that incorperated in the volume knob by pulling it out.
- The original Blaupunkt quattrobooster amp. Comes with a mounting bracket that's NLA from BMW.
- Rear speaker cabinets. Not really necessary if you just turned 18 as you can put 6x9's in there but they do look good. Found mine in the USA.
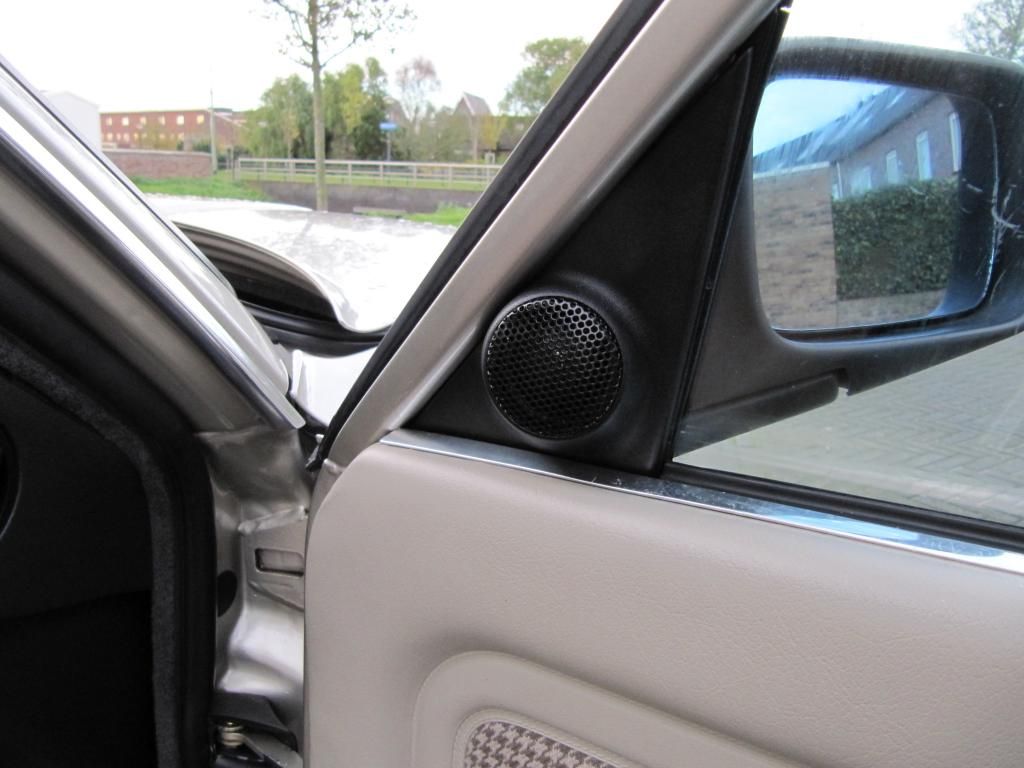
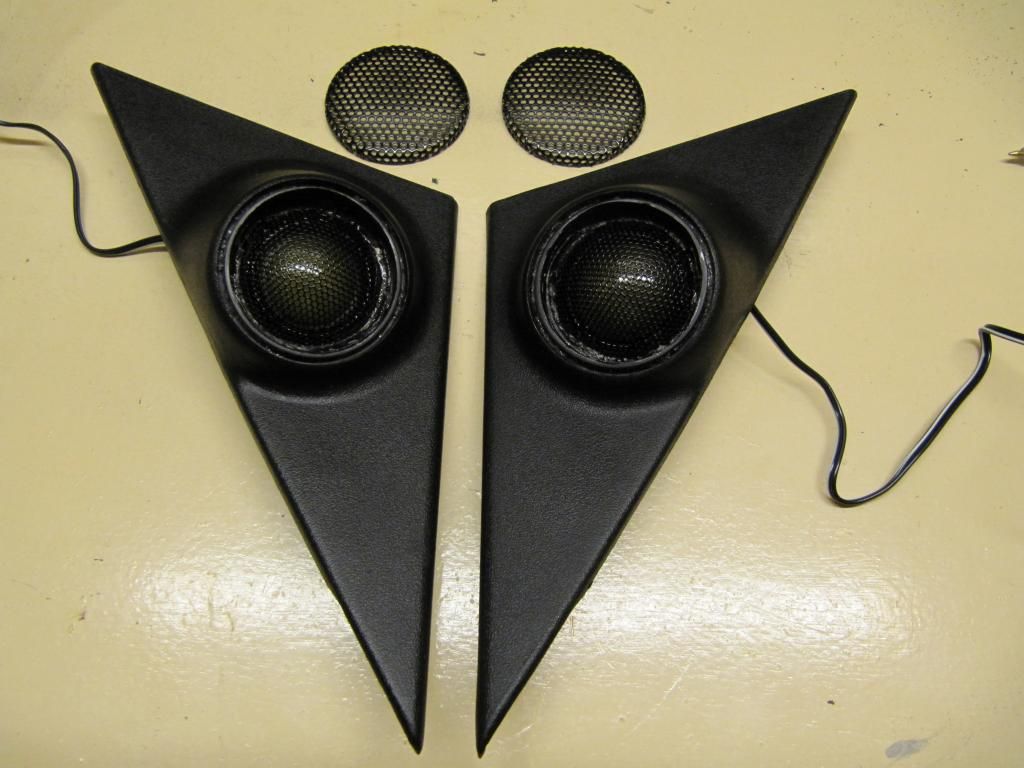
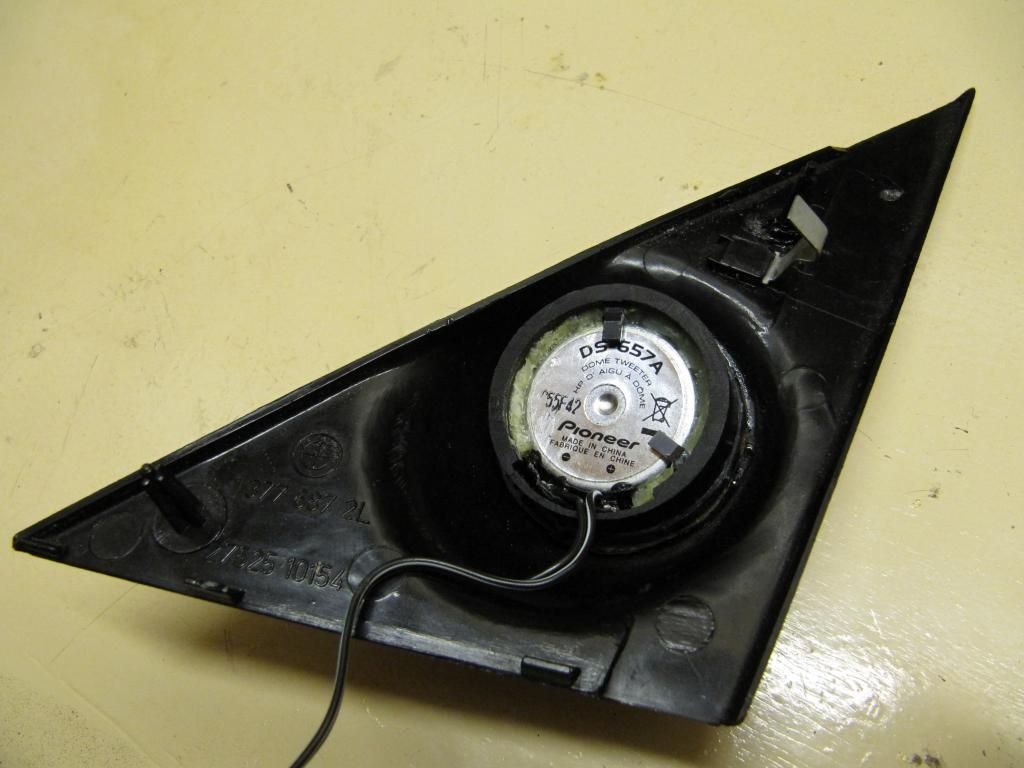
- Tweeter speakerpots to put in the doors.
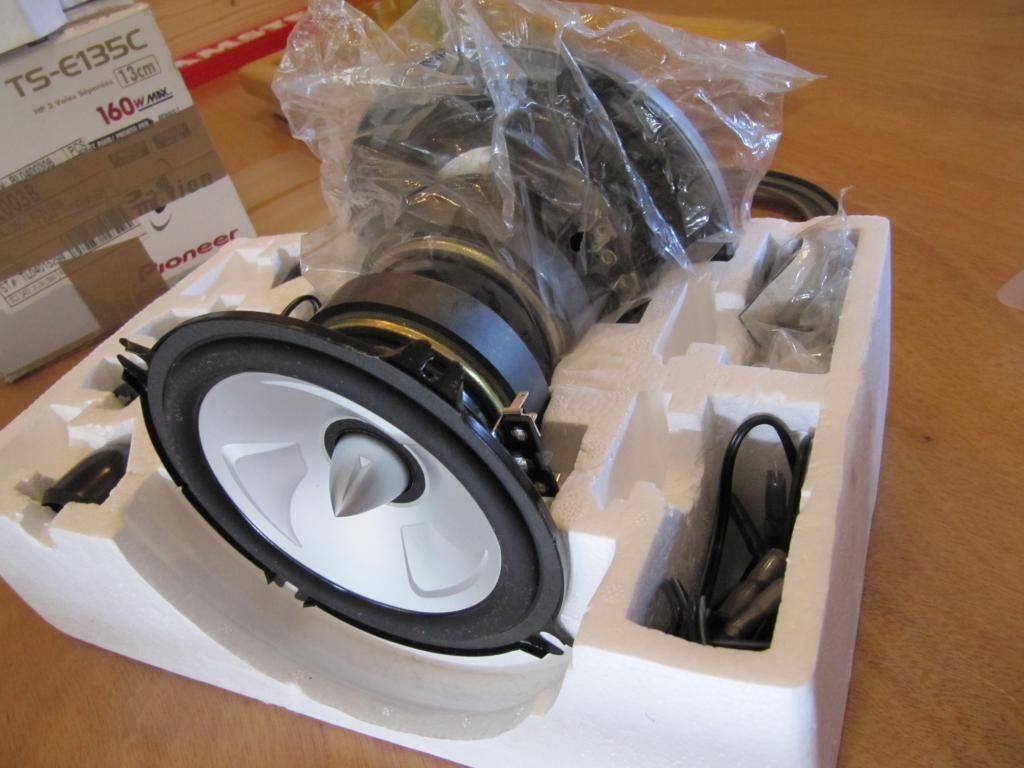
- The speakerset itself. You can either use the original Nokia setup or replace them for something modern like a set of Pioneer TS-E136C's.
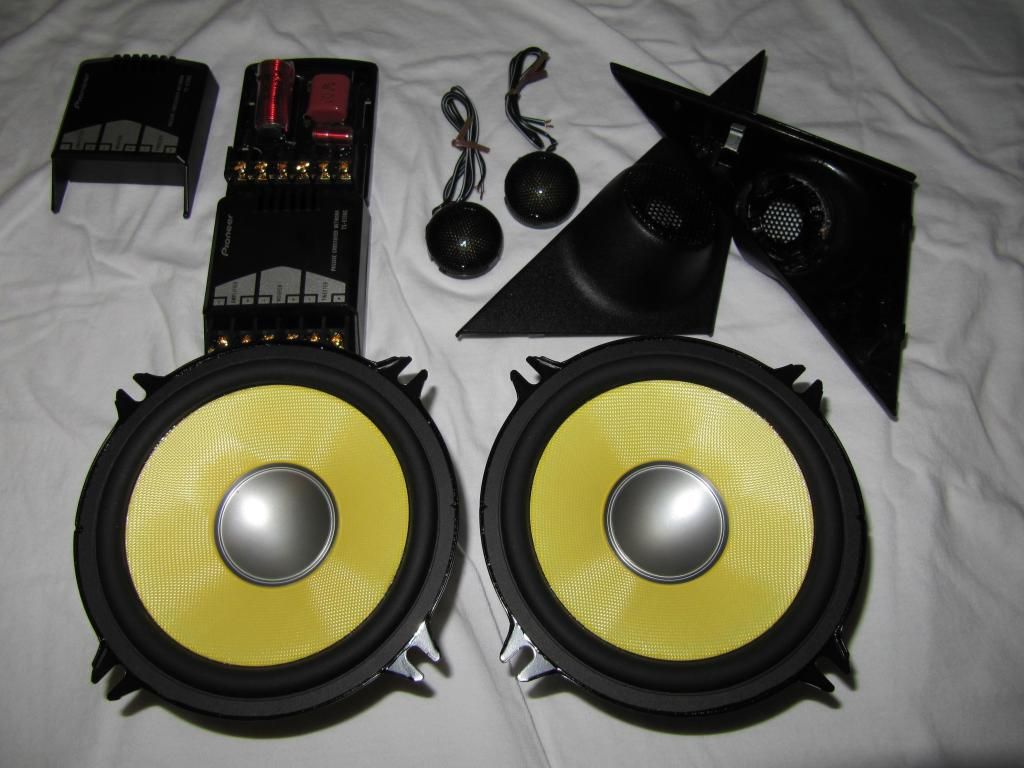
For the rear cabinets i chose these (Pioneer TS-E135C) as there's no room under the parcelshelf for the crossover boxes. With this set it's incorperated in the kabel going from the woofer to the tweeter which solves that problem.

- In case of the Bavaria CD2 you're gonna need a bunch of these and you're pretty much there to complete the install of a Sound System.
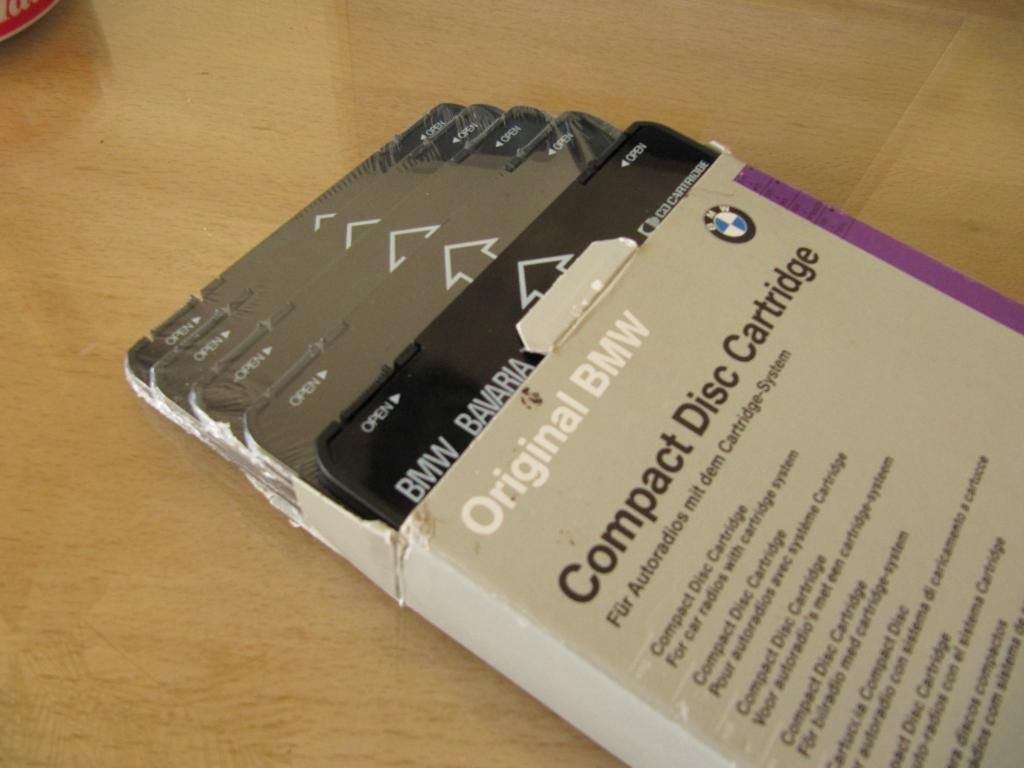
Radio manuals still available from BMW.
Build the Pioneer tweets in de pots.
Re: E30 325e 3/1987
Posted: Tue Mar 19, 2013 5:31 pm
by bab-91
ummpf. Brilliant looking car
Re: E30 325e 3/1987
Posted: Tue Mar 19, 2013 5:33 pm
by e30Passion
Cloggy Saint wrote:Is it an import? It's unusual to have 3 digits together on the kenteken on such an old car.
Yes.. the guys i bought it from imported it from Germany.
Re: E30 325e 3/1987
Posted: Tue Mar 19, 2013 5:43 pm
by e30Passion
Re: E30 325e 3/1987
Posted: Tue Mar 19, 2013 5:48 pm
by bab-91
Dismantling & Rebuilding the tweeters must have been a royal pain in the arse?
Re: E30 325e 3/1987
Posted: Tue Mar 19, 2013 6:19 pm
by oomz1975
WOW, what a stunning car, I really like what your doing with it.
Re: E30 325e 3/1987
Posted: Tue Mar 19, 2013 6:59 pm
by e30Passion
Re: E30 325e 3/1987
Posted: Tue Mar 19, 2013 7:05 pm
by e30Passion
Re: E30 325e 3/1987
Posted: Tue Mar 19, 2013 7:15 pm
by e30Passion
Re: E30 325e 3/1987
Posted: Tue Mar 19, 2013 7:21 pm
by Nobby_N
Great thread and what a lovely car you have there!
Re: E30 325e 3/1987
Posted: Tue Mar 19, 2013 7:21 pm
by Kedge
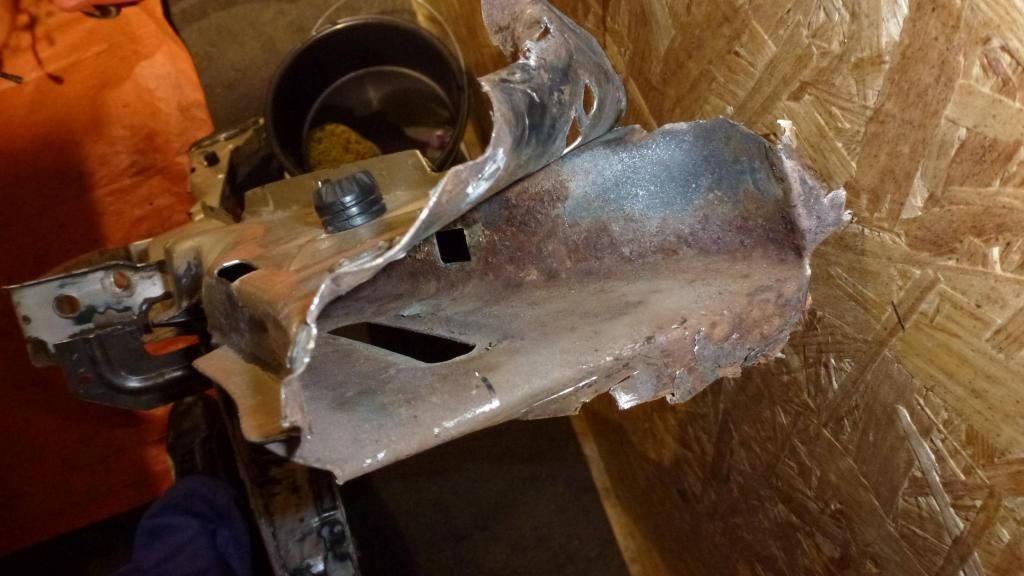
Must have been horrible getting out the car to see that damage, good to see it got sorted though! Most over here would really have struggled to get an insurance company to fix that.
How do you keep finding these eBay bargains?!?!?!?
Re: E30 325e 3/1987
Posted: Tue Mar 19, 2013 7:26 pm
by e30Passion
Re: E30 325e 3/1987
Posted: Tue Mar 19, 2013 7:47 pm
by e30Passion
Re: E30 325e 3/1987
Posted: Tue Mar 19, 2013 8:01 pm
by gooner1
Liking that, a lot.

Re: E30 325e 3/1987
Posted: Tue Mar 19, 2013 8:21 pm
by Kedge
e30Passion wrote:
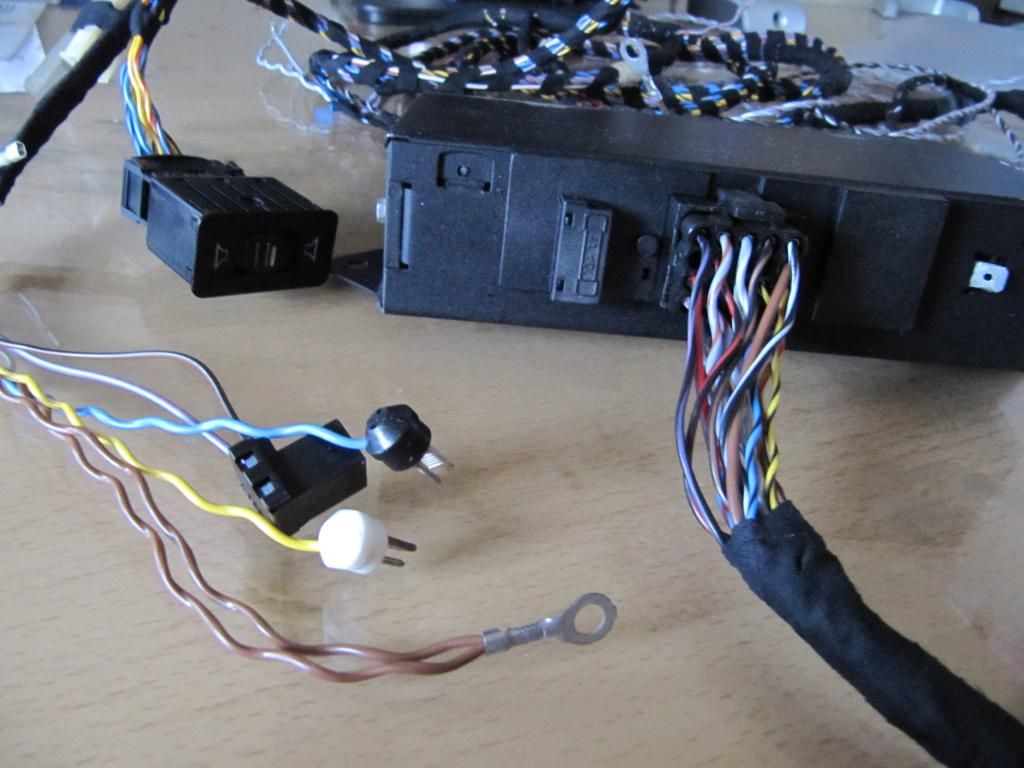
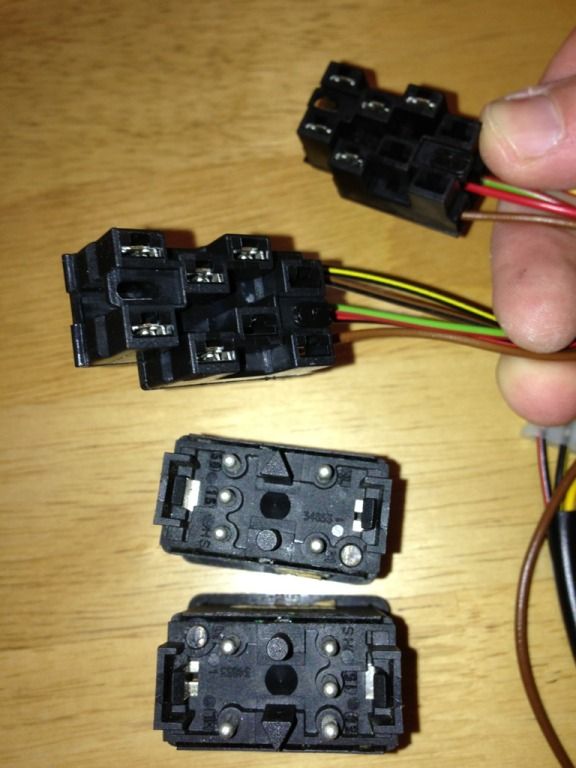
And a new wireloom for future heated seats. Still have to take the seats out and dismantle them to put the heatmats in.

Can you give me the part number on that please (or the part number on the switch plugs), I've just bought a new loom but it doesn't have the correct plugs on it for the heated seat switches.
Re: E30 325e 3/1987
Posted: Tue Mar 19, 2013 8:27 pm
by e30Passion
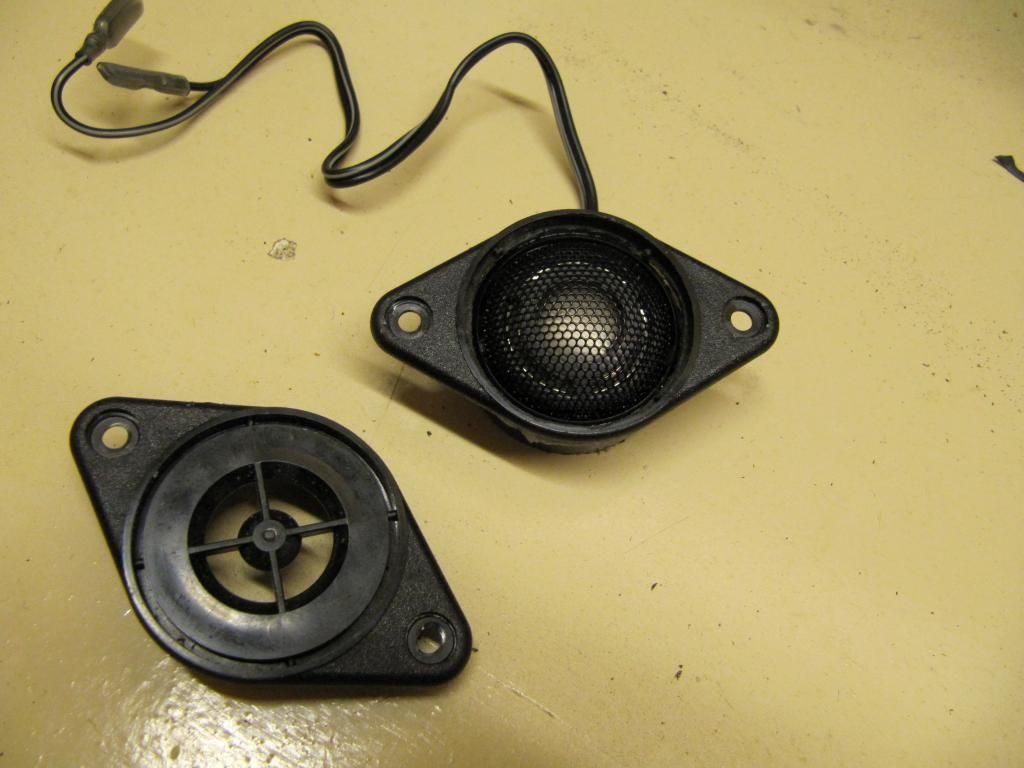
bab-91 wrote:Dismantling & Rebuilding the tweeters must have been a royal pain in the arse?
Yes they were a fidle but worth the efford.
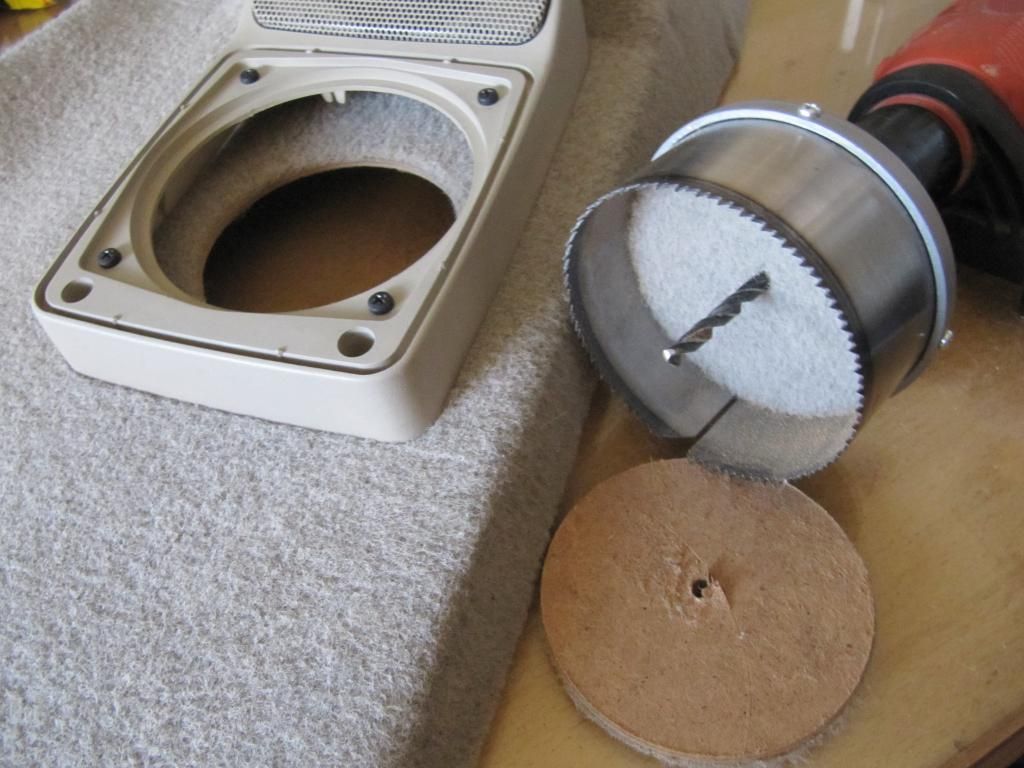
When you pulled back the old tweeter the outside ring (yellow) can be carefully pulled out cause it's gleud in place.


Then at the front, remove the grill and take out the access plastic with a circular saw on a drill. Or if you don't have one..

.. use a file like i did which is a royal pain in the ass for sure.

Shorten the tweeter holder.

And glue it in place on the ring so it fits perfectly.

Rear ones where a bit easier.

I think you will now probably never attempt it..
Re: E30 325e 3/1987
Posted: Tue Mar 19, 2013 8:36 pm
by e30Passion
Nobby_N wrote:Great thread and what a lovely car you have there!
Thank you.. much appreciated!
Kedge wrote:Must have been horrible getting out the car to see that damage, good to see it got sorted though! Most over here would really have struggled to get an insurance company to fix that.
How do you keep finding these eBay bargains?!?!?!?
Can't remember.. fainted!
Searching for hours on every seperate Ebay. Thats means typing BMW E30 and scolling down the entire Ebay.co.uk/Ebay.de/.ie/.at/.ch/.it/.com
Good luck and have coffee handy
Re: E30 325e 3/1987
Posted: Tue Mar 19, 2013 8:57 pm
by gooner1
e30Passion wrote:
[quote="Kedge"
How do you keep finding these eBay bargains?!?!?!?
Can't remember.. fainted!
Searching for hours on every seperate Ebay. Thats means typing BMW E30 and scolling down the entire Ebay.co.uk/Ebay.de/.ie/.at/.ch/.it/.com
Good luck and have coffee handy
[/quote]
Have been doing that for a while, give me a shout if you happen to spot any Pine green seat material, please.

Re: E30 325e 3/1987
Posted: Tue Mar 19, 2013 9:10 pm
by e30Passion
Kedge wrote:
Can you give me the part number on that please (or the part number on the switch plugs), I've just bought a new loom but it doesn't have the correct plugs on it for the heated seat switches.
I believe it's number 5 which would be 61121381721
http://realoem.com/bmw/showparts.do?mod ... g=52&fg=65
Cheers.
Re: E30 325e 3/1987
Posted: Tue Mar 19, 2013 9:14 pm
by Kedge
Thanks for that, I'm thinking I might have ordered 61121380484, will have to check when I get home tomorrow!
Re: E30 325e 3/1987
Posted: Tue Mar 19, 2013 9:27 pm
by Duke137
F U C K Me! What a car!
I have one of those tidy trays for a battery in the boot kit and they look amazing!
I tell you what I really like from your project/car was the bottletop wheels
Re: E30 325e 3/1987
Posted: Tue Mar 19, 2013 9:27 pm
by e30Passion
Re: E30 325e 3/1987
Posted: Tue Mar 19, 2013 9:38 pm
by bab-91
e30Passion wrote:bab-91 wrote:Dismantling & Rebuilding the tweeters must have been a royal pain in the arse?
Yes they were a fidle but worth the efford.
I think you will now probably never attempt it..
It does look fiddly. I'll give it a go, In the future. In for a penny in for a pound.

Could be ages, I have enough to be getting on with. Keep the updates coming. Great work & attention to detail!!!
Re: E30 325e 3/1987
Posted: Tue Mar 19, 2013 9:49 pm
by e30Passion
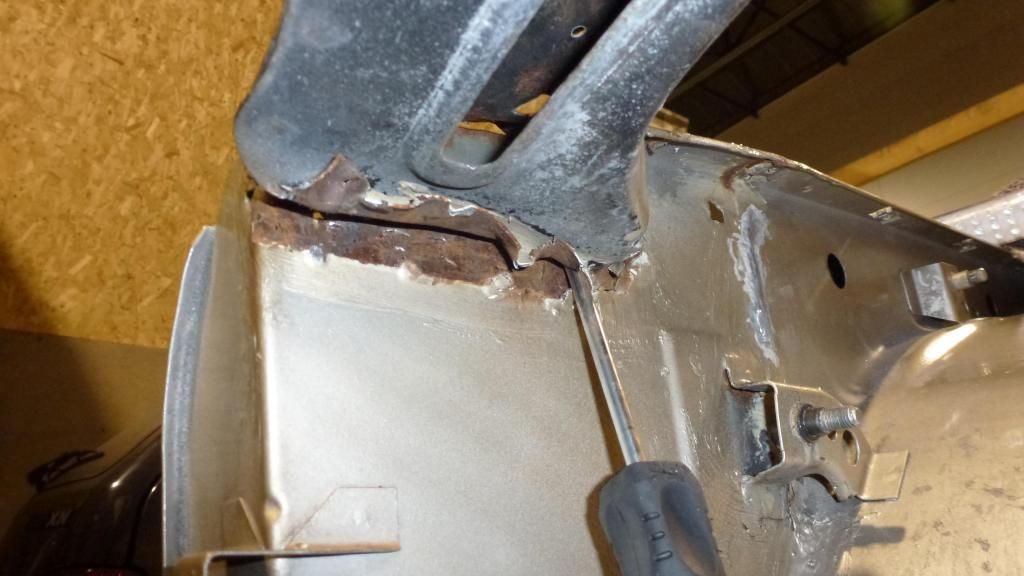
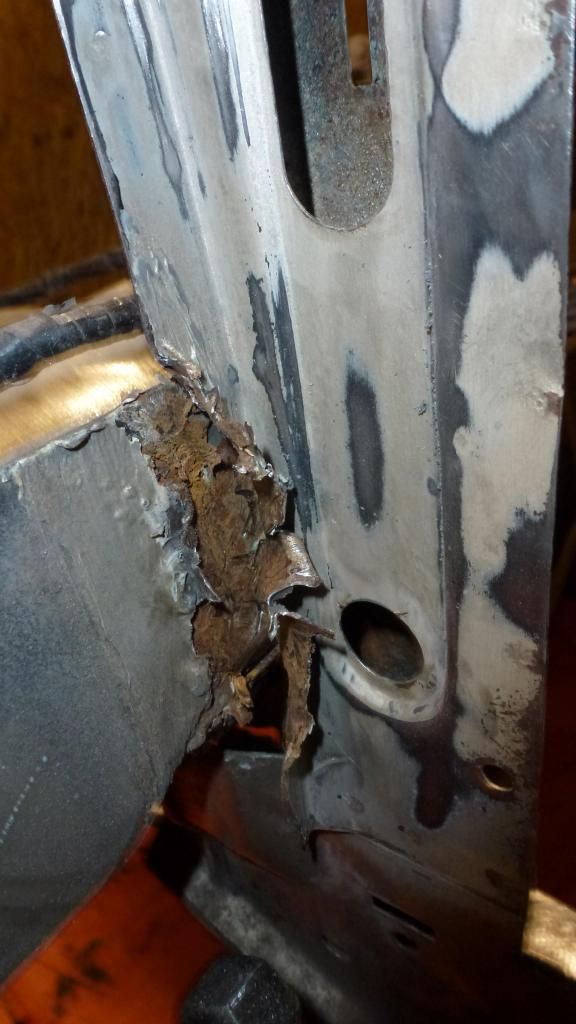
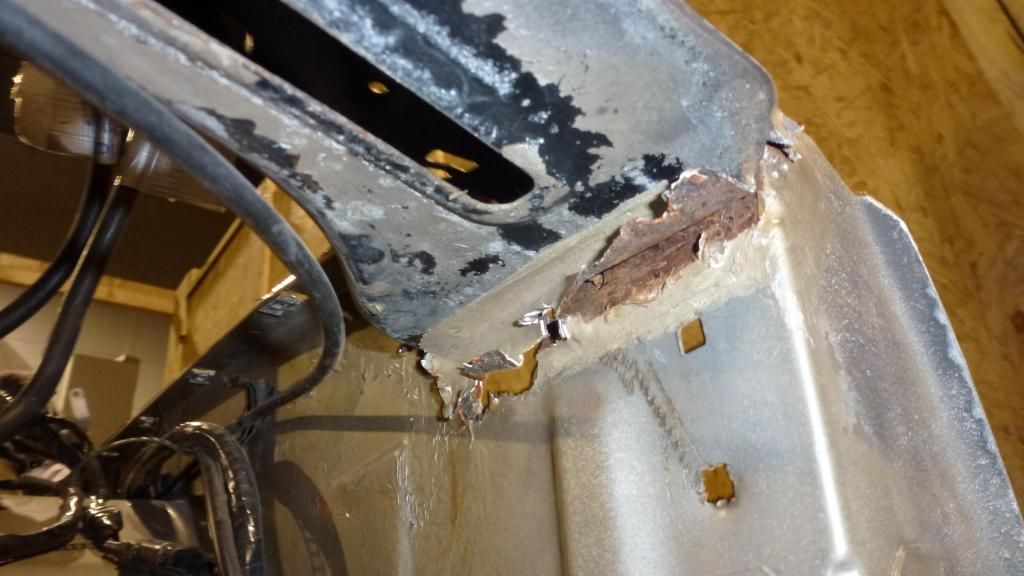
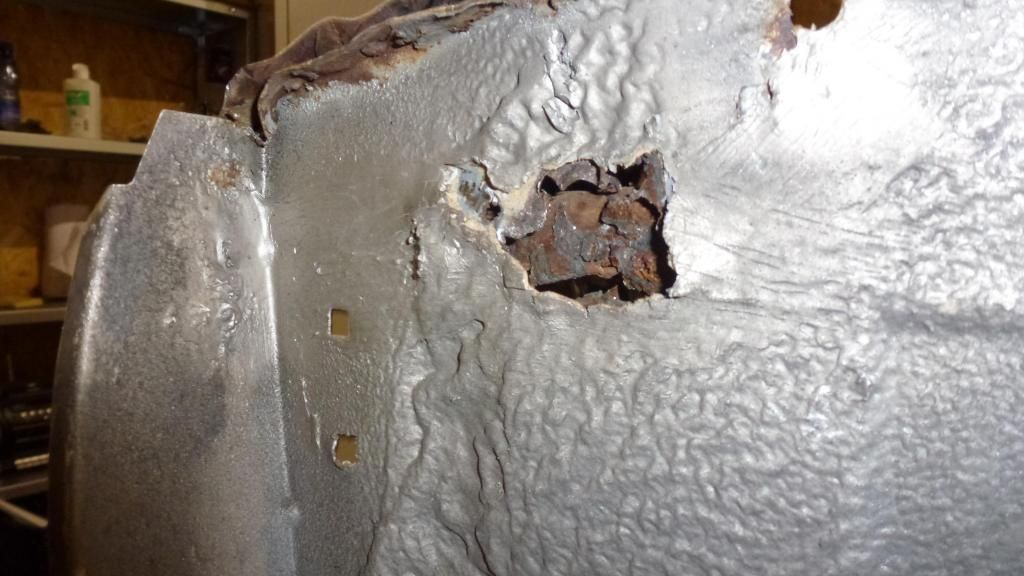
You didn't expect that did you? I did, but not this bad. At this stage the paint flaking off and rust starting went really fast. I think its a case of not properly sanding, cleaning, priming and waxcoating after paint that is the reason for it to go this bad this fast. Whoever did the repairs obviously did not do a proper job.
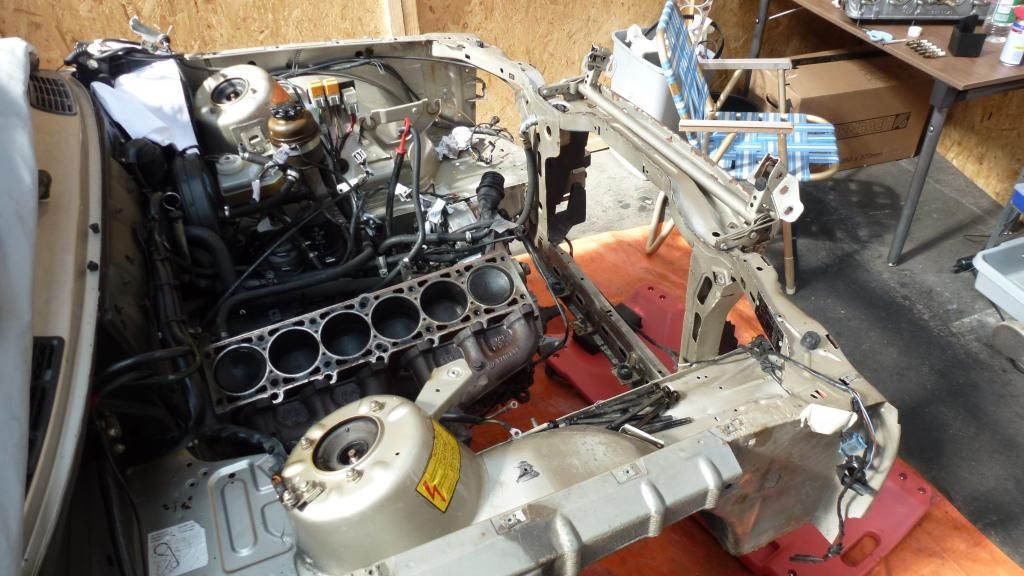
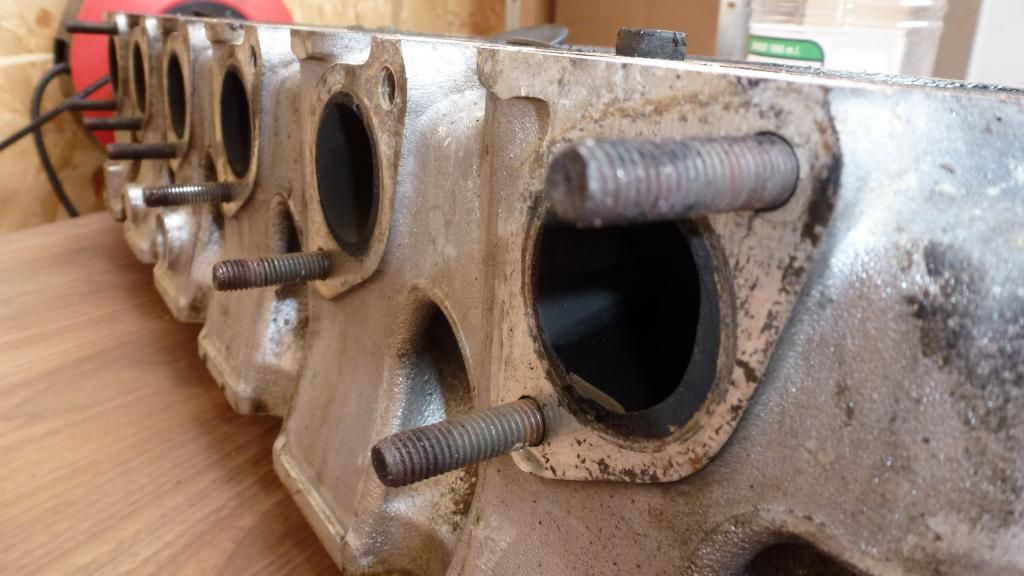
I went along to take the engine apart.
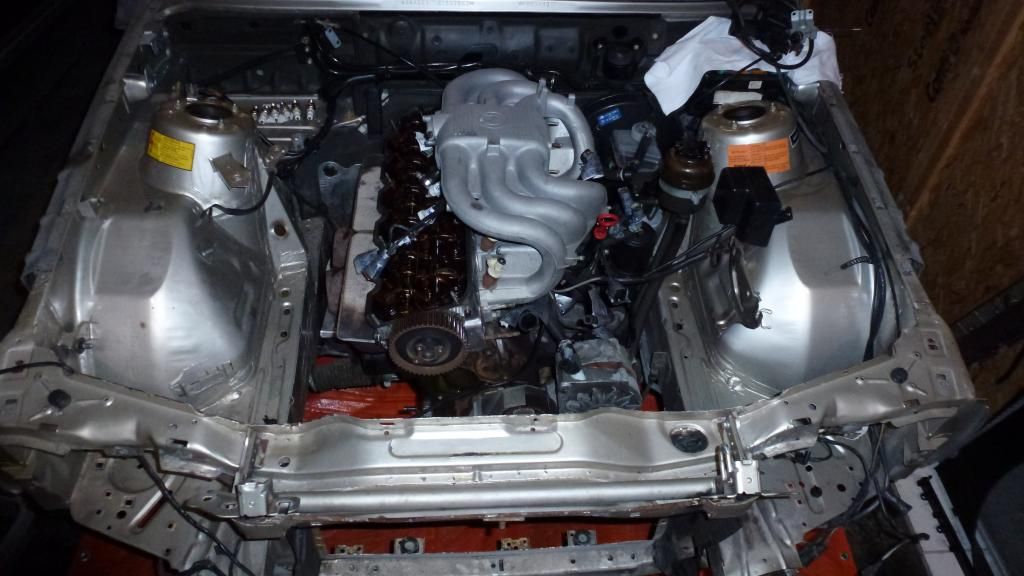
Finally got the damn thing off.
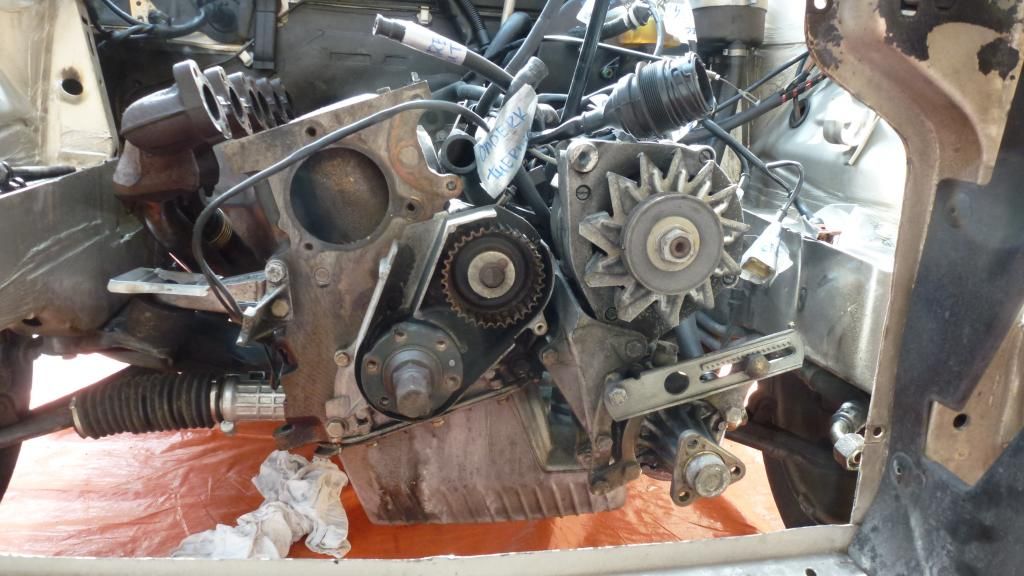
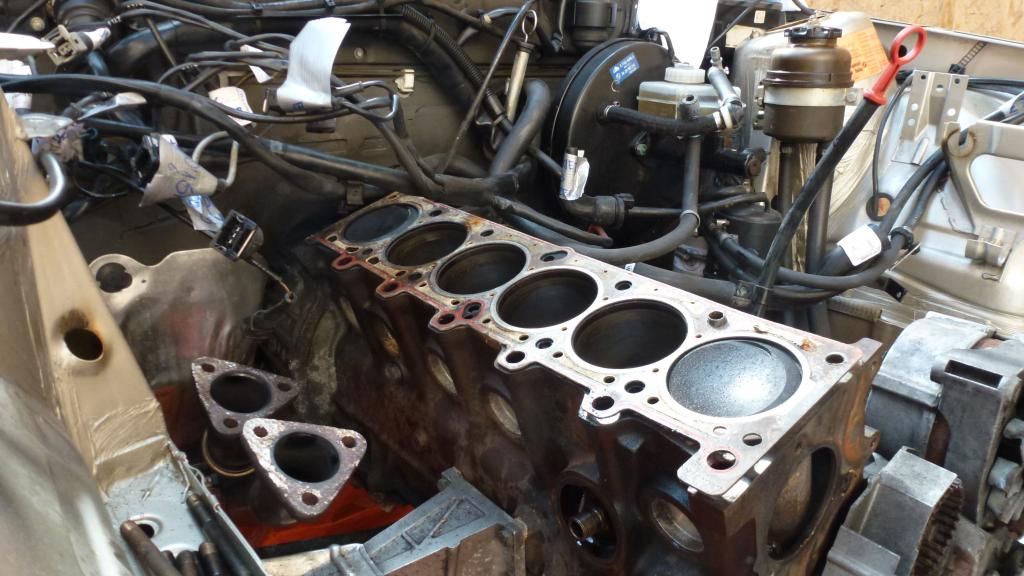
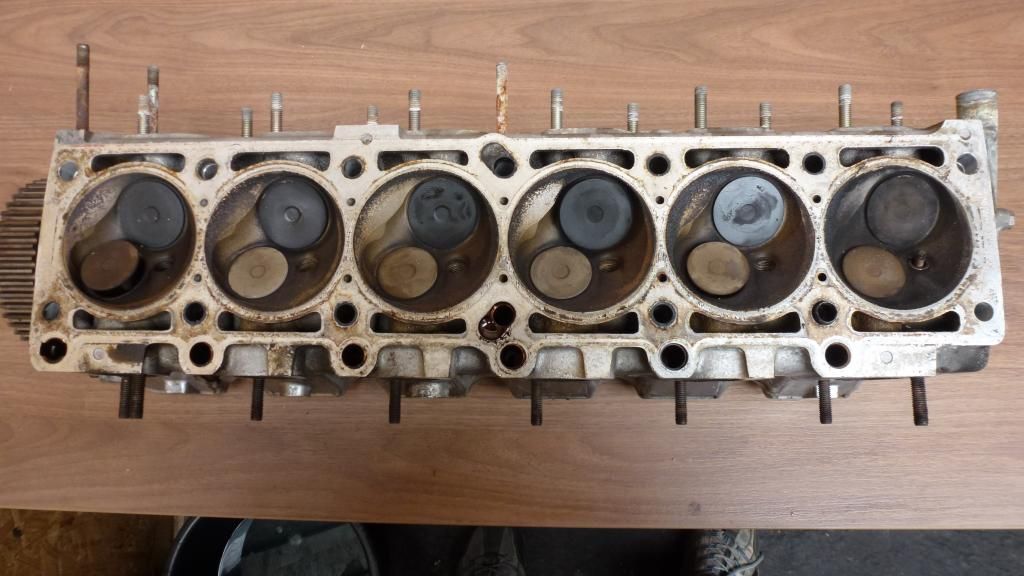
With my limited knowlegde i thought the head looked great. Do note the buildup of carbon deposits on cylinder 6.
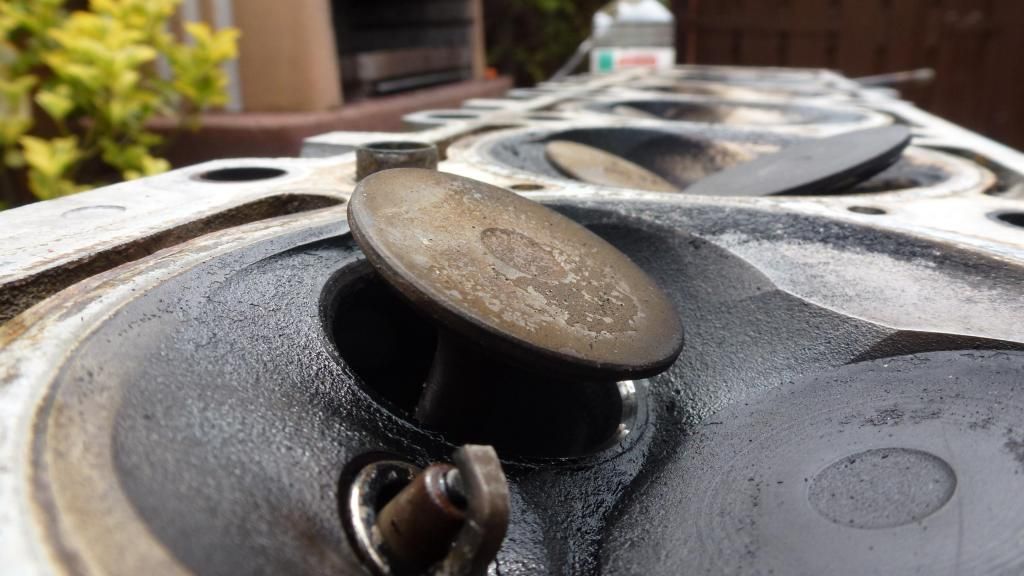
Tested suspect cylinder 6.
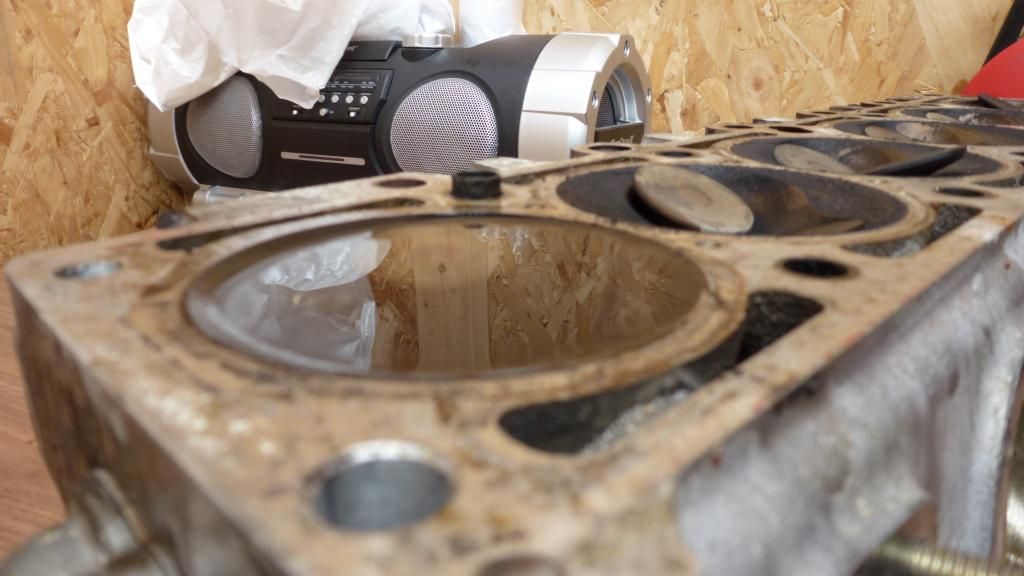
And sure enough.. Finally found the problem that was buggin me for nearly 4 years.
The exhaust valve was not shutting properly and leaking combustion past the valveseat.
Re: E30 325e 3/1987
Posted: Tue Mar 19, 2013 10:16 pm
by e30Passion
Now there's 2 ways of doing this:
1. Keep everything stock, low-reving, economised, tuned down boring bullshit or..
2. Make it an exciting high reving 2.7 autobahn screamer like everybody else does who gets there hands on one of these. For some reason (probably money related) i chose the first
I'll might regret it.
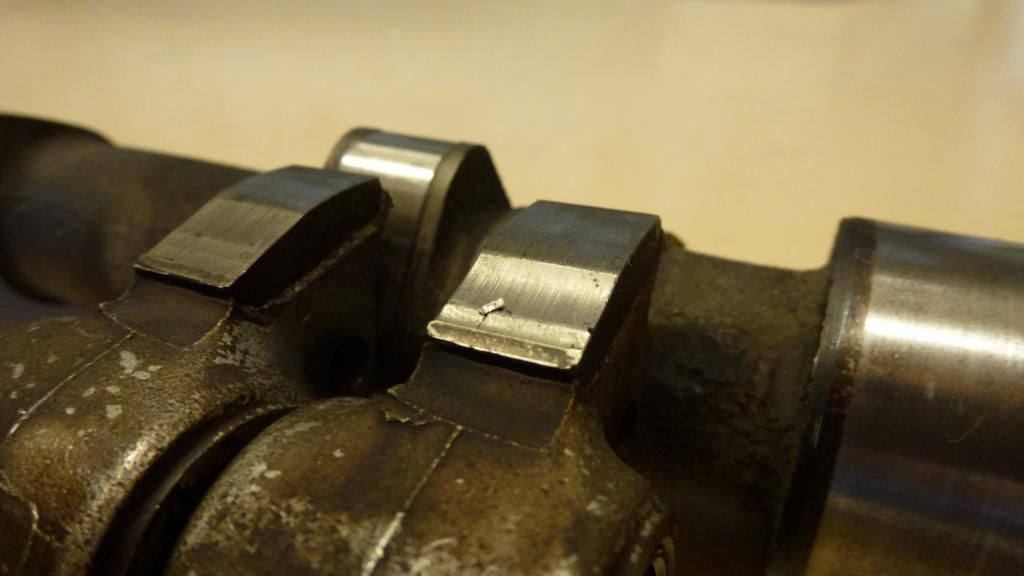
The super-eta 885 cilinderhead received a brand new genuine camshaft of Ebay for just a 180 quid which is more then half dealer price. Payed 15 quid a piece for the new genuine valves which turned out to be the wrong ones because the diameter of the valves were smaller.

These where the old rockers
Got new ones from the dealer.
I attempted to try and save the front but it was gone to far.
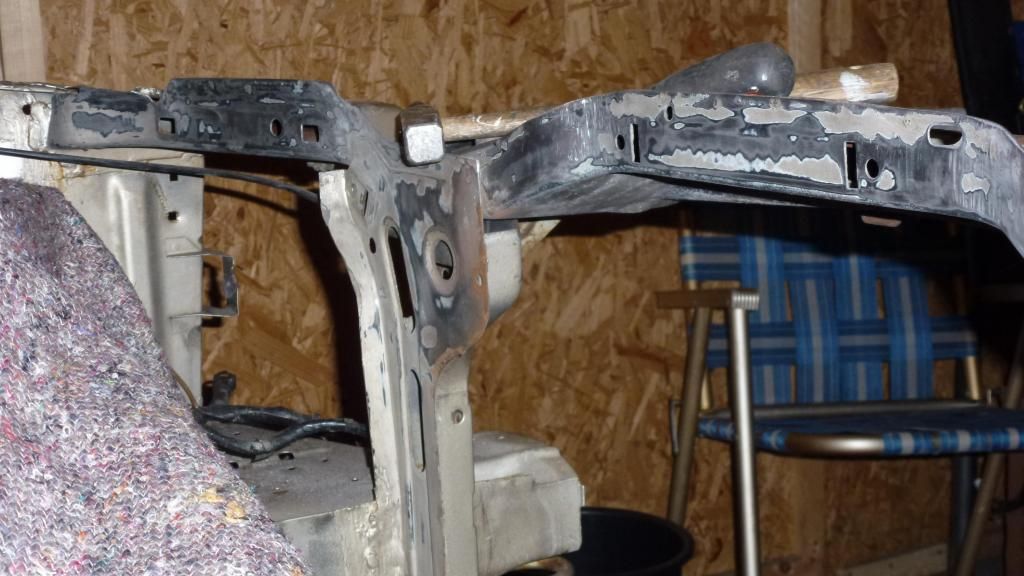
I wasn't really prepared for this shit so without the proper tools i grabbed a hamer and screwdriver and went for it.
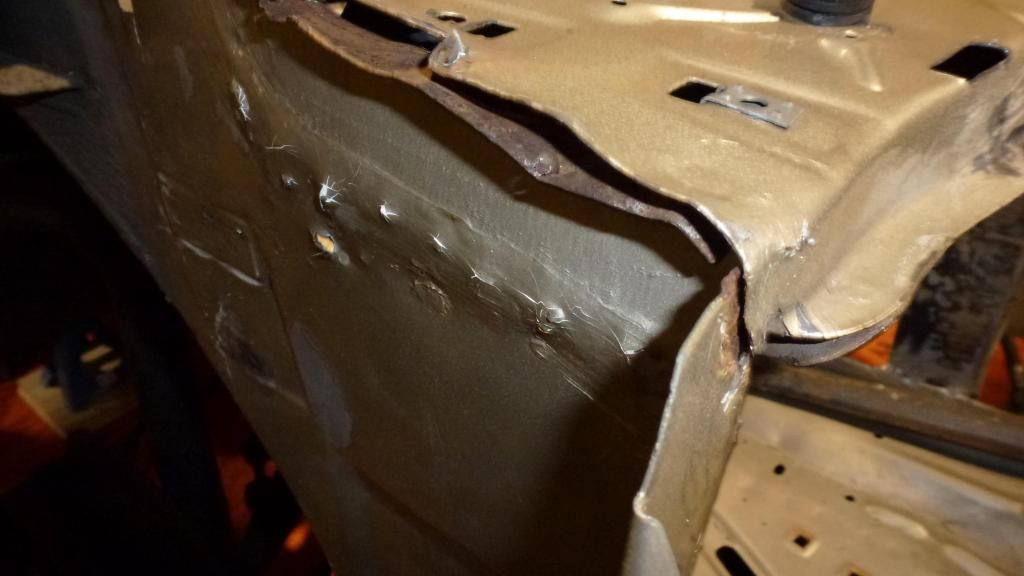
See ya mate

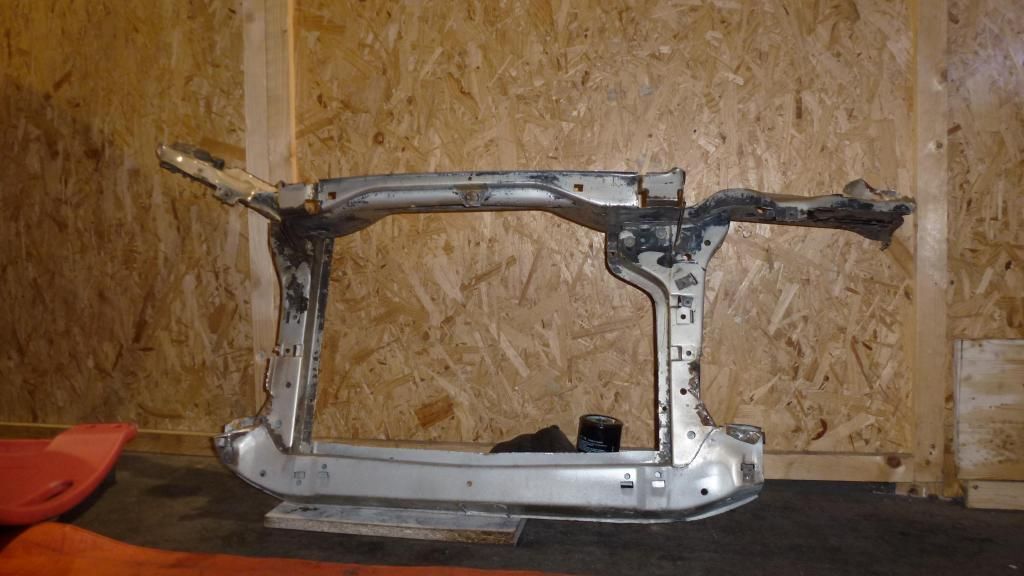
Thank god that's gone.