Eddypeck's '93 318i Touring

Show off your pride and joy here

Moderator: martauto

User avatar
eddypeck
E30 Zone Regular
E30 Zone Regular
Posts: 260
Joined: Tue Aug 12, 2014 11:00 pm
Location: Bristol, UK

Wed Aug 20, 2014 2:17 pm

After recently posting an intro in New Members, I thought I may as well go the whole hog and start a thread.

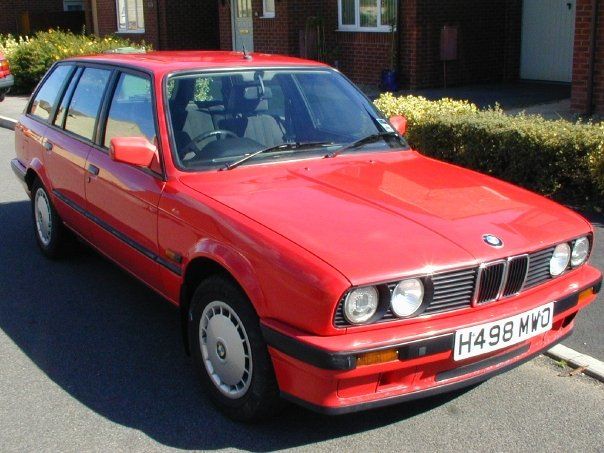
I had an 1990 e30 touring 318i lux in red many years ago (1998-2003) and to this day I still rate it as the best car I ever owned.

My old one from back in the day: Image

However in a mission to relive my youth last year I bought myself an example of the 2nd best car I'd ever owned a 1986 Mk2 Golf GTI.

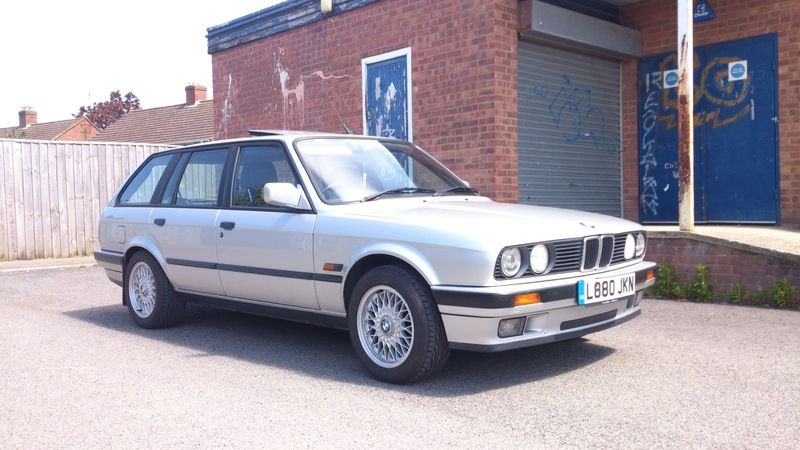
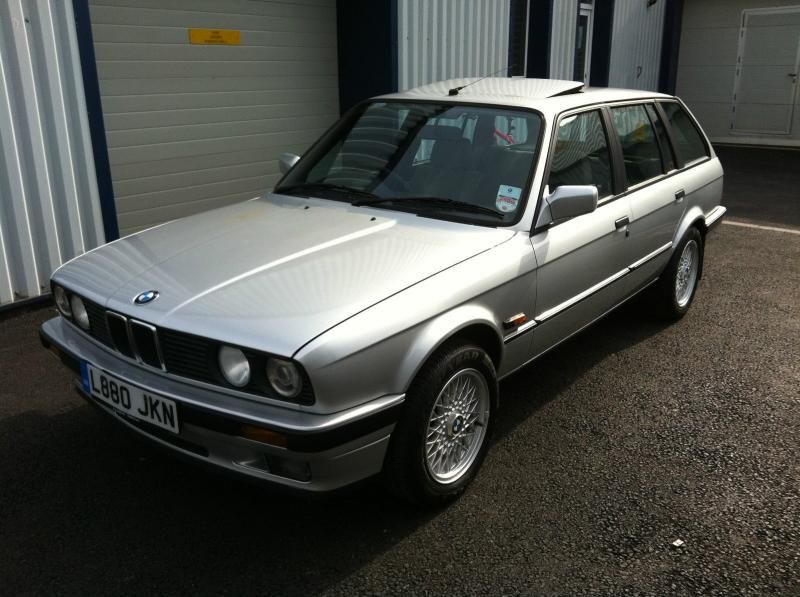
So after going to a few meets and car shows etc. with the Golf, my wife she decided she wanted to have a car that she enjoyed too (and not the dull, boring and sensible Ford Focus estate I got her last year) so I've just bought her this:

Image

I had my old one when we first got together, and she kind of took it over as as much hers as mine as I had a motorbike for everyday transport.

I've found out already this car was previously owned by an e30Zone member and was cover car on Total BMW a few years back. Although I'm yet to discover a copy.

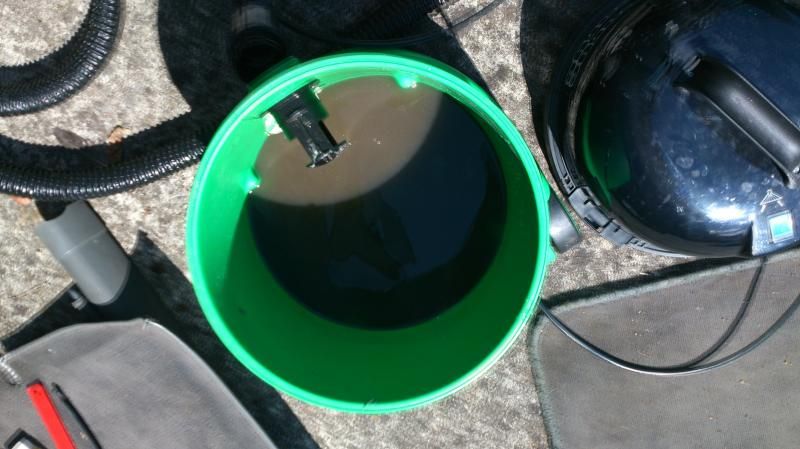
The guy I got it from used it for his Brighton to London commute and I gather everyday he must have had a coffee en route, and everyday he must have spilt it! as there's stains everywhere.

So after getting it home to Bristol on Saturday, Sunday the deep clean started.
Image

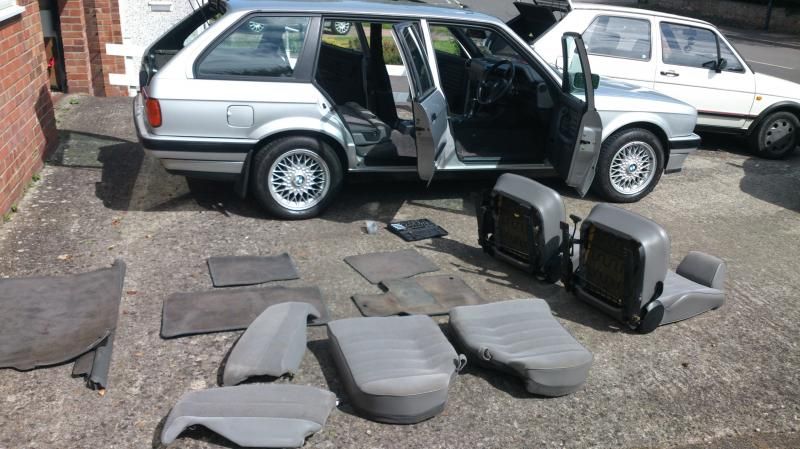
This even smelt of coffee!
Image

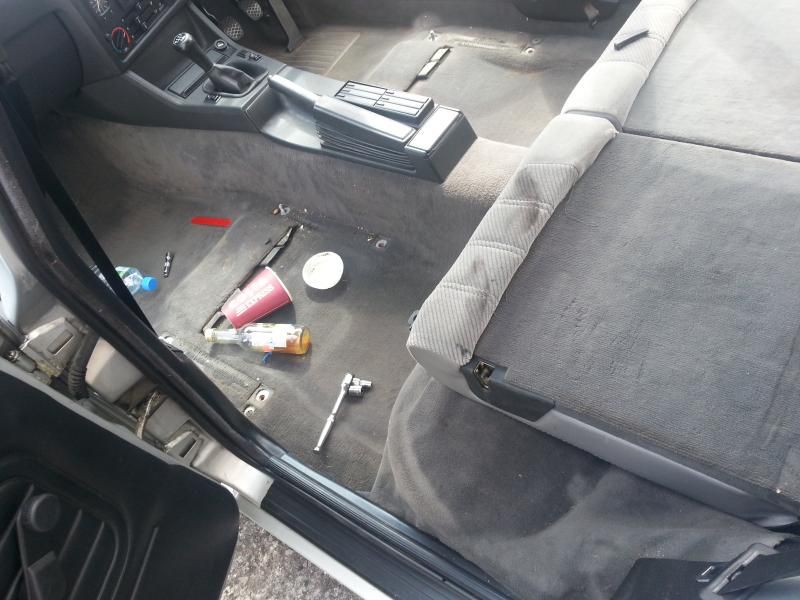
Proof of the coffee antics, as well as a half bottle of wine under the passenger seat
Image

The outside, underneath and bay all seem respectable. A bit of bubbling on the front o/s arch so might have to look at paint in the near future.

And there's a few bit in need of attention. Some of which I've already started separate threads for

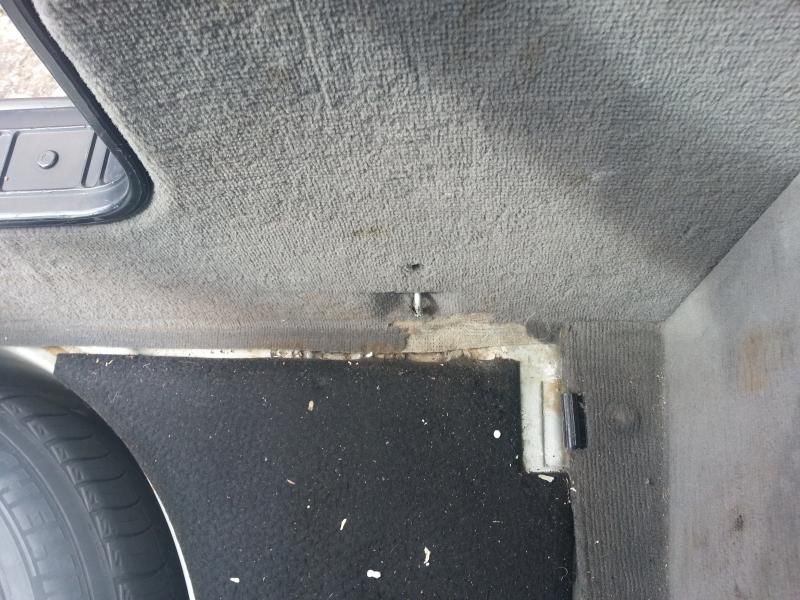
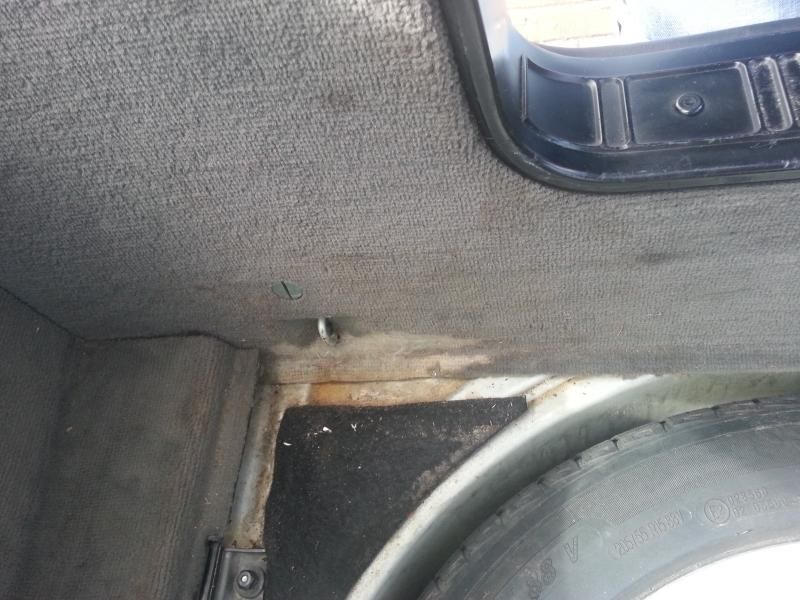
Some staining in the passenger well, so I need to investigate if the heater valve has been fixed and just not cleaned or if this is still an issue:
Image

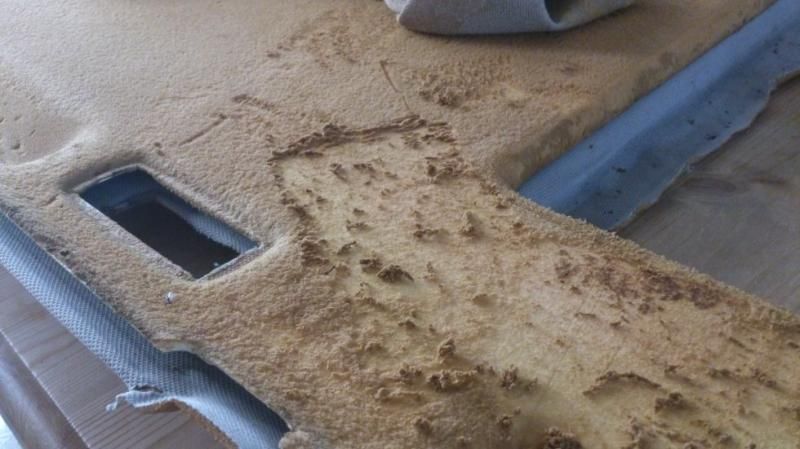
Some 'dog related?' carpet damage
Image

Image

Will replace at some point but not urgent.

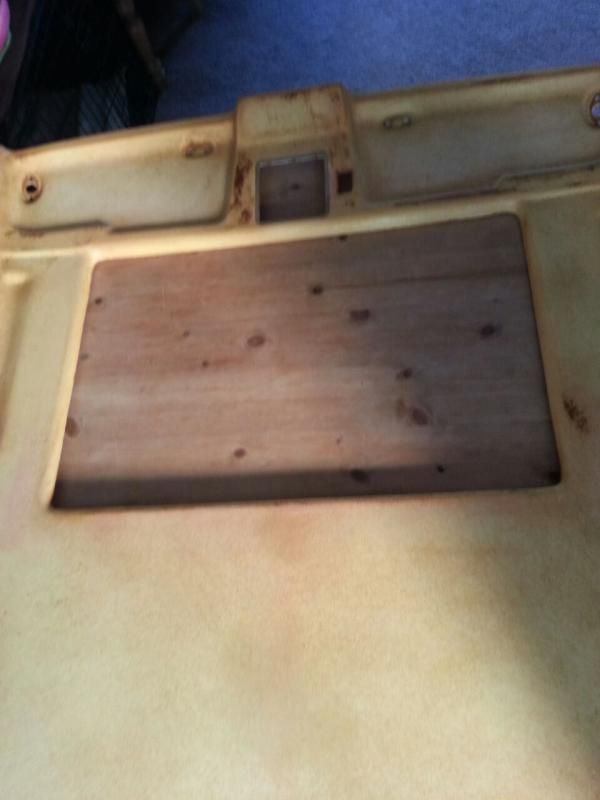
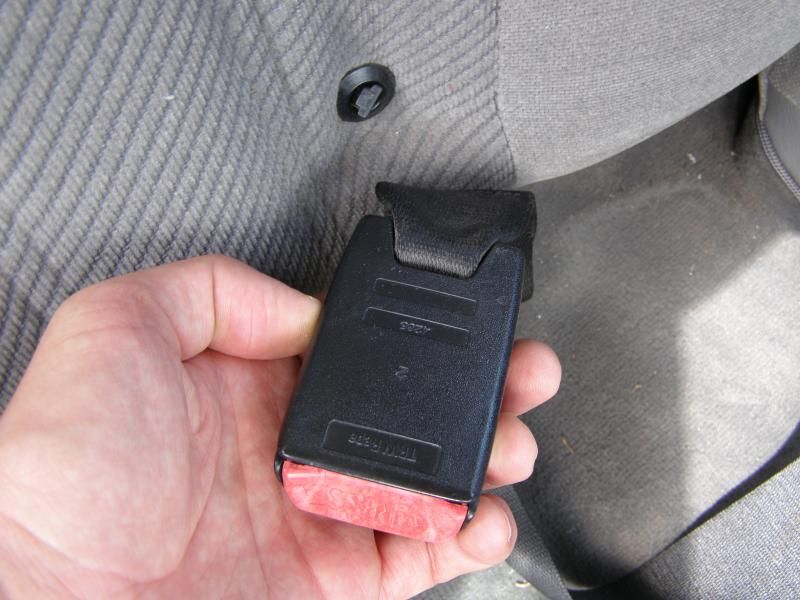
A broken carpet fixing,
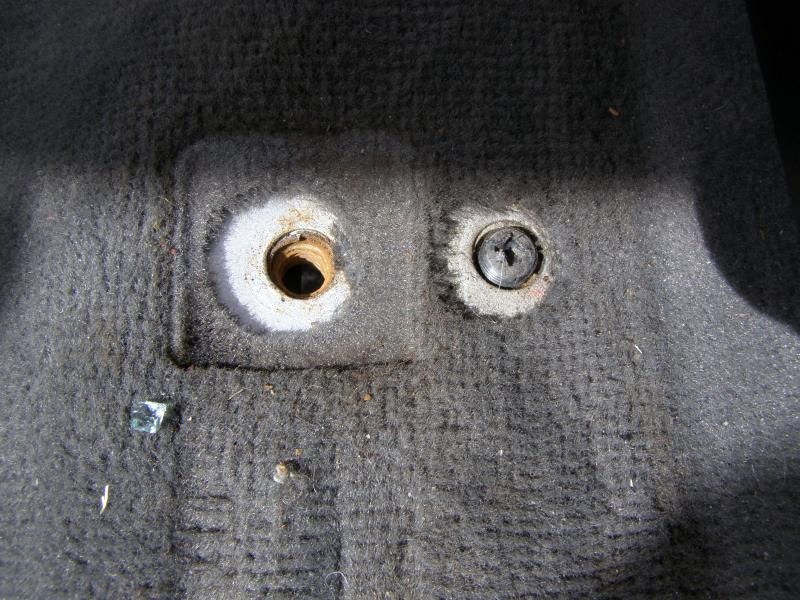
 Image

Should be like this
Image


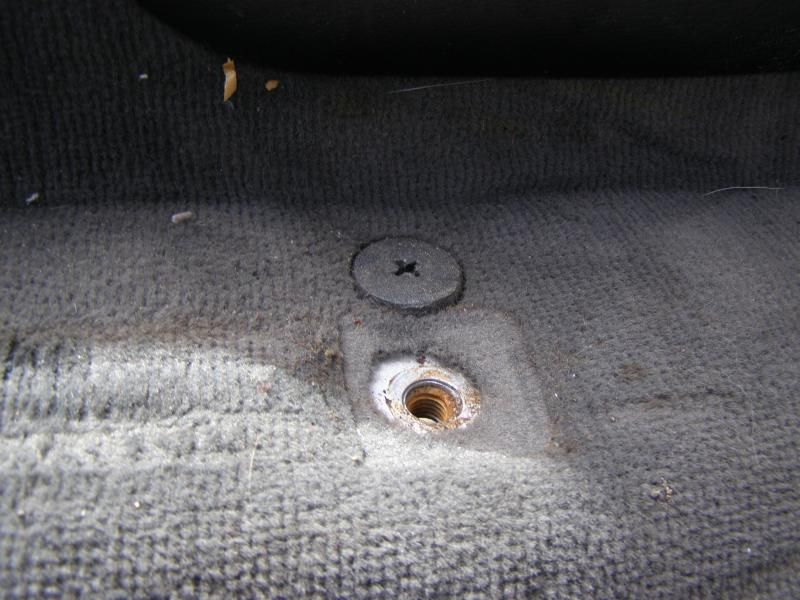
From memory there should be a slot on the back of these to attach in position on the rear seat - possibly changed at some point??
Image

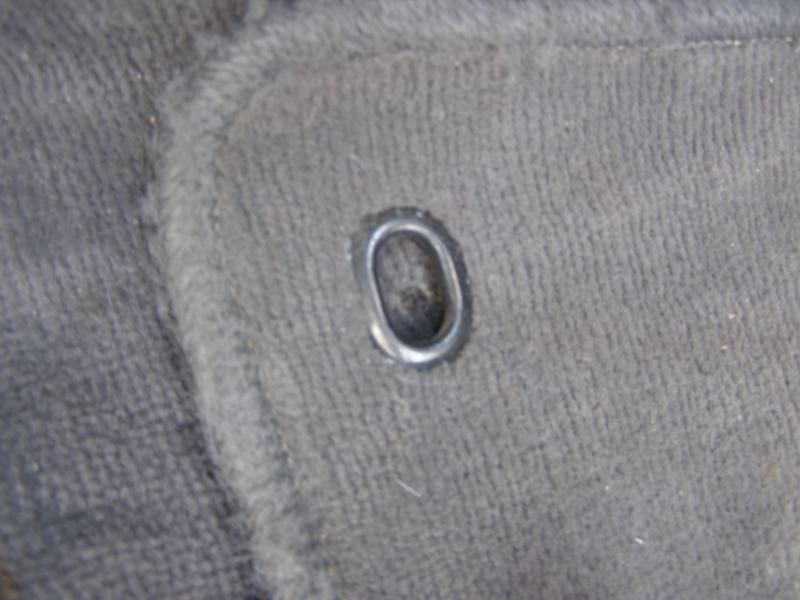
Missing fixings for the floor mats
Image

A small crack in the dash
Image

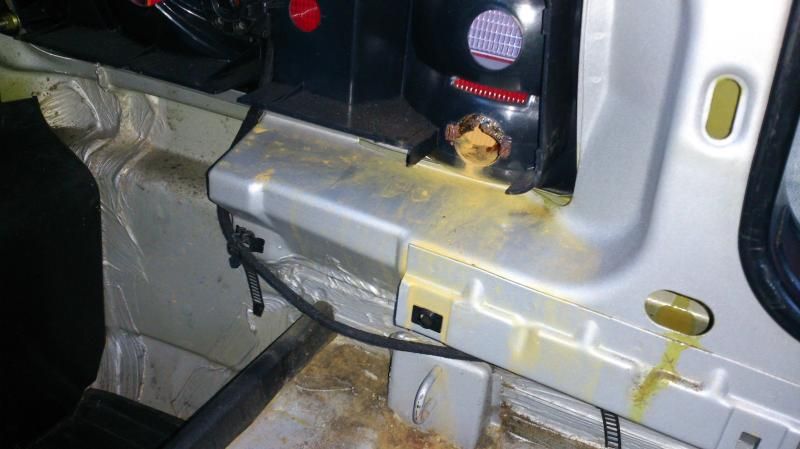
o/s rear light unit needs replacing as water has got in and the chrome reflector dish has disintegrated - I think on the fog light.
Image

Also, no pictures yet:

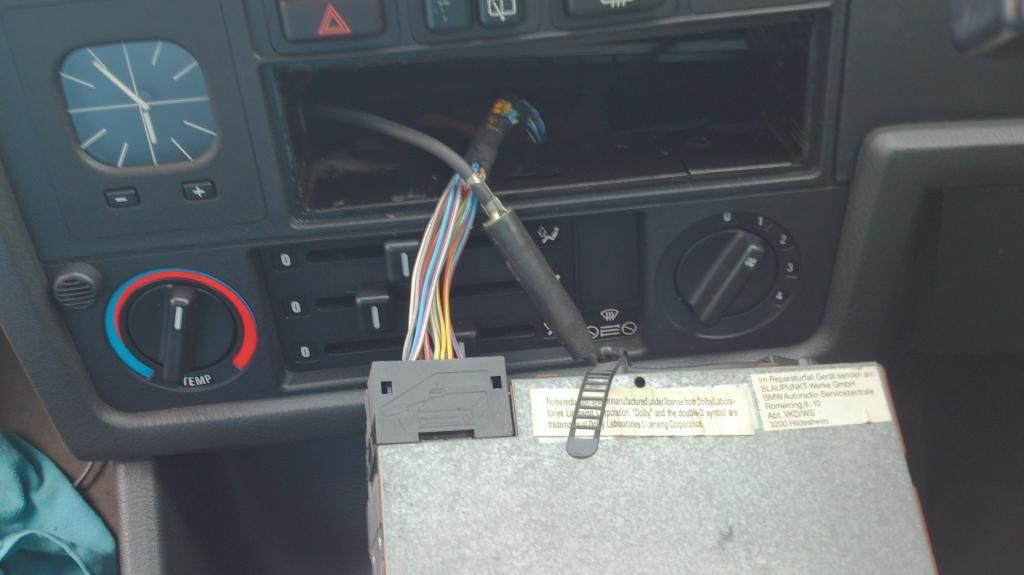
I've already picked up a period Sony CD player to replace the BMW Reverse RDS unit, so got this to fit.

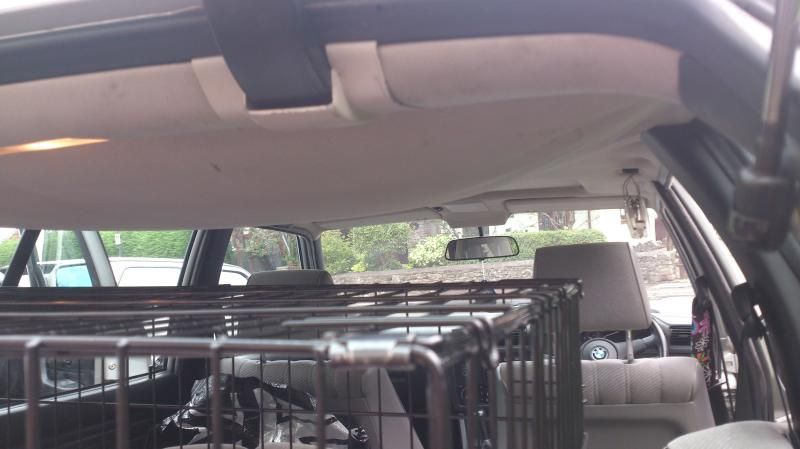
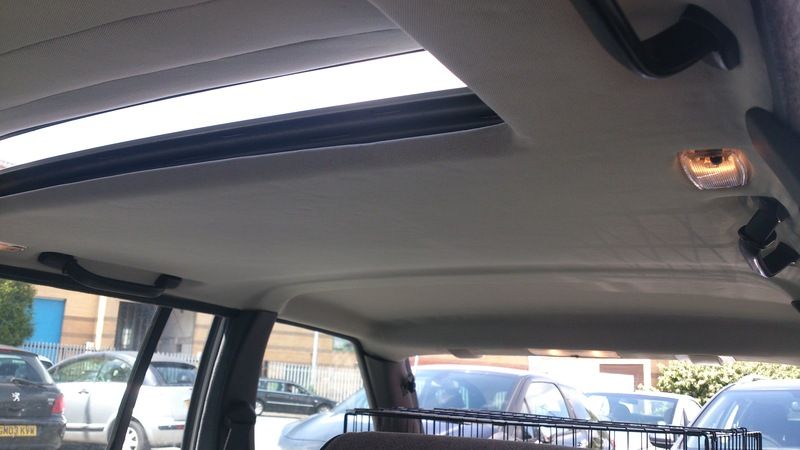
The headlining is sagging, not sure if this can be fixed or if I need to try and find another one. A common issue for the Golfs too and I know gluing rarely works and people ask silly money for replacements.

One of the tailgate hinge surrounds is missing.

One of the inner headlamp lens's is smashed and one front indicator lens is cracked.

The headlight height adjust doesn't work - but didn't on my old one either!

The BBS wheels could do with a refub.

The storage flap in the boot (not the first aid kit one) the hinge is snapped so I'll be on the look out for new.

And the finish on the tailgate spolier is pretty poor. I think it's been painted at some point.

That takes care of the appearance, now the mechanics.

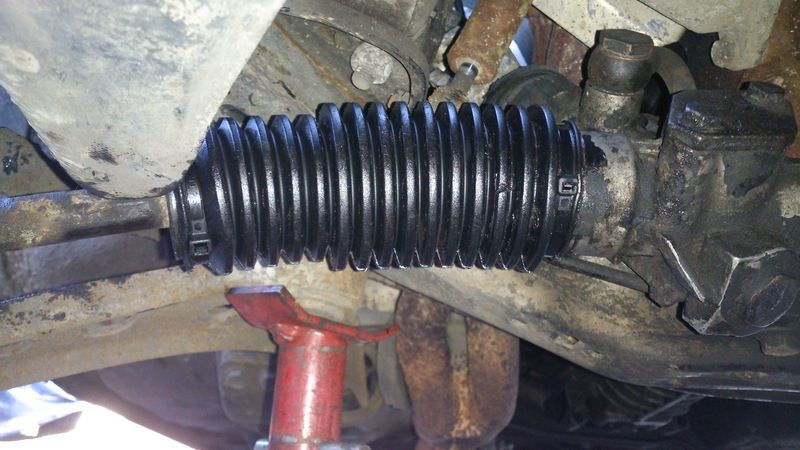
There's play in the steering, not sure if rack of the UJ coupling (steering guibo thing?) - or both! Need to check it out.

PAS fluid is yuk, so hopefully changing that will help too.

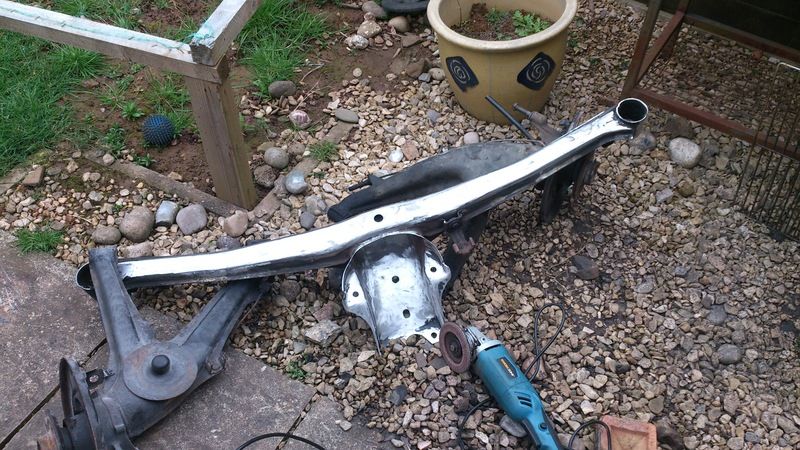
It's quite wallowy, so need to check all the bushes etc.

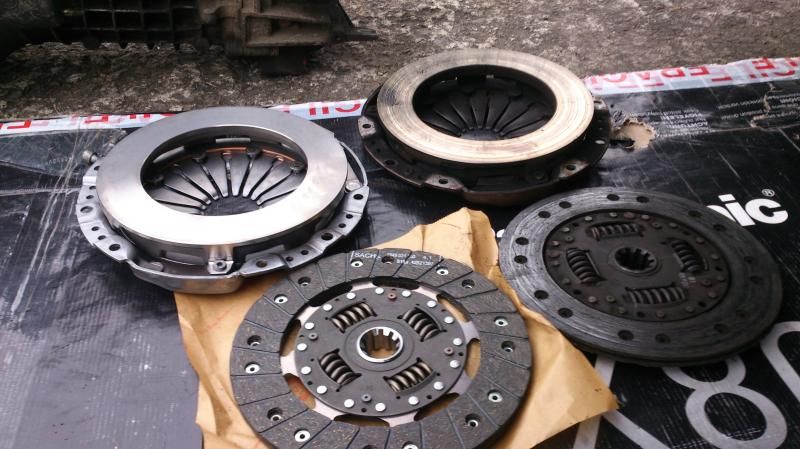
The central bearing/coupling on the prop needs replacing - I had to do this on my last one.

and the rear diff is a little whiny :( hopefully not a big deal?


I'll be at Reto Rides show next week, I've got my Golf on the Mk2 Owners Club Stand, but I gather there's a e30 Zone Stand so I'll be sure to pop along and say hi.

Future plans:
I'd like to retro fit Air-con and rear electric windows to give my wife a bit of luxury. Other than that want to keep it clean, tidy and original. It appears to be a fantastic example.
Last edited by eddypeck on Wed Oct 25, 2017 3:14 pm, edited 3 times in total.
User avatar
eddypeck
E30 Zone Regular
E30 Zone Regular
Posts: 260
Joined: Tue Aug 12, 2014 11:00 pm
Location: Bristol, UK

Mon Sep 01, 2014 10:20 am

So a busy Saturday:

New NGK plugs
New HT leads, I'd forgotten what a sod it was doing that sensor under the air intake. Got my son to help with his small teenage fingers!
New air filter (old one was hideous)

Oil on the dipstick is still quite golden and all green service lights are on so I left that for now, although odd oil was done without checking air filter? Think I might do oil change soon and reset the lights anyway just in case the oil filter wasn't changed either.

Changed the PAS fluid, this definitely needed doing. I still want to fit a fast rack but at least for now this will help.

Also fitted new clutch slave cylinder, old one was leaking so gear change is better. Still room for improvement though. Haven't checked out how the linkage works on these but I'm wondering if there's a bush kit or anything that can be done to tighten it up. Quick-shift would be nice too.

Had a good look underneath. There's evidence of some new brake lines and the front end, lower arms, ball joints and track rods etc. all look in order. One of the bellows on the rack is a bit perished but not split yet! I'll hold off on this if I'm going to swap the rack.

Back end on the other hand is a different story, rear ARB drop links are shot and from what I can see of the rear beam bushes they ain't too clever either, can't see the top mounts but while I'm at that end I may as well do them, am I right in thinking e46 mounts are a direct fit and good upgrade?

Can't see the prop bearing as it's covered with the exhaust heat shield but from the noise in the cabin and from what I remember when my old one went I suspect this is also on it's way out.

I'll also change the oil in the diff and replace the fuel filter.

So praying for good weather next weekend as there's a few big jobs there.

Is there anything I've missed?
User avatar
eddypeck
E30 Zone Regular
E30 Zone Regular
Posts: 260
Joined: Tue Aug 12, 2014 11:00 pm
Location: Bristol, UK

Thu Sep 04, 2014 3:29 pm

Standard loom was complete and unmolested

Image

Plug and play ISO kit off ebay and now updated with Sony Xplod CD player. Not quite period correct but RED illumination so doesn't look out of place.
User avatar
eddypeck
E30 Zone Regular
E30 Zone Regular
Posts: 260
Joined: Tue Aug 12, 2014 11:00 pm
Location: Bristol, UK

Fri Sep 05, 2014 9:01 am

ARGH! fuel tank is leaking, appears to be split at the seam :(
cmsslee
E30 Zone Newbie
E30 Zone Newbie
Posts: 89
Joined: Sat Sep 01, 2012 11:00 pm
Location: Manchester

Fri Sep 05, 2014 10:18 am

It's a great looking motor. Good luck with the work
User avatar
eddypeck
E30 Zone Regular
E30 Zone Regular
Posts: 260
Joined: Tue Aug 12, 2014 11:00 pm
Location: Bristol, UK

Thu Sep 25, 2014 3:36 pm

Not a lot of progress on the mechanical side of things. Solved the problem of an annoying rattle; after checking exhaust clamps, wheel bearings, ball joints and pretty much anything else under the car I could think of, my wife noticed one of the BBS centre caps wasn't looking very secure - hey presto! rattle fixed :o:

A bit box of bushes and rubbers has arrived from C3, so that's all on the horizon for the back end, as well as dropping the tank. At present we're just putting £20 in at a time which is keeping the level below the seam so no more fuel on the driveway. Not the best solution but the car's being used very little so it'll have to do in the short term.

Current task however is the sagging headlining.

Image

Image

which is now out on the dining room table, with the material stripped off:
Image

And now I understand how/why they sag. It's a foam back material and the foam if firmly stuck to the headling, just as it's perished the fabric has separated from the foam.

Image

Image

So lots more scraping and rubbing later...
Image

Image

Image

very nervous about this next bit, but bought some new material and spray adhesive so fingers crossed for my next update being a good one.
appletree
E30 Zone Addict
E30 Zone Addict
Posts: 3482
Joined: Fri Jan 20, 2006 11:00 pm
Location: Retford

Thu Sep 25, 2014 10:31 pm

Not a fun job but will make a big improvement whe its done, are you going back to cream or swapping to black?
Image

You should never underestimate the predictability of stupidity

M42 Supercharged 285bhp + M3 6speed box
User avatar
eddypeck
E30 Zone Regular
E30 Zone Regular
Posts: 260
Joined: Tue Aug 12, 2014 11:00 pm
Location: Bristol, UK

Fri Sep 26, 2014 11:15 am

I got a medium grey as it was on offer, and you're right it wasn't a fun job. Got a bit of trimming and finishing off to do then tackle the sunroof panel. I'll get some more pictures when its done.

I'm thinking I might put a grab handle on the drivers side - I have spares, just to help hold it up in the recess and hide the little bit of a mess I made there :?
User avatar
eddypeck
E30 Zone Regular
E30 Zone Regular
Posts: 260
Joined: Tue Aug 12, 2014 11:00 pm
Location: Bristol, UK

Fri Feb 06, 2015 2:44 pm

Got my weekend planned.

Image
povertyspec
E30 Zone Newbie
E30 Zone Newbie
Posts: 158
Joined: Mon Jun 30, 2014 11:00 pm

Fri Feb 06, 2015 5:03 pm

nice motor, i was going to get one for a daily but ended up with an E36 touring. great car and much smoother but not as special to pilot as the E30. still got my E30 cab for the summer so my bets are hedged. lovely colour your touring.
User avatar
eddypeck
E30 Zone Regular
E30 Zone Regular
Posts: 260
Joined: Tue Aug 12, 2014 11:00 pm
Location: Bristol, UK

Sat Feb 07, 2015 8:26 pm

A few shots from today, didn't all go to plan and thing the box has to come out again tomorrow 8O

Image

Image

Image
User avatar
eddypeck
E30 Zone Regular
E30 Zone Regular
Posts: 260
Joined: Tue Aug 12, 2014 11:00 pm
Location: Bristol, UK

Thu Feb 19, 2015 12:38 pm

The car went in for a new Longlife Stainless Steel back box today. Only to discover the Cat was split and rattling so going for a full system now.... Ouch! :mad: but one less thing I'll need to worry about.
User avatar
eddypeck
E30 Zone Regular
E30 Zone Regular
Posts: 260
Joined: Tue Aug 12, 2014 11:00 pm
Location: Bristol, UK

Fri Feb 27, 2015 11:34 am

Got to play with fire last weekend...

Image

Made a start on refurbishing the rear end with spare parts removed from a breaker. All bushes now removed with the help of some small bonfires, luckily it was a bit drizzly so none of the neighbours would have had any washing on the line, ready to start rubbing down all the metal work now.

Hopefully I spend a bit more time on it this weekend although I now need to swap the radiator from the breaker too as it's leaking.
oomz1975
E30 Zone Addict
E30 Zone Addict
Posts: 2019
Joined: Mon Feb 09, 2009 11:00 pm
Location: London UK

Sat Mar 07, 2015 8:52 pm

Nice work, looking forward to the updates.
Reminds me, I still have my sunroof panel to re-trim...
Image
andrew_baran
E30 Zone Regular
E30 Zone Regular
Posts: 762
Joined: Fri Feb 12, 2010 11:00 pm
Location: Leamington Spa

Sat Mar 07, 2015 10:42 pm

Bloody hell, that brick structure supporting your car looks a bit sketchy! You're still here to post the update though, haha!

Good work, sorry to see you've had to battle with the headlining! Hope it's all gone back together OK!
Image
User avatar
eddypeck
E30 Zone Regular
E30 Zone Regular
Posts: 260
Joined: Tue Aug 12, 2014 11:00 pm
Location: Bristol, UK

Fri Mar 13, 2015 2:45 pm

haha, the bricks are solid. Honest! :roll:

Yeah, headlining is all done and back in, forgot to do any more pics after trimming it. But it came out OK not 100% happy but then I'm becoming a bit of a perfectionist.

I need to have another go a seating the sunroof panel, it catches on the lift arms where I had to flare them out to remove the cloth. I just need to hammer them flat.
User avatar
eddypeck
E30 Zone Regular
E30 Zone Regular
Posts: 260
Joined: Tue Aug 12, 2014 11:00 pm
Location: Bristol, UK

Fri Mar 20, 2015 10:25 am

Yey, New boots have arrived. I love it when the postman brings fun stuff

Image
User avatar
eddypeck
E30 Zone Regular
E30 Zone Regular
Posts: 260
Joined: Tue Aug 12, 2014 11:00 pm
Location: Bristol, UK

Mon Mar 23, 2015 10:20 am

A couple of updates from the weekend. Took the wheels from the one I'm breaking, as they were all in better condition than the ones fitted and got the new tyres fitted, then gave them a bit of a deep clean before fitting...

Image

I hate cleaning BBS :mad:


Also swapped a front caliper, as it was binding a bit and got round to fitting the new steering boot, noticed it was split the other week when I was doing the clutch.

I got the proper clips with it, then realised I didn't have the tool to tighten it and wasn't sure I'd manage it with just pliers, so bog standard Cowboy ties will do after all, that's what I took off.
Image

I managed to do it by splitting the track rod end (without damaging the boot) and pulled the boot over the ball joint so I didn't need to interfere with the tracking, which was just as well as I don't think the TRE was looking like it wanted to move anyway :eek:

And just for good measure, a pic of the S/S system I had fitted a few weeks back
Image

Still need to go back and get the downpipe done, you can see it in the picture of the boot. They didn't have time to finish the full system.
User avatar
eddypeck
E30 Zone Regular
E30 Zone Regular
Posts: 260
Joined: Tue Aug 12, 2014 11:00 pm
Location: Bristol, UK

Wed Apr 08, 2015 11:39 am

Made a start on the rear beam over the weekend.

Image

Stripped back to metal with a flap wheel and various size wire brushes on a grinder. And my DIY soda balster for the small nooks and grannies.

I know it would have been easier to send it off for blasting but there's something very satisfying about doing a job yourself, and doing it well.
User avatar
eddypeck
E30 Zone Regular
E30 Zone Regular
Posts: 260
Joined: Tue Aug 12, 2014 11:00 pm
Location: Bristol, UK

Mon Apr 13, 2015 1:23 pm

Bit more of an update, all rust removed and chemically treated. Then etch primer and a few coats of red oxide. Ready for gloss black next week.

Image

I also tested the fuel sender with a spare out of the car I'm breaking. That seemed to work so swapped it over.

Image

And since I had to remove the rear seats front hinge to get at the sender, I replaced the bar with the one from the breaker as mine had a broken clip.

Image

Also swapped out the front indicator lens that was cracked with a good one. So slowly working through the whole car improving it where I can :D
User avatar
eddypeck
E30 Zone Regular
E30 Zone Regular
Posts: 260
Joined: Tue Aug 12, 2014 11:00 pm
Location: Bristol, UK

Thu Apr 23, 2015 4:21 pm

Started my second attempt on the sunroof panel last night. I wasn't happy with the first attempt and the material was catching on the guides when slid back.

Image

More updates to follow. Sewing in the central flaps was more of a pain than I remember it being the first time.
User avatar
eddypeck
E30 Zone Regular
E30 Zone Regular
Posts: 260
Joined: Tue Aug 12, 2014 11:00 pm
Location: Bristol, UK

Mon May 11, 2015 11:09 am

A bit of progress from the weekend. The spare fuel tank had every bit of rust, tiny blemish or blister (to be fair, not many) ground back to clean metal, and rust treated:

Image

As did the filler neck, rear arb, link pipe for the fuel tank and the diff got cleaned up too:

Image

So the plan this week is to finish the prep ready for paint on all of this and the already prepared rear beam hopefully next weekend.
User avatar
ianev
E30 Zone Newbie
E30 Zone Newbie
Posts: 153
Joined: Sat Apr 25, 2015 11:00 pm
Location: Redhill, Surrey

Mon May 11, 2015 10:51 pm

wow - epic effort - congrats!
User avatar
eddypeck
E30 Zone Regular
E30 Zone Regular
Posts: 260
Joined: Tue Aug 12, 2014 11:00 pm
Location: Bristol, UK

Tue May 12, 2015 1:10 pm

Another small update today. I've started bringing it to work to take advantage of my 'free' time over lunch to finish off a few of those smaller outstanding niggly jobs.

Job #1 faulty fuel gauge
So yesterday I swapped the instrument cluster, without joy so today I changed the fuel tank sender

Image

Which seemed to do the job
Image


Other eligible lunchtime tasks.... swap a headlight and replace the sunroof panel, and a good detail.
User avatar
eddypeck
E30 Zone Regular
E30 Zone Regular
Posts: 260
Joined: Tue Aug 12, 2014 11:00 pm
Location: Bristol, UK

Wed May 13, 2015 1:43 pm

Right, I wasn't happy with my first attempt at the sunroof panel and it never fitted right so was catching on the runner and tore.

Image

and as mentioned above I trimmed a spare frame
Image

So, that got fitted today and as I never added any finished shots of the re-trimmed headliner here goes:
ImageImageImage
User avatar
eddypeck
E30 Zone Regular
E30 Zone Regular
Posts: 260
Joined: Tue Aug 12, 2014 11:00 pm
Location: Bristol, UK

Mon May 18, 2015 10:38 am

Stepped it up a gear with the refurb over the weeking using my makeshift spray booth.

Image
ImageImage
Image

Just need to flip the fuel tank and do the top, and get the bushes fitted then hopefully get all this new stuff fitted soon.

Meanwhile got handy with a toothbrush
ImageImage

And gave it a good wash
Image

If the weather holds out clay polish and wax is will happen over the next few days.
Scruffymurphy
E30 Zone Regular
E30 Zone Regular
Posts: 775
Joined: Sun Sep 24, 2006 11:00 pm
Location: Ireland

Mon May 18, 2015 11:04 am

Very nice work and attention to detail. Keep it up.
User avatar
eddypeck
E30 Zone Regular
E30 Zone Regular
Posts: 260
Joined: Tue Aug 12, 2014 11:00 pm
Location: Bristol, UK

Tue May 19, 2015 2:04 pm

Grabbed half hour in my lunch break to clay and polish the bonnet.

Image

Image

Image

Image

If the weather holds out for the next week or so I'll work my way over the whole car :D
User avatar
eddypeck
E30 Zone Regular
E30 Zone Regular
Posts: 260
Joined: Tue Aug 12, 2014 11:00 pm
Location: Bristol, UK

Fri May 22, 2015 9:50 am

Trailing arm bushes were fine but beam bushes took some effort. all done with a bench vice... not on a bench.

Image

Image

Image

Looking forward to getting them in, this is the state of the current ones

Image
baggimodo
E30 Zone Regular
E30 Zone Regular
Posts: 379
Joined: Sun Nov 27, 2011 11:00 pm
Location: Coventry

Sat May 23, 2015 7:07 am

No fun doing those bushes. Did mine with threaded bar and a shed load of washers and sockets last year. Makes a hell of a difference though.

Great progress on this mate really fancying a touring now :P
User avatar
eddypeck
E30 Zone Regular
E30 Zone Regular
Posts: 260
Joined: Tue Aug 12, 2014 11:00 pm
Location: Bristol, UK

Tue May 26, 2015 11:46 am

Thanks for the comments guys, really looking forward to getting the back end sorted. I hate the way the rear end reluctantly follows round bends at the moment, it's really un-stable...

and this is part or the reason why:

Image

So with the beam bushed and nearly ready for fitting I concentrated on a few of the other bits. And I've scheduled in the rebuild for a couple of weeks.

Image

Image

Image

Image

Image

It also has a cracked inner lamp, so using the thinners I've tried to de-cloud my spare lamps,

Image

Image

I've also painted the metal rings but haven't got a pic of them.

The car was actually bought for my wife so I haven't driven it all that much, but while I've been doing little jobs on it we've swapped cars so I can take it into work and tinker in my lunch break and I'm really beginning to enjoy it

Image
baggimodo
E30 Zone Regular
E30 Zone Regular
Posts: 379
Joined: Sun Nov 27, 2011 11:00 pm
Location: Coventry

Wed May 27, 2015 6:56 am

Headlamps have come up really well! Was that just thinners and elbow grease?
User avatar
eddypeck
E30 Zone Regular
E30 Zone Regular
Posts: 260
Joined: Tue Aug 12, 2014 11:00 pm
Location: Bristol, UK

Wed May 27, 2015 9:18 am

baggimodo wrote:Headlamps have come up really well! Was that just thinners and elbow grease?
The fogging is inside the lamps, the thinner was poured in through the bulb aperture and sloshed around. Left the unit lens down for a while to let is soak then flipped it over and drained out the fluid.

I've heard other people put rice inside (with thinners) to work as an abrasive to agitate any dirt but I thought the bulb hole was a little too small for that I didn't want to get left with any stubborn grains left inside. This is a trick I picked up from the Mk2 Golf guys, but they're H4 lamps so the hole is bigger.
baggimodo
E30 Zone Regular
E30 Zone Regular
Posts: 379
Joined: Sun Nov 27, 2011 11:00 pm
Location: Coventry

Fri May 29, 2015 8:29 am

Ah got ya, think my bullseyes would benefit from this. :D
User avatar
eddypeck
E30 Zone Regular
E30 Zone Regular
Posts: 260
Joined: Tue Aug 12, 2014 11:00 pm
Location: Bristol, UK

Mon Jun 01, 2015 12:22 pm

Image
Post Reply