
Result with the shell and interior mate!
Just need a couple of parts now then, tech 1 front and rear spoiler, and its there..
Going for dolpin grey?
My e30 325i sport project
Moderator: martauto
-
SUMPCRACKER
- E30 Zone Addict

- Posts: 2040
- Joined: Sat Dec 13, 2008 11:00 pm
- Location: Milton Keynes
-
SUMPCRACKER
- E30 Zone Addict
- Posts: 2040
- Joined: Sat Dec 13, 2008 11:00 pm
- Location: Milton Keynes
Mint cloth for me all day long...but im not sure if they put blue with dolphin grey??
Will be worth it all though, A mint freash paint tec 1 sport, non sunroof with mint cloth....yes please
Will be worth it all though, A mint freash paint tec 1 sport, non sunroof with mint cloth....yes please
hehe this one has a manual sunroof but thankfully no rust on the roof, already popped it up and had a look. was considering swapping the electric mechanism off of the green one onto it but the copper pipes are well shagged on it


IMO keep the leather interior would look better........Nath325i wrote:Cheers mate. Yup after some debating its going back to dolphin grey. Now gotta decide which interior to keep, the slightly worn leather or the mint cloth....
was eyeing up the interior earlier and i think i agree with you, never realised how blue the cloth interior actually wasdon-king wrote:IMO keep the leather interior would look better........Nath325i wrote:Cheers mate. Yup after some debating its going back to dolphin grey
Had some spare time today so starting stripping bits off of the doner


nice solid rear inner arches with wax oil on them still
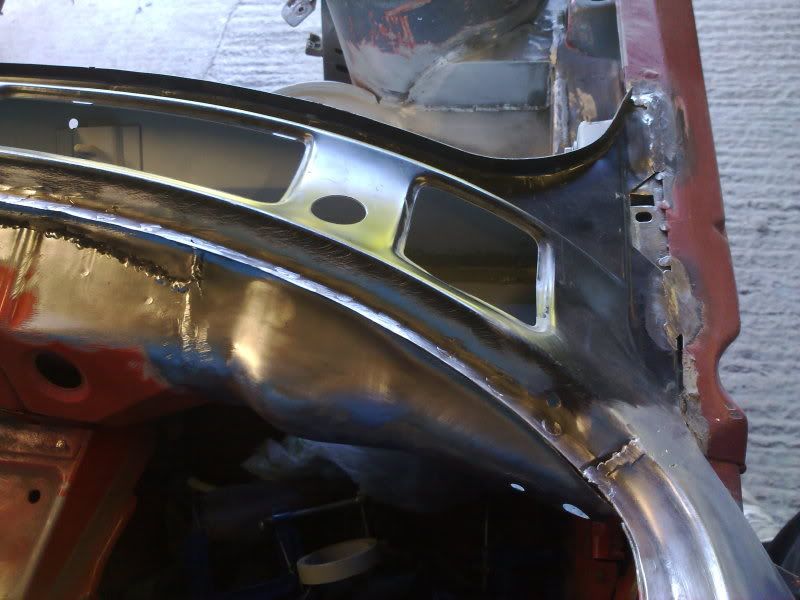
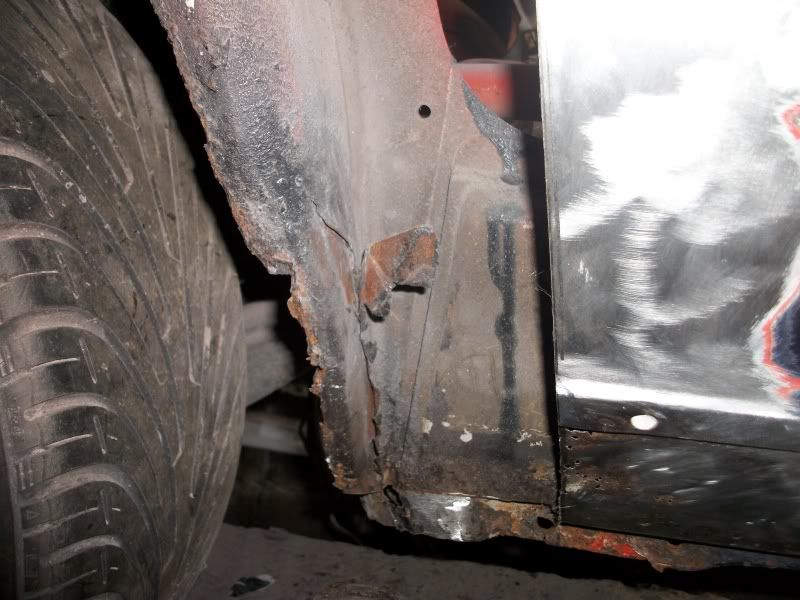
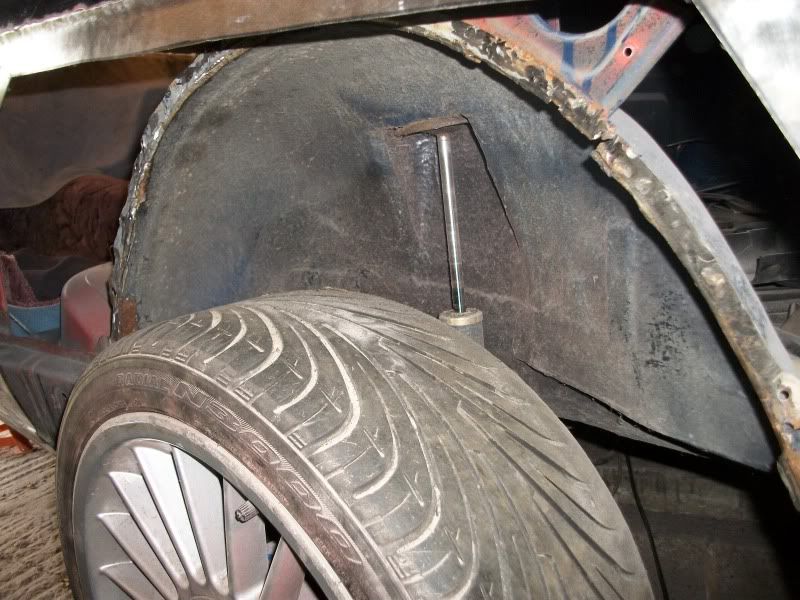
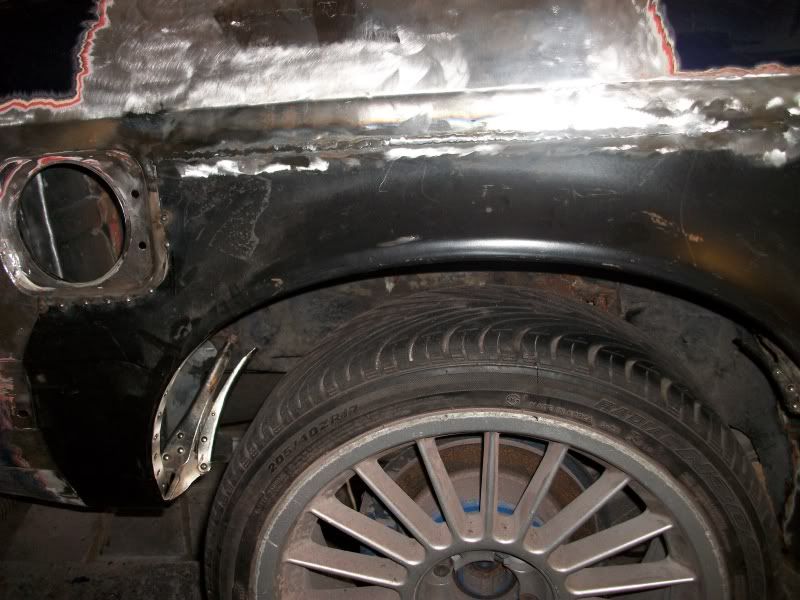
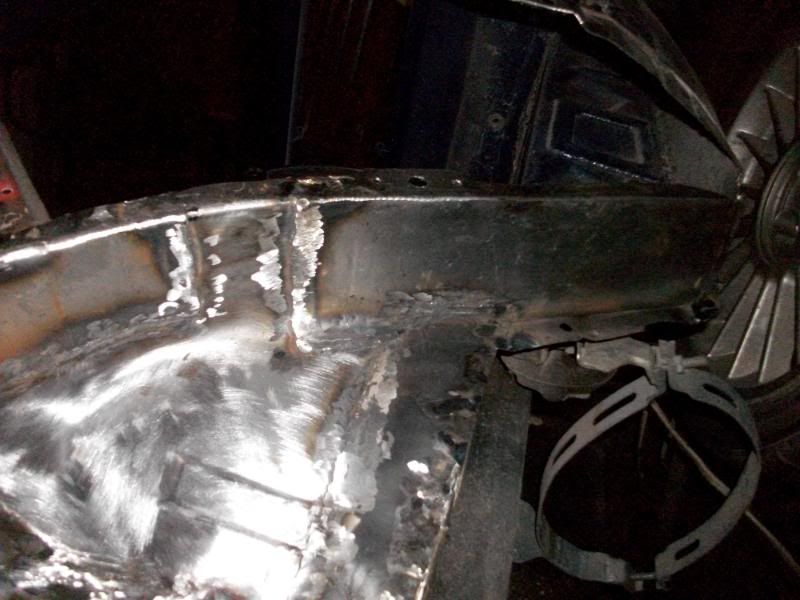
gutted he boot but forgt to take a pic, all nice and solid in there, same as the sills when i got the skirts off. Was all looking good until i removed the front wings and found this


and the n/s

 still at least its not as bad as the green one.
Does anyone know if you can still get those sections of the front inner wings?
nice solid rear inner arches with wax oil on them still
gutted he boot but forgt to take a pic, all nice and solid in there, same as the sills when i got the skirts off. Was all looking good until i removed the front wings and found this
and the n/s
Does anyone know if you can still get those sections of the front inner wings?
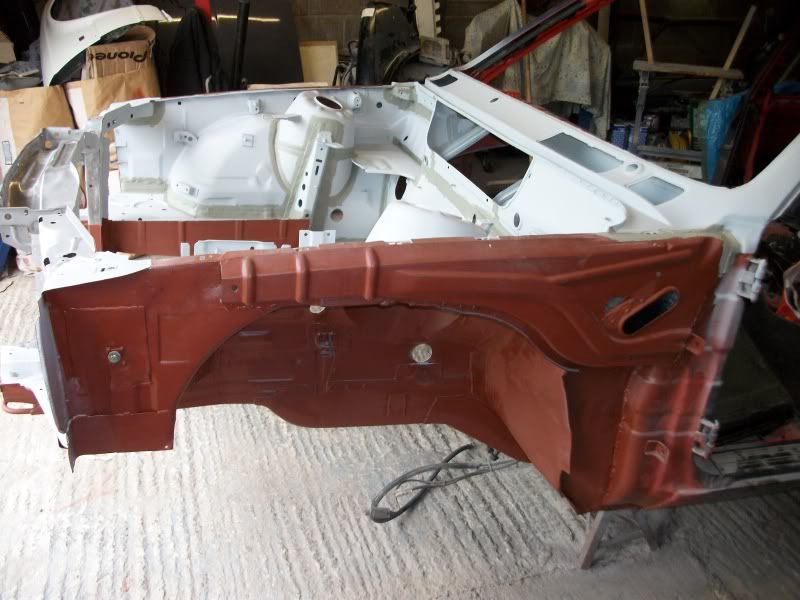
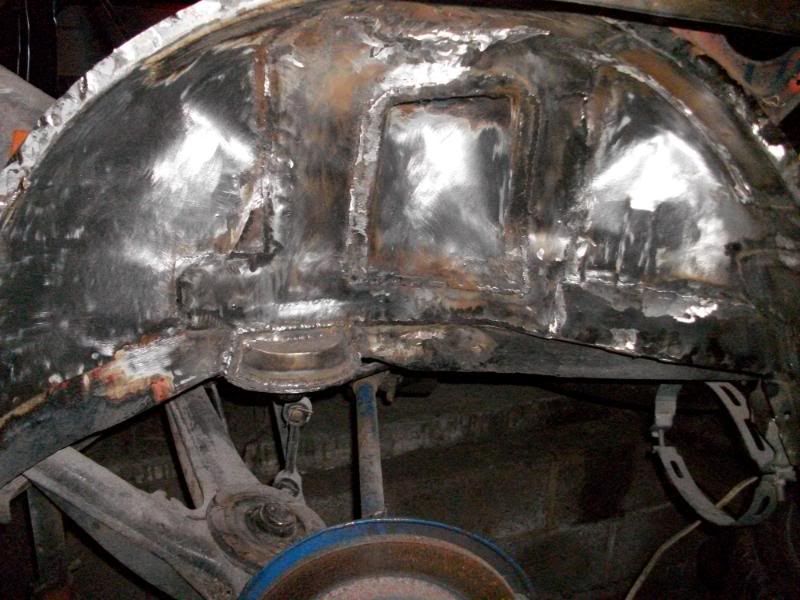
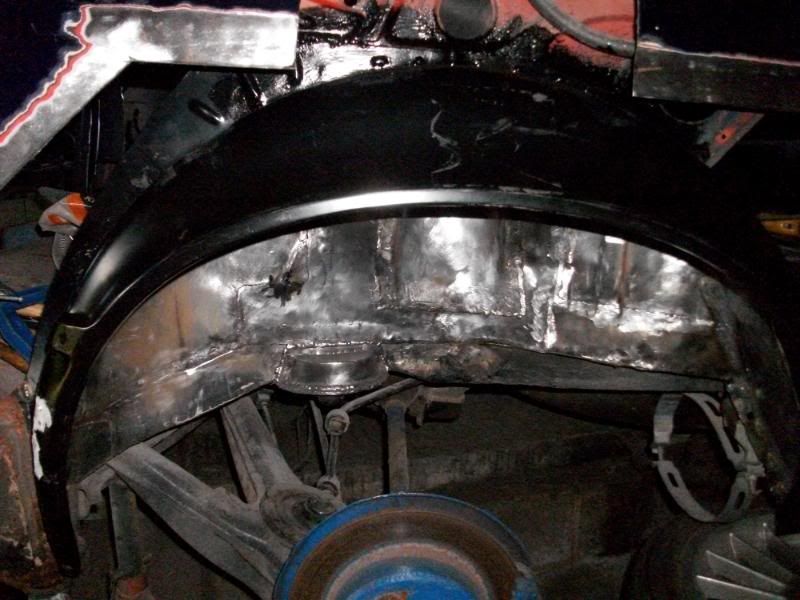
time for a long overdue update. Turns out my prefacelift shell wasnt quite as rust free as it first seemed but none the less it was 50x better than the green one so i pressed on.
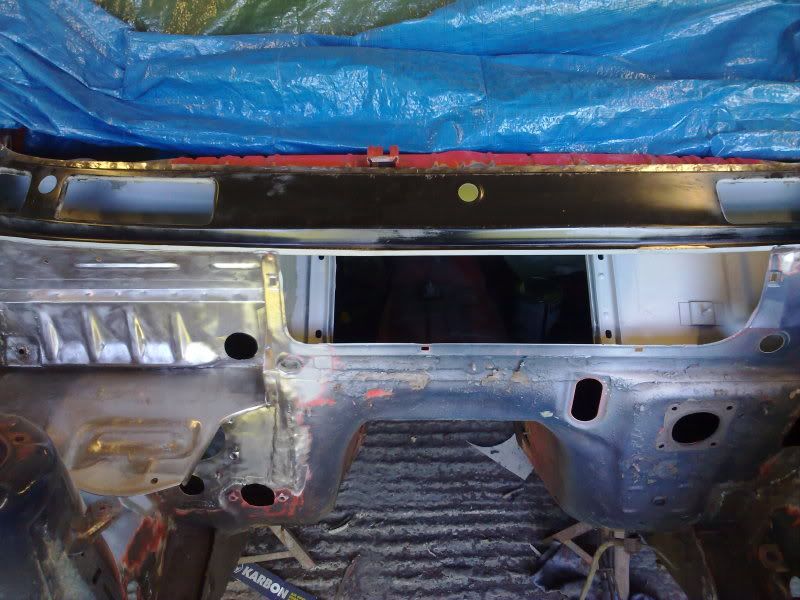
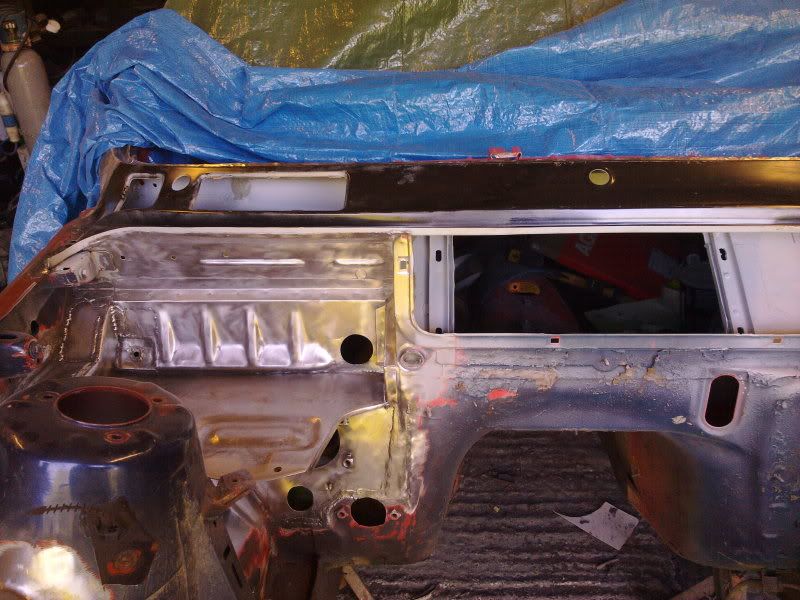
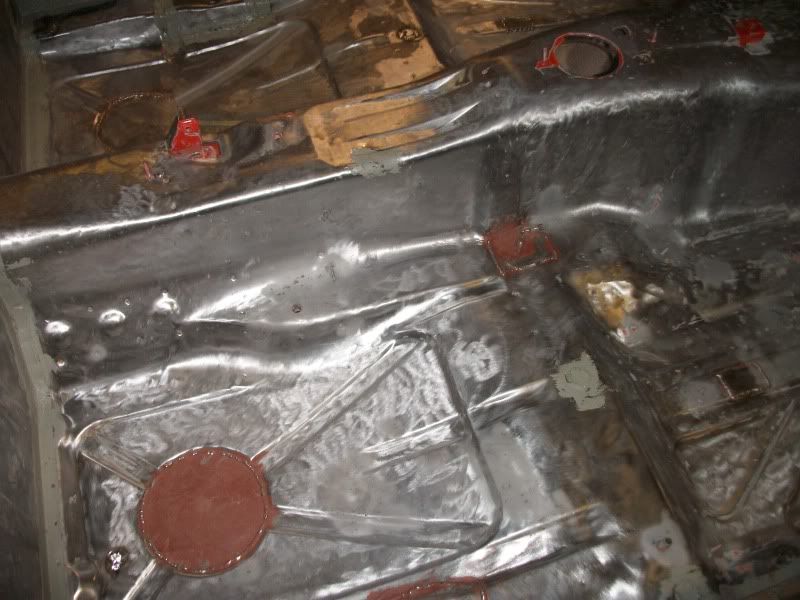
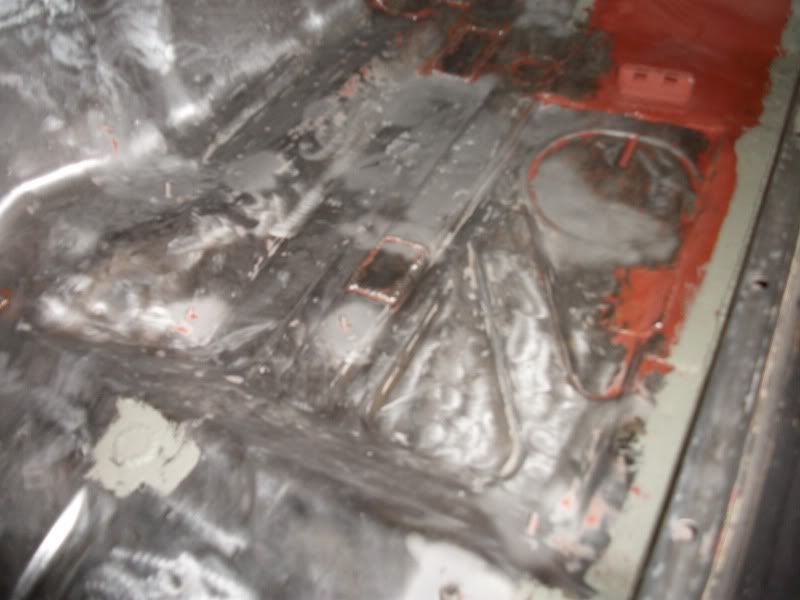
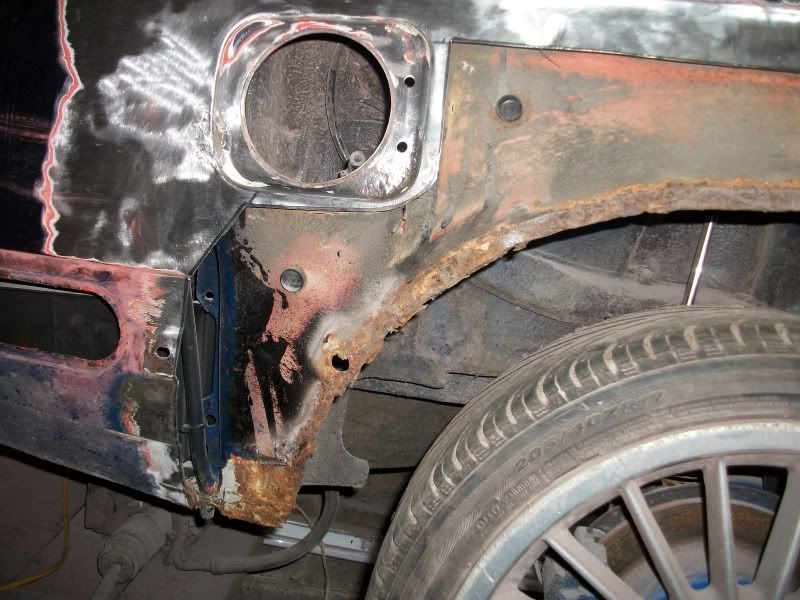
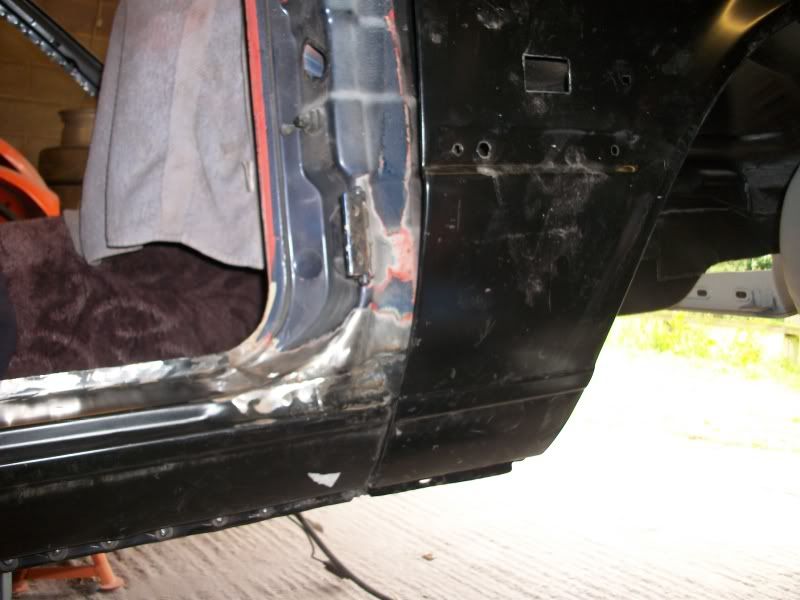
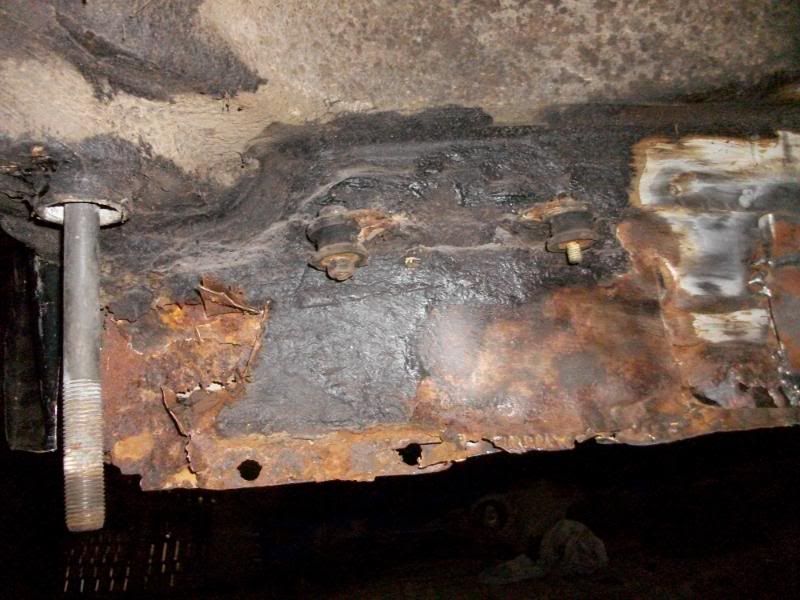
the inner wings i knew about but once i cleaned all the old underseal off it became apparent that the floor corners had gone, a bit around the back side of the skuttle panel ontop of the fire wall, battery tray and the section of firewall where the looms goes through on the n/s.
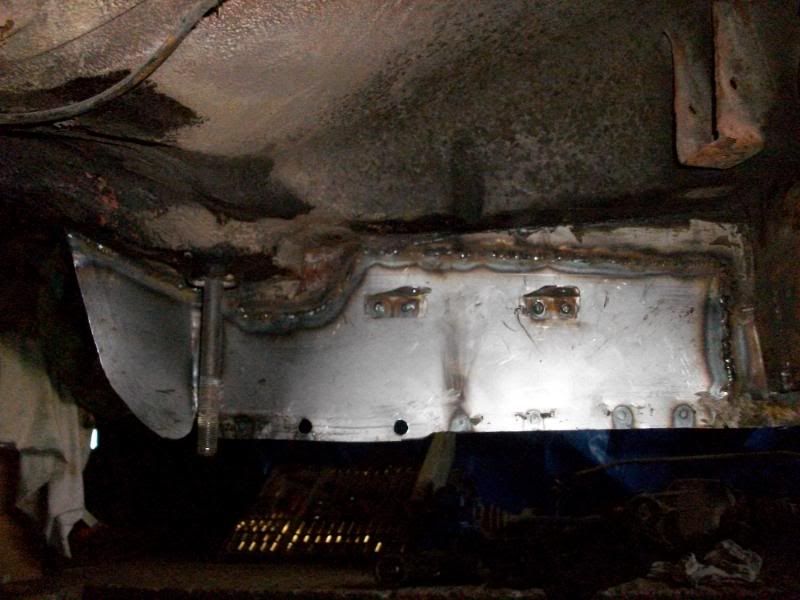
I seem to have lost all my pics with the orangy bits cut out but heres the after pics for good measure anyhow.

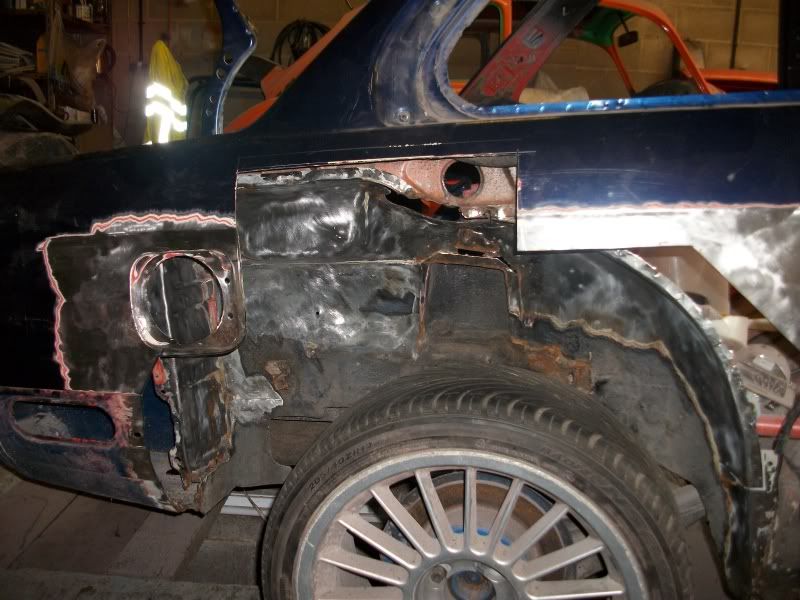
 this was the first side that was done so its a bit more patchy, when it came to the other side it was cut out in one go and less patches welded together


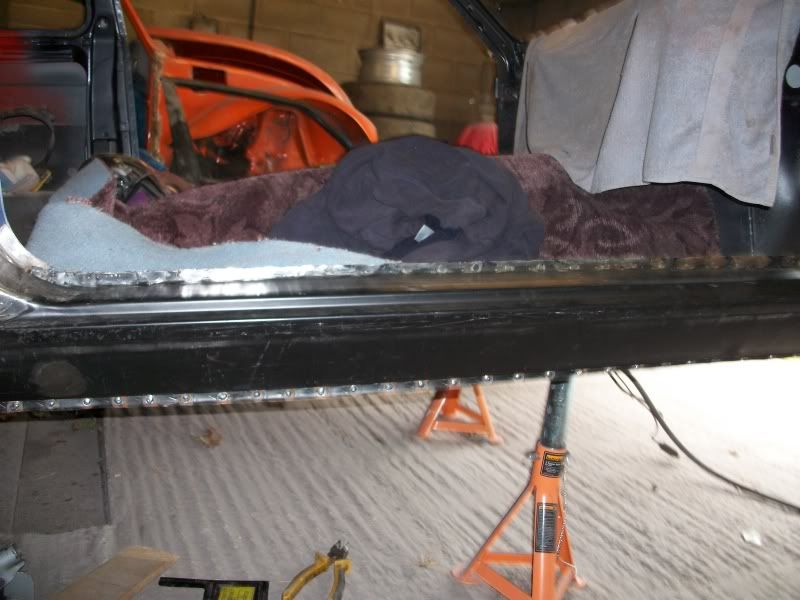
 new scuttle ready to be welded on, want topaint behind it first before it does go on
 welded up the dread floor bungs
 the scuttle lip ontop of the firewall, pinched it from the green shell, probably the only decent bit that was on it lol
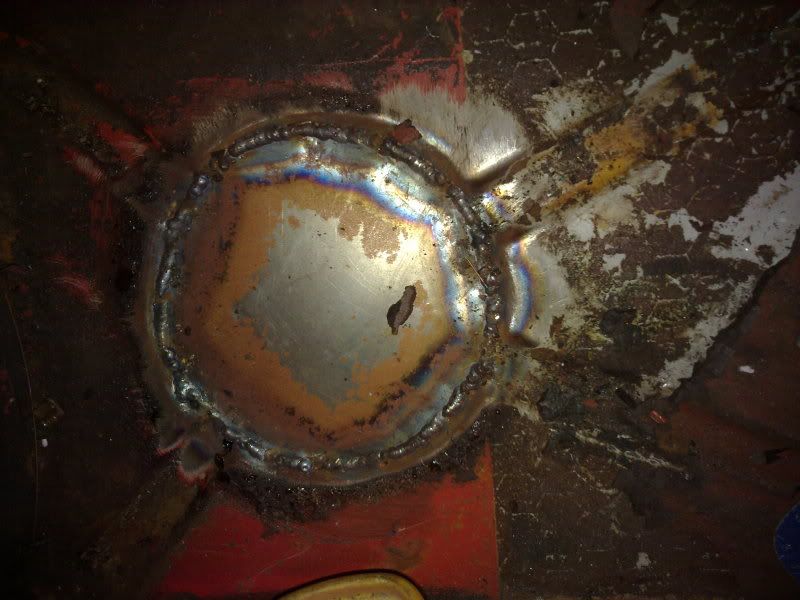
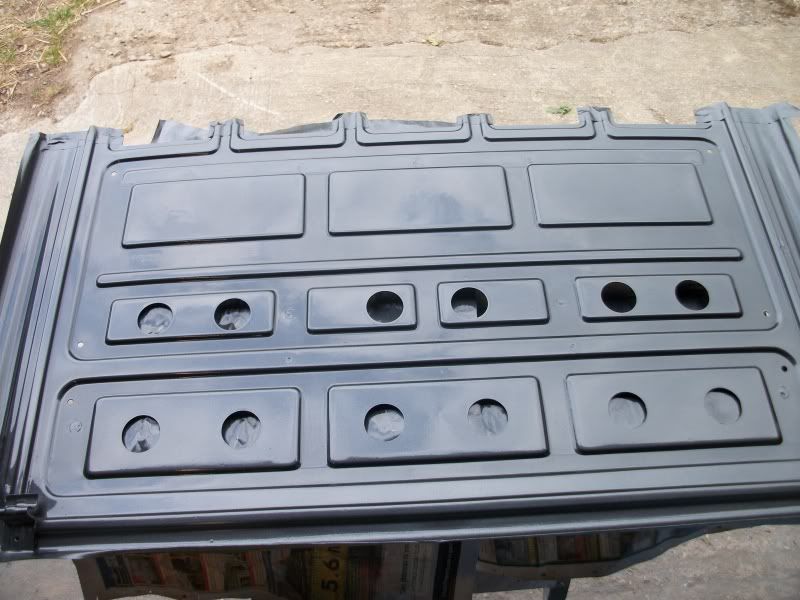
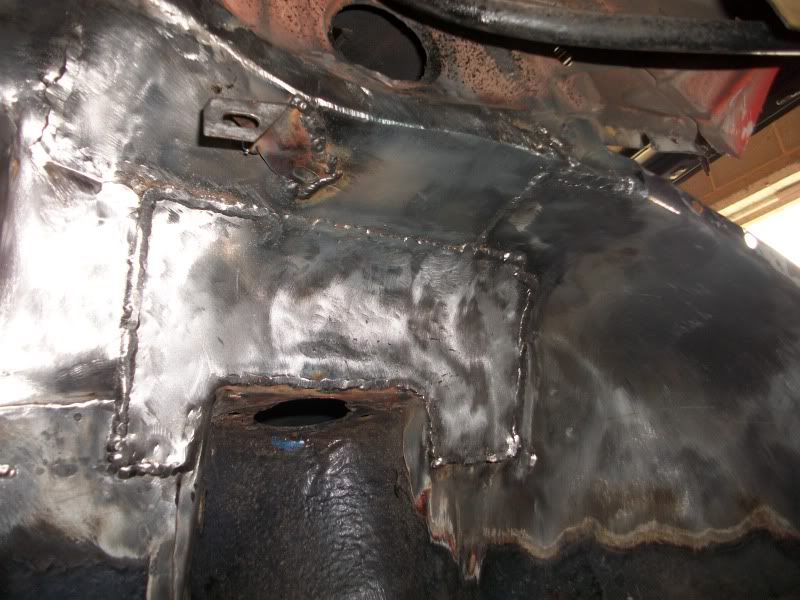
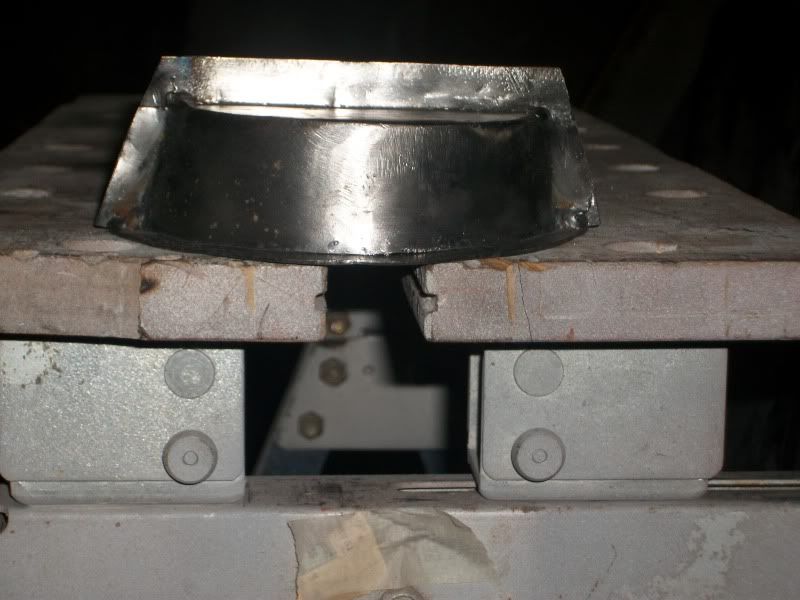
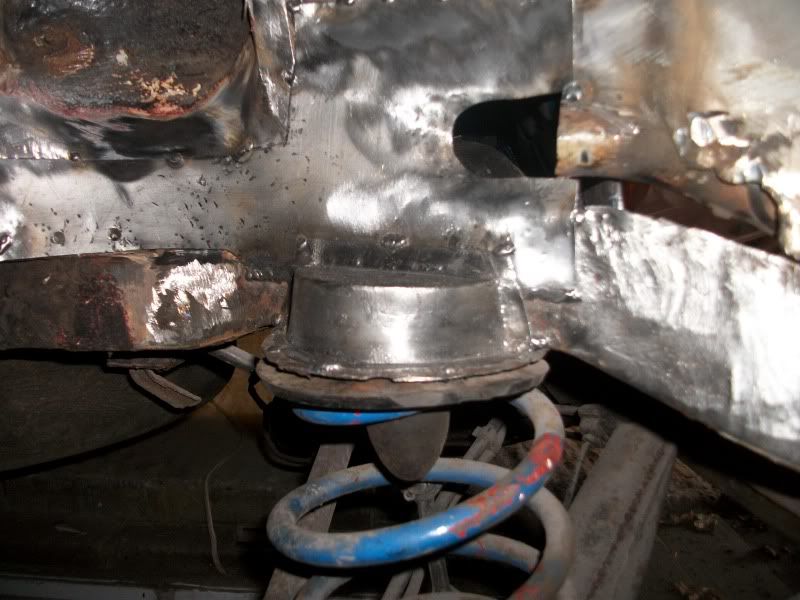
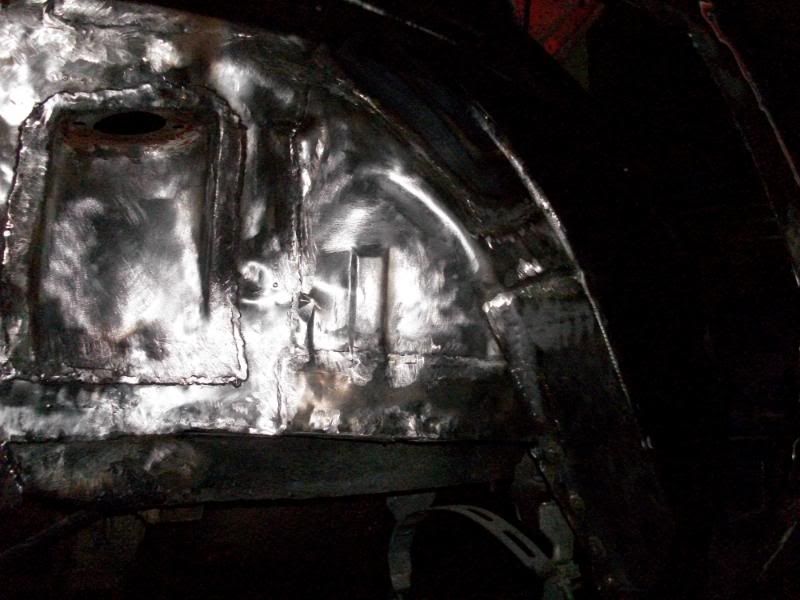
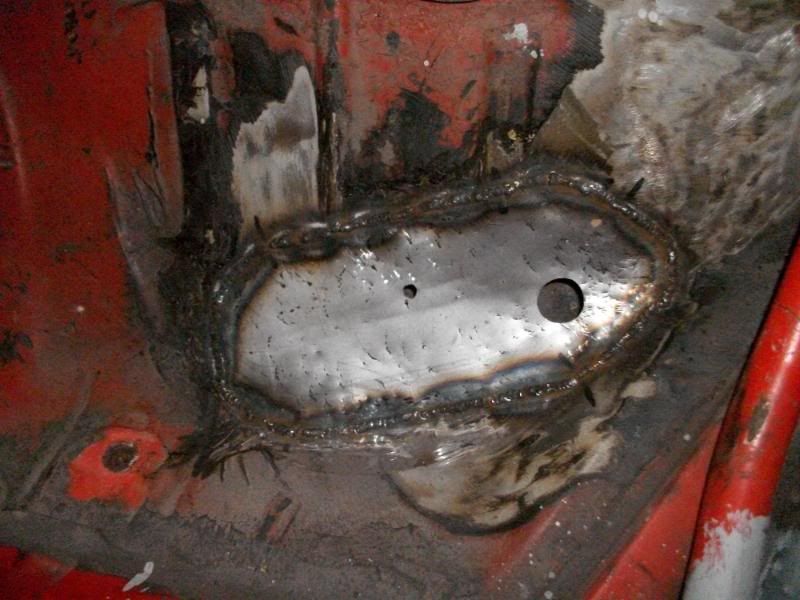
 this bit was a task, turns out you cant get new battery trays on their own so a new one was made. cut the shape out of a lump of wood and routered out the indentations. then cut a new tray to size and massaged the shape in with a hammer ontop of the wood. also had to replace the section underneath it, drill new holes and fit the captive nuts.

So thats where im upto at the moment. Hopefully will be stripping the paint soon, filling where necessary, undersealing then getting it in primer ready for paint which porb wont be til next year now as the cold and wet is setting in. Still got the suspension to overhaul and build the 2.8 over winter so plenty to do still!
the inner wings i knew about but once i cleaned all the old underseal off it became apparent that the floor corners had gone, a bit around the back side of the skuttle panel ontop of the fire wall, battery tray and the section of firewall where the looms goes through on the n/s.
I seem to have lost all my pics with the orangy bits cut out but heres the after pics for good measure anyhow.
this was the first side that was done so its a bit more patchy, when it came to the other side it was cut out in one go and less patches welded together new scuttle ready to be welded on, want topaint behind it first before it does go on welded up the dread floor bungs the scuttle lip ontop of the firewall, pinched it from the green shell, probably the only decent bit that was on it lol this bit was a task, turns out you cant get new battery trays on their own so a new one was made. cut the shape out of a lump of wood and routered out the indentations. then cut a new tray to size and massaged the shape in with a hammer ontop of the wood. also had to replace the section underneath it, drill new holes and fit the captive nuts.So thats where im upto at the moment. Hopefully will be stripping the paint soon, filling where necessary, undersealing then getting it in primer ready for paint which porb wont be til next year now as the cold and wet is setting in. Still got the suspension to overhaul and build the 2.8 over winter so plenty to do still!

Cheers, had a browse through yours last night now that is an epic amount of work especially the rear inner arches! Fortunatly the rear end of mine looks rust free
Last edited by Nath325i on Fri Jul 29, 2011 12:26 am, edited 1 time in total.
-
tonybtonyb
- E30 Zone Addict
- Posts: 3580
- Joined: Wed Jun 13, 2007 11:00 pm
- Location: essex
Good luck mate
They don't make bm's like this anymore!..They should.

-
octanejunkie
- E30 Zone Regular

- Posts: 479
- Joined: Fri Jul 02, 2010 11:00 pm
- Location: Somerset England
Nice. It'll be satisfying when that new paint goes on.
Do it white!
Do it white!

-
bmwe30mtech
- Engaged to the E30 Zone
- Posts: 5288
- Joined: Thu Feb 03, 2005 11:00 pm
Good work Nath, looks like it's keeping you very busy!
1988 M3 EvoII, Macau Blue/EvoII trim
1989 325i Sport M Tech II, Diamond Black/Black leather
1989 325i Sport M Tech II, Diamond Black/Black leather
Update time;
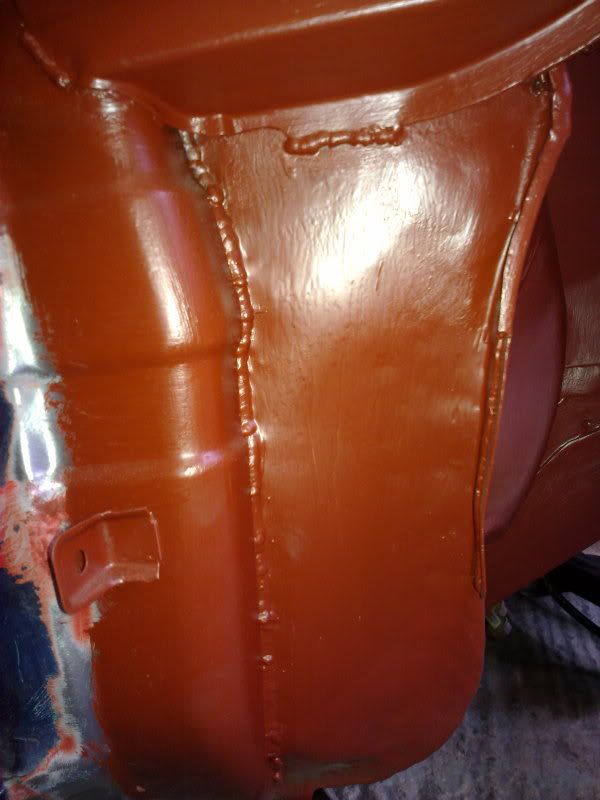
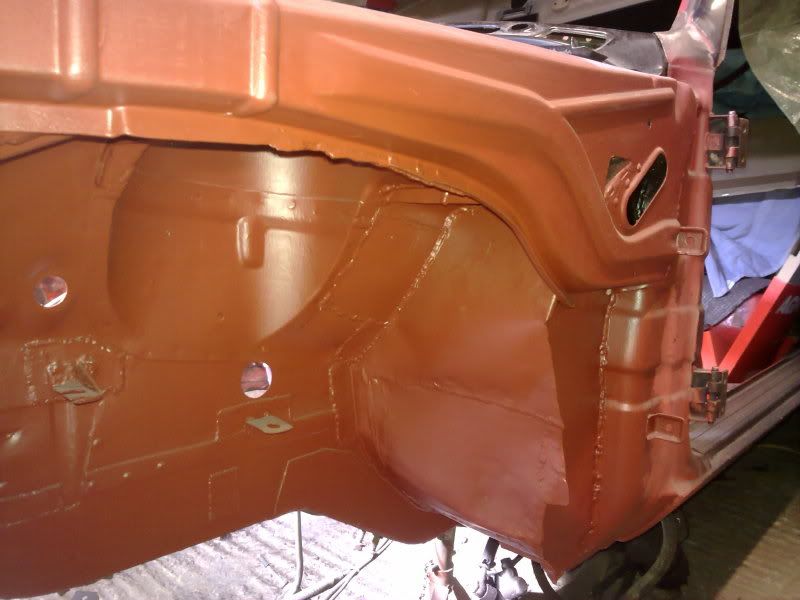
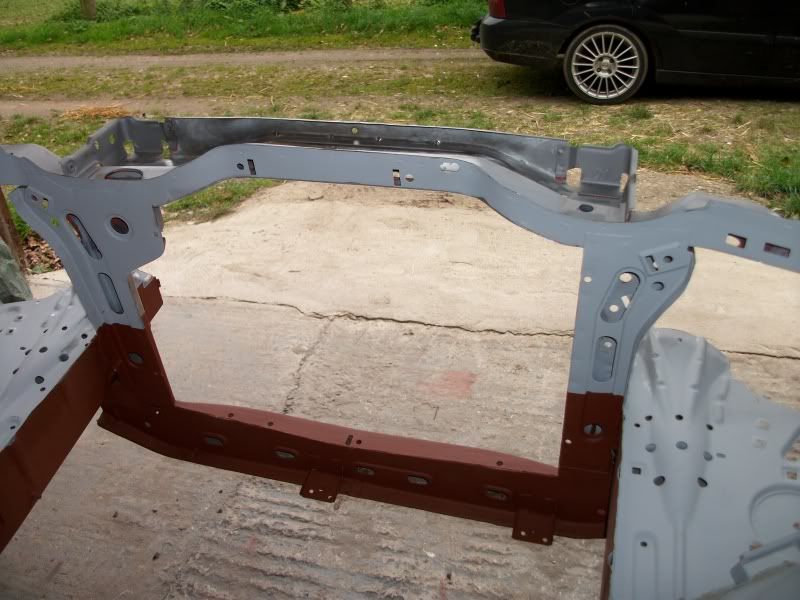
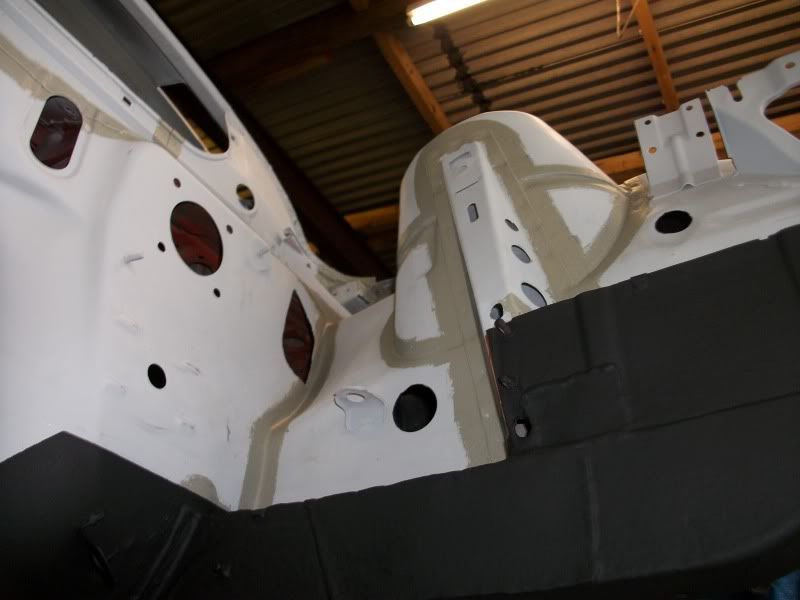
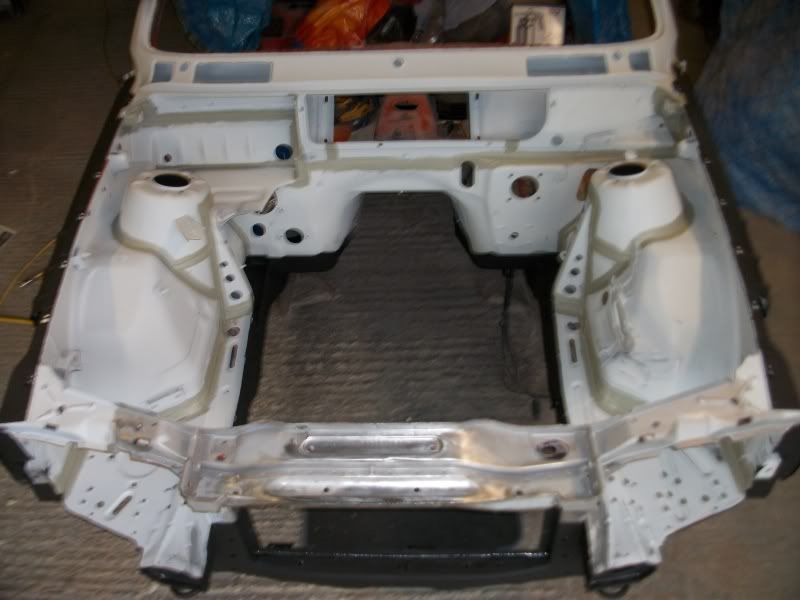
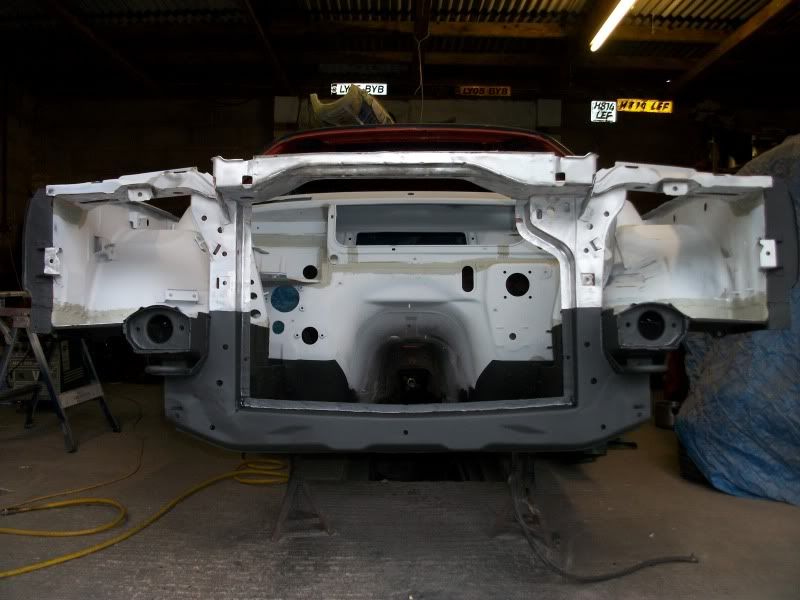
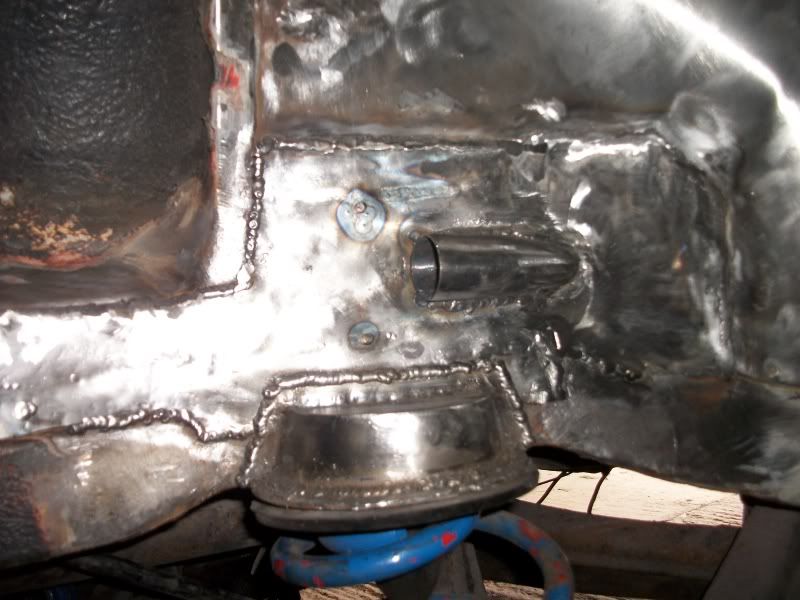
run a skim of filler over the welds in the engine bay to tidy things up. Also finally got the primer on and ran some seam sealer over neccessary areas! The bottom has been red oxided to give it a base for the stone chip underseal.


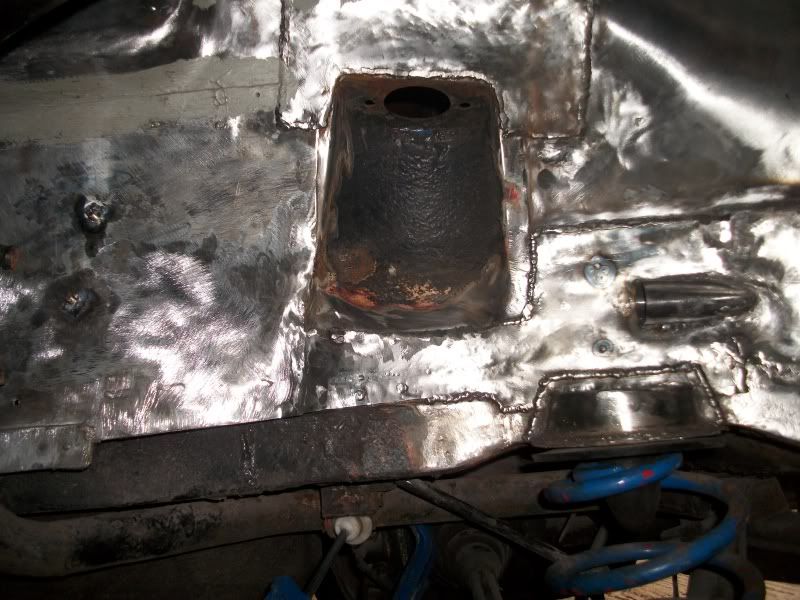
home made batery tray came out pretty good


Had a bit of a kick in the teeth tonight though, sprayed on the tetrosyl and it reacted with some of the red oxide. The inner wings and new sides of the cabin were fine as i used hammerite red oxide on those. the rst of the bottom half i used some Wickes stuff i had at home which is what has reacted . Now need to clean these bit of again and do them again.... All part of the fun and games i guess
run a skim of filler over the welds in the engine bay to tidy things up. Also finally got the primer on and ran some seam sealer over neccessary areas! The bottom has been red oxided to give it a base for the stone chip underseal.
home made batery tray came out pretty good
Had a bit of a kick in the teeth tonight though, sprayed on the tetrosyl and it reacted with some of the red oxide. The inner wings and new sides of the cabin were fine as i used hammerite red oxide on those. the rst of the bottom half i used some Wickes stuff i had at home which is what has reacted
Took the reacted bits of the tetrosyl back today and re did them, didnt come out to shabby


due to the lovely cold weather thats drawing in i think thats gonna be it paint wise fdor a while,
plenty to be getting on with though.
due to the lovely cold weather thats drawing in i think thats gonna be it paint wise fdor a while,
plenty to be getting on with though.
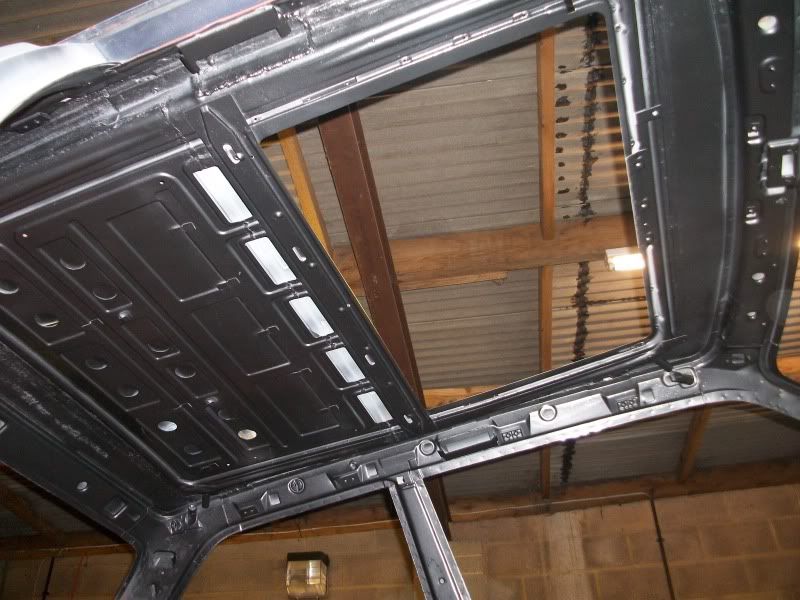
Update time. With the niced weather coming back can press on again. There was a some surface rust on the inside of the roof above the bottom of the sunroof tray. Also the drain tubes on said tray needed replacing. I was going to seperate the tray from the roof but looking at it seemed alot of faffing around. In the end decided to do this
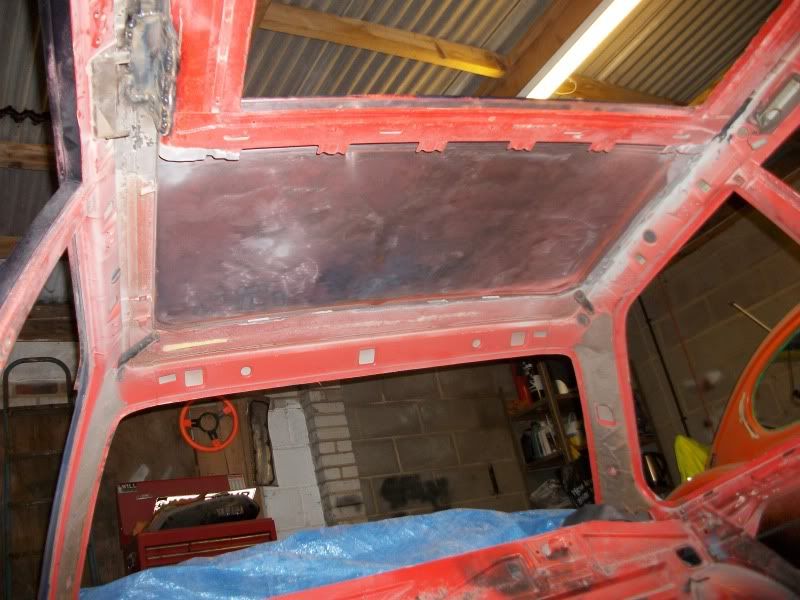
Cut bottom of the tray off with some .6mm cutting discs ( these things are thin! and great for making thin cuts). Could easily get to the roof like this with my sand blaster and no more rust


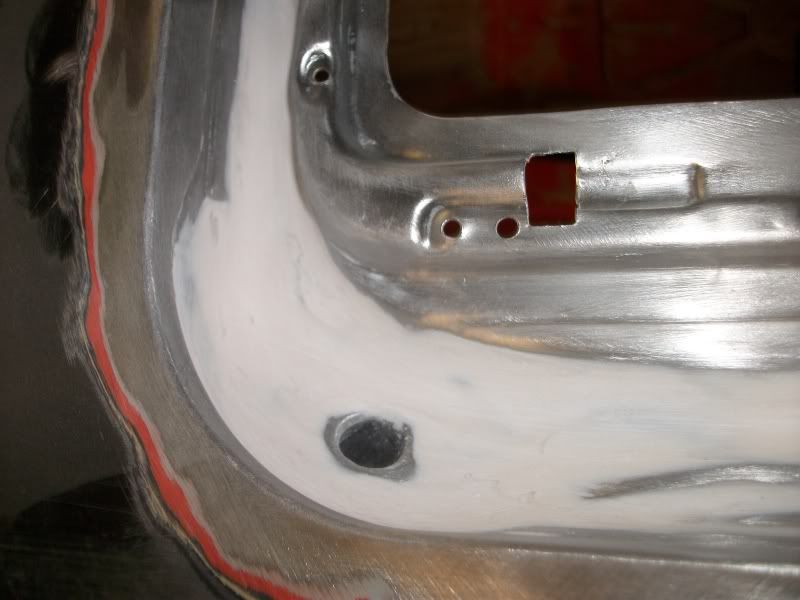
next the tray drains were repaired with some new metal in the corners and some new pipes
then that was all sandblasted.
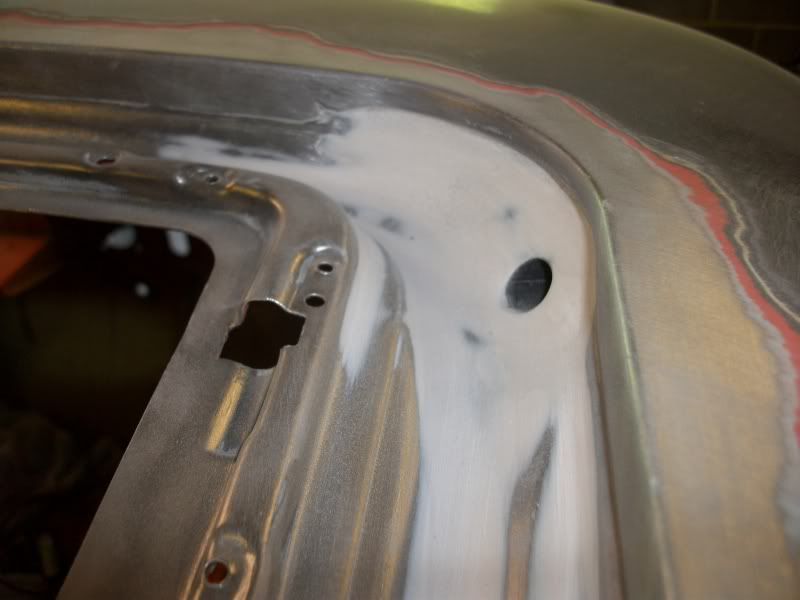
repaired the front drains the same way
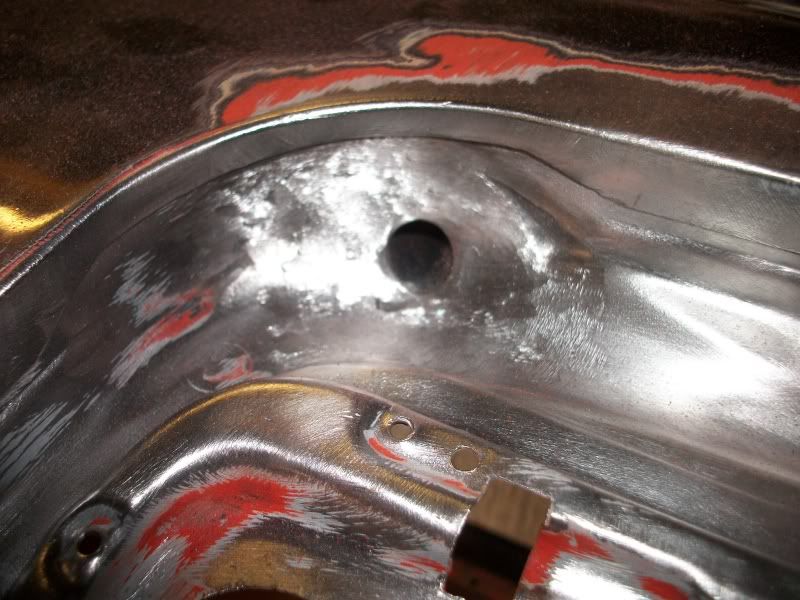
Then whilst cleaned the rest of the roof up disaster! A hole appeared here but was carefully welded


Then a samll bit of filler to smooth things off

same with these repairs
Now was the perfect time to coat the roof and tray with primer
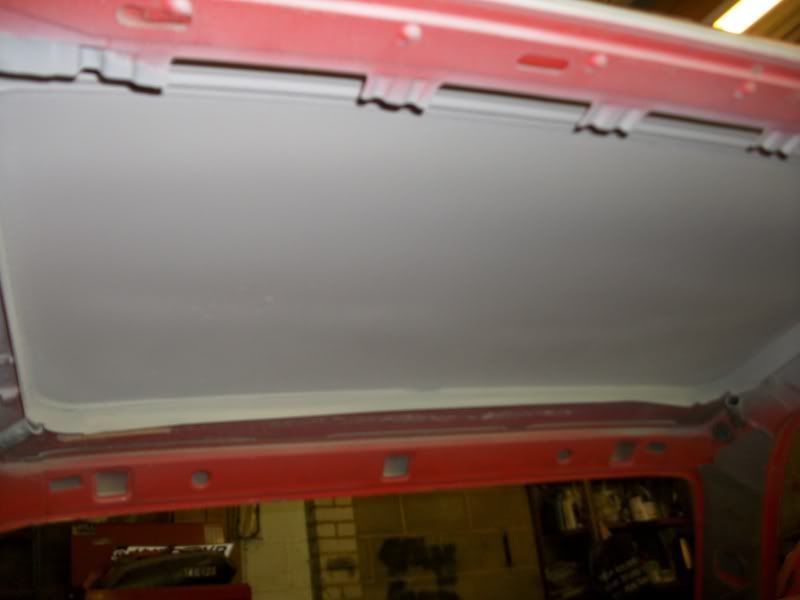
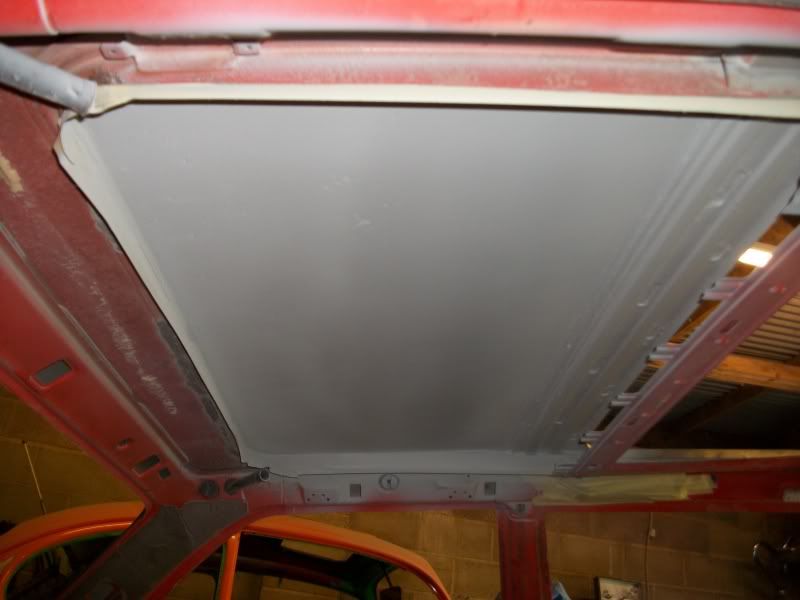
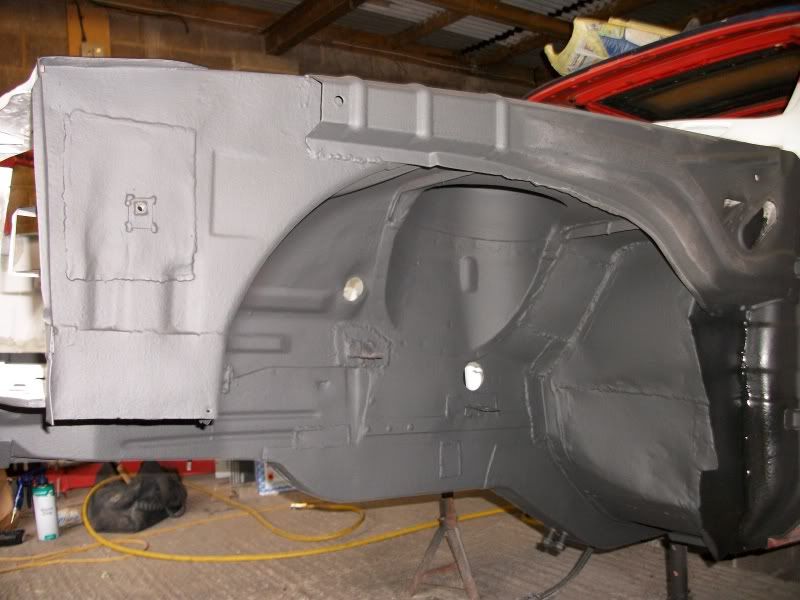
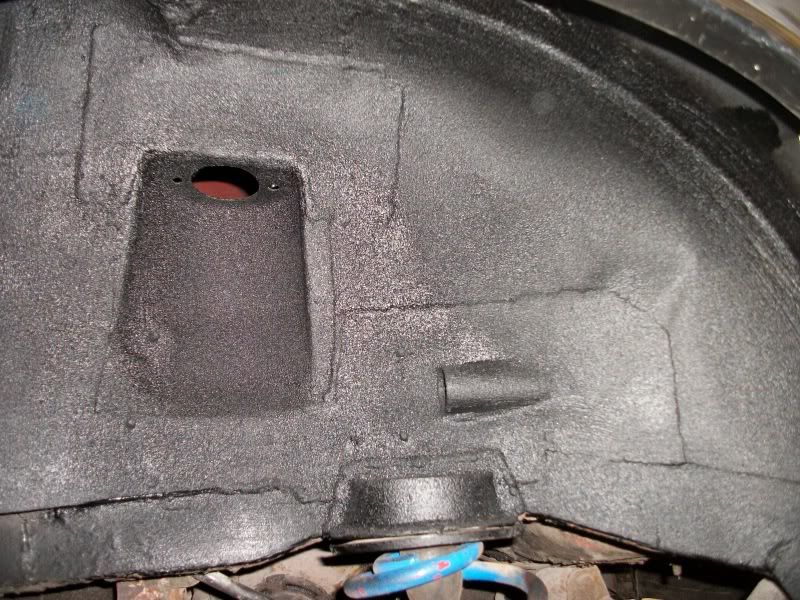
Next, again whilst access was easy nice coat of paint!

It doesnt picture very well here but it shows up much better with the sunroof tray


Didnt come out to shabby if i do say so myself as ive never sprayed with a gun bar primer before.
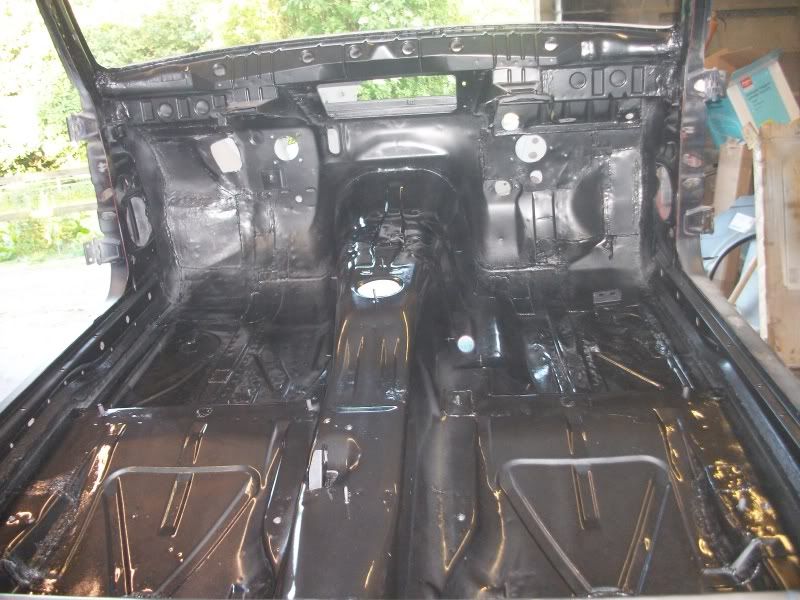
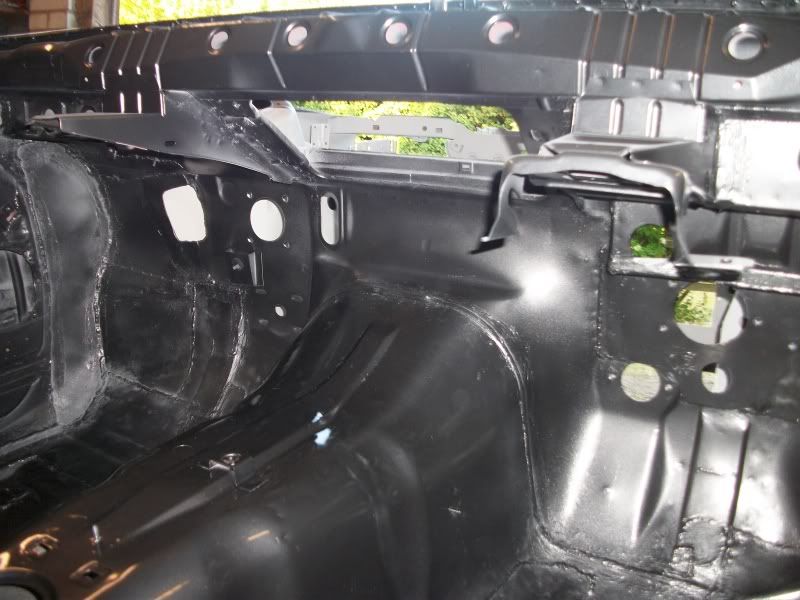
The astute amongst you will notice that this isnt Dolphin grey. It is infact a close matching cellulose i got from my local paint shop. The reason for this is i want to cover the whole inside before it goes back together but didnt see the point in Dolphin grey base coat, then clear coat making it look all nice and pretty to never see it again. So the whole interior is going this shade whilst everything else will be Dolphin grey when the time comes.
Next installment will be tray welded back into place, seam sealed and hopefully interior fully sprayed.
Cut bottom of the tray off with some .6mm cutting discs ( these things are thin! and great for making thin cuts). Could easily get to the roof like this with my sand blaster and no more rust
next the tray drains were repaired with some new metal in the corners and some new pipes
then that was all sandblasted.
repaired the front drains the same way
Then whilst cleaned the rest of the roof up disaster! A hole appeared here but was carefully welded
Then a samll bit of filler to smooth things off
same with these repairs
Now was the perfect time to coat the roof and tray with primer
Next, again whilst access was easy nice coat of paint!
It doesnt picture very well here but it shows up much better with the sunroof tray
Didnt come out to shabby if i do say so myself as ive never sprayed with a gun bar primer before.
The astute amongst you will notice that this isnt Dolphin grey. It is infact a close matching cellulose i got from my local paint shop. The reason for this is i want to cover the whole inside before it goes back together but didnt see the point in Dolphin grey base coat, then clear coat making it look all nice and pretty to never see it again. So the whole interior is going this shade whilst everything else will be Dolphin grey when the time comes.
Next installment will be tray welded back into place, seam sealed and hopefully interior fully sprayed.
Right havnt updated this for a while but heres what ive been upto
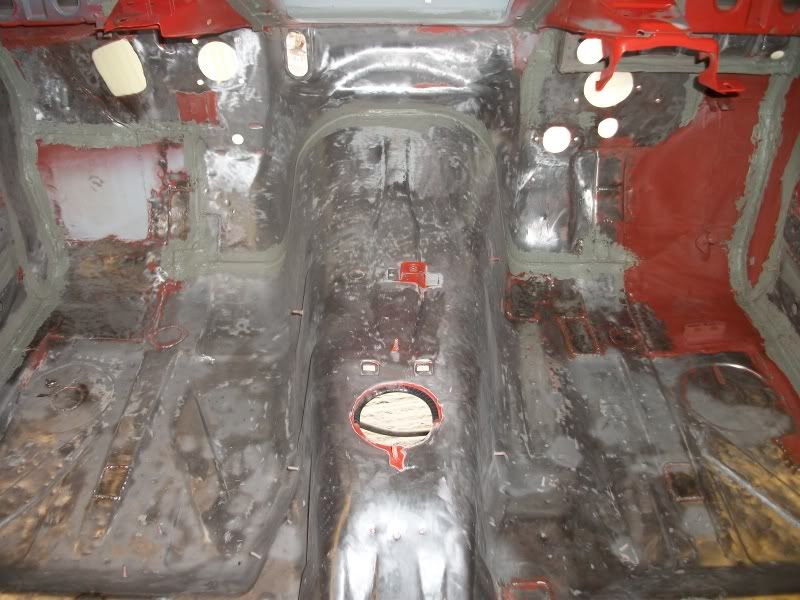
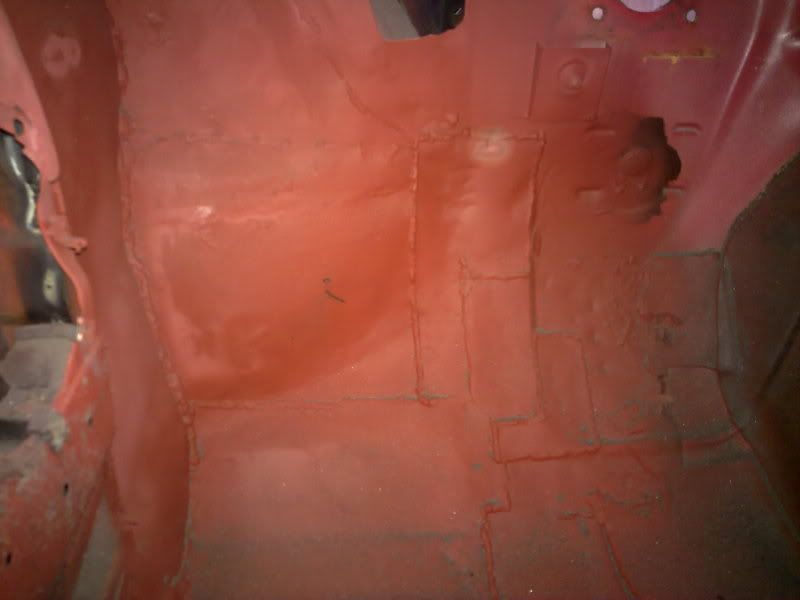
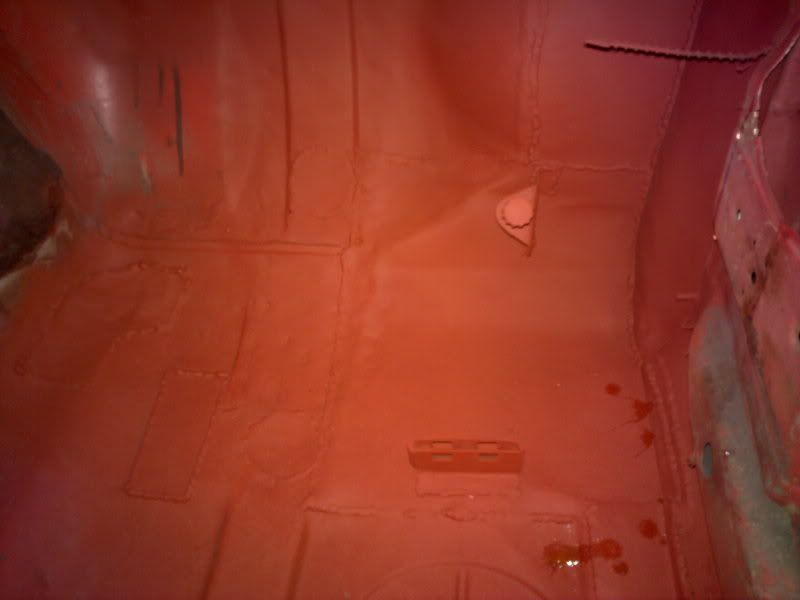
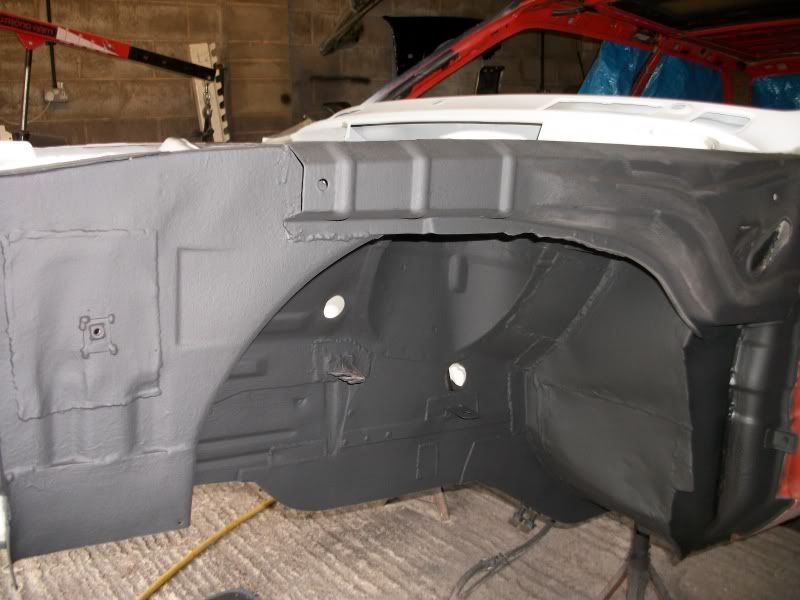
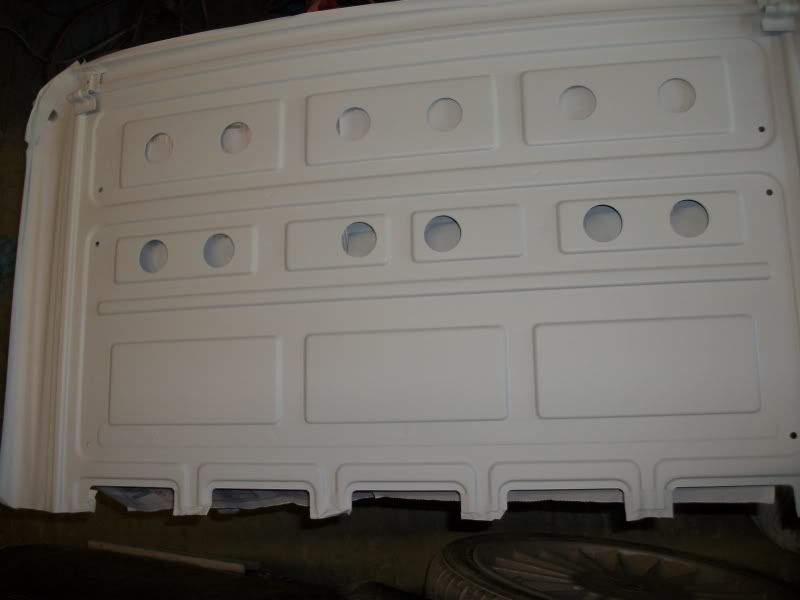
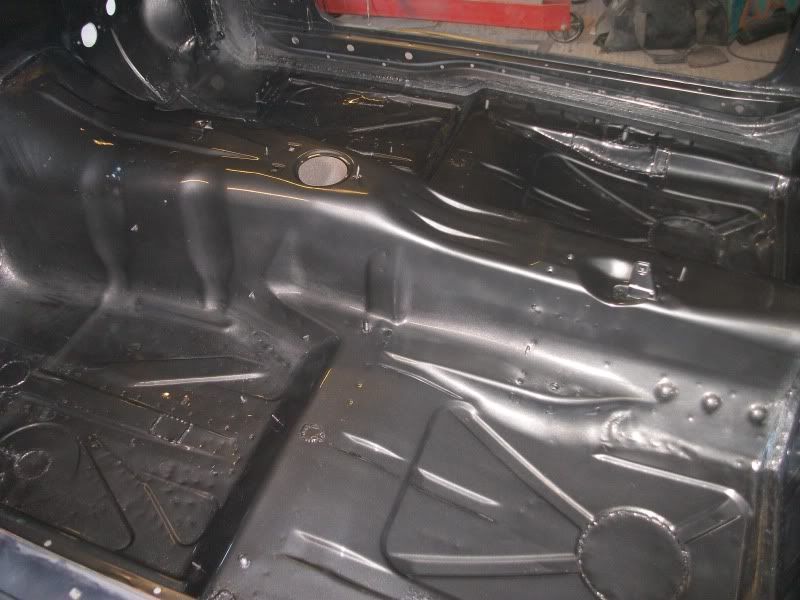
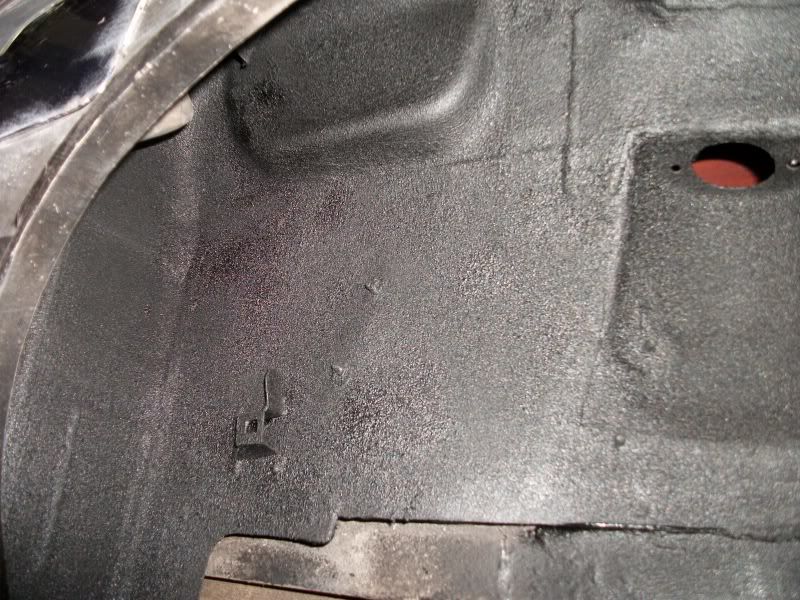
Stripped all of the old paint and seam sealer off of the interior, sand blasted it and plated a few small holes. Re seam sealed all over
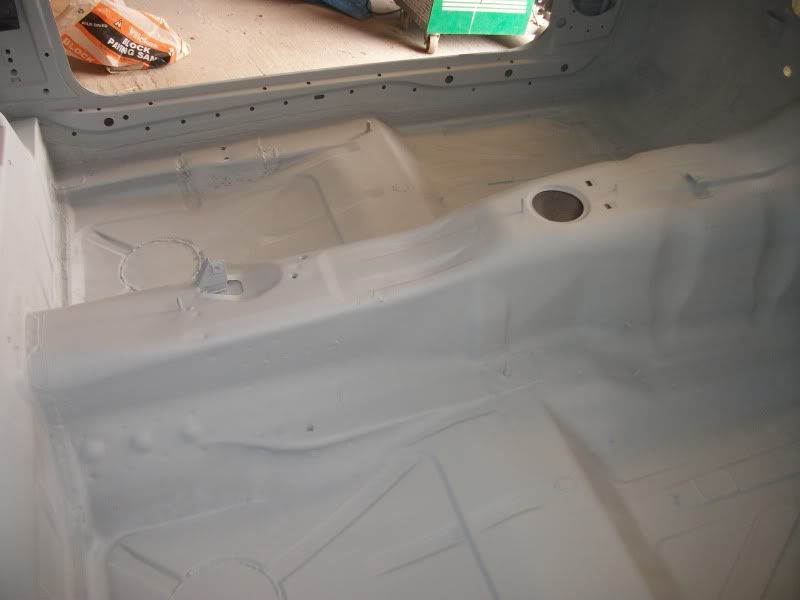
Then painted all inside in primer, I tell ya what a task it was getting in all the nooks and craneys of the firewall area and get a decent finish.
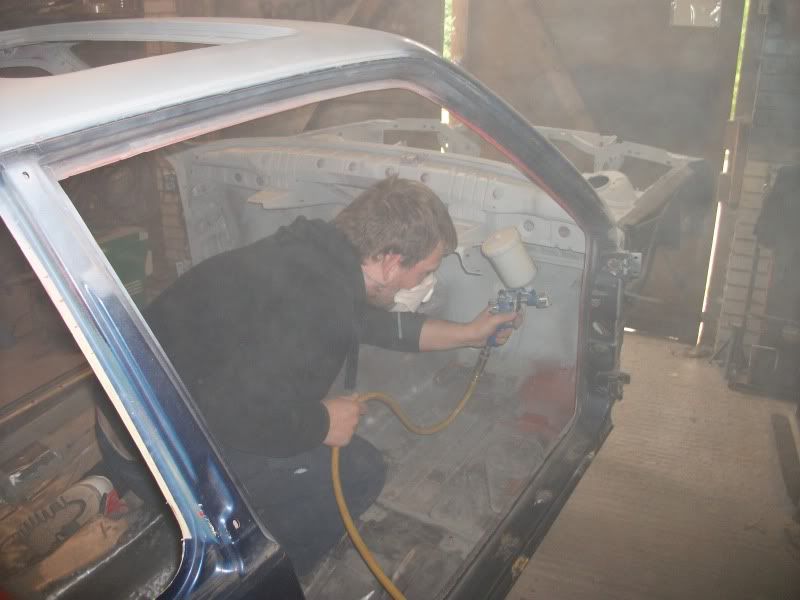
A picture of the muppet (me) doing the spraying :hihi
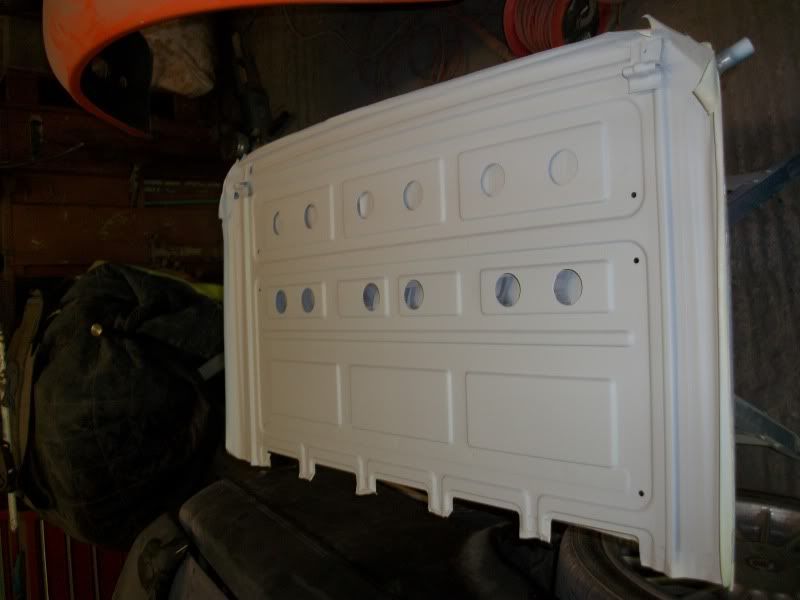
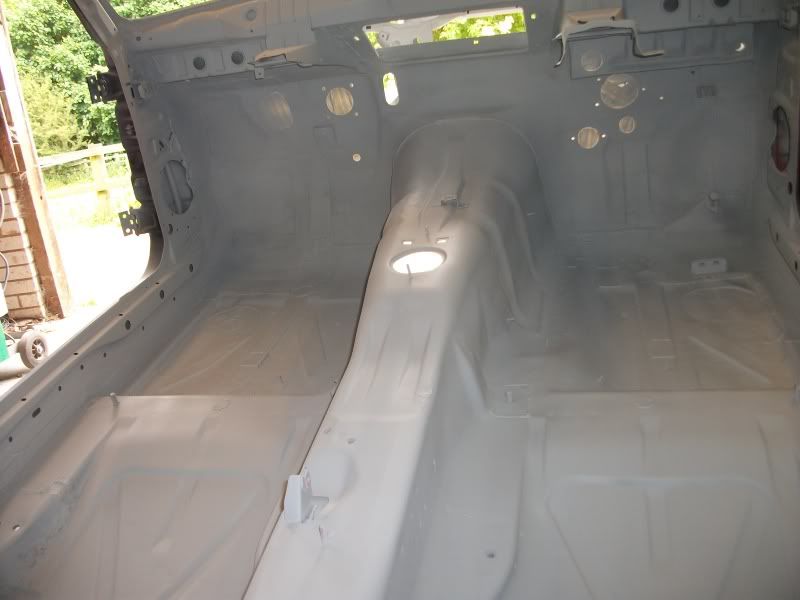
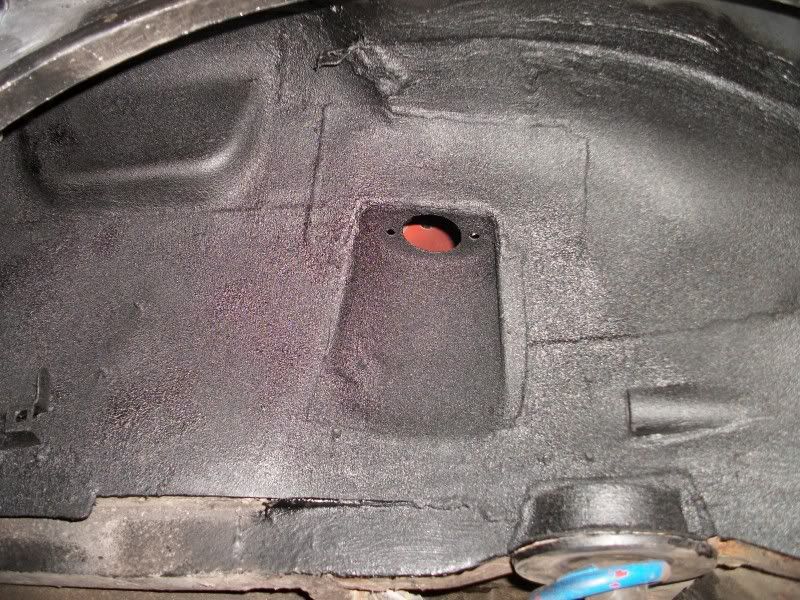
Then after sanding some dusty bits down
Onto some colour!

Considering im no pro if i do say so myself it didnt come out half bad considering shapes of the thing inside. I tell ya when it comes the exterior it will be a breeze :hihi


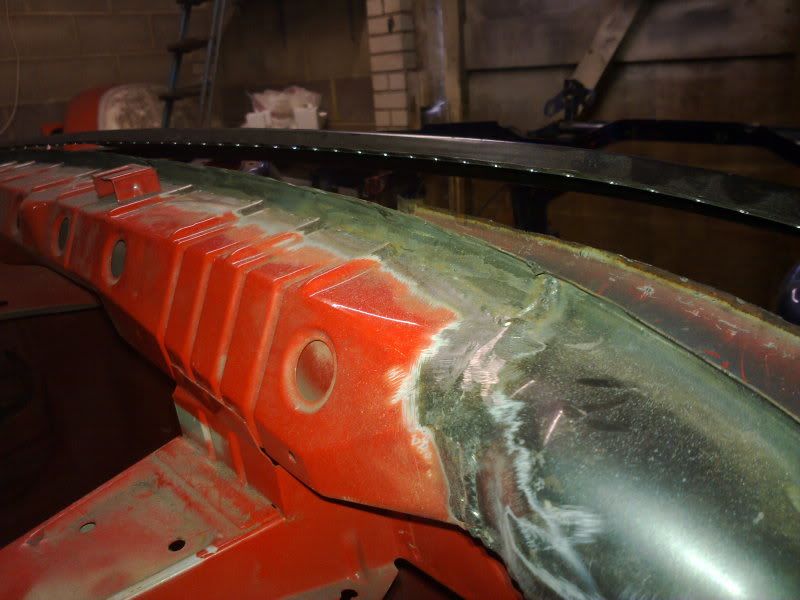
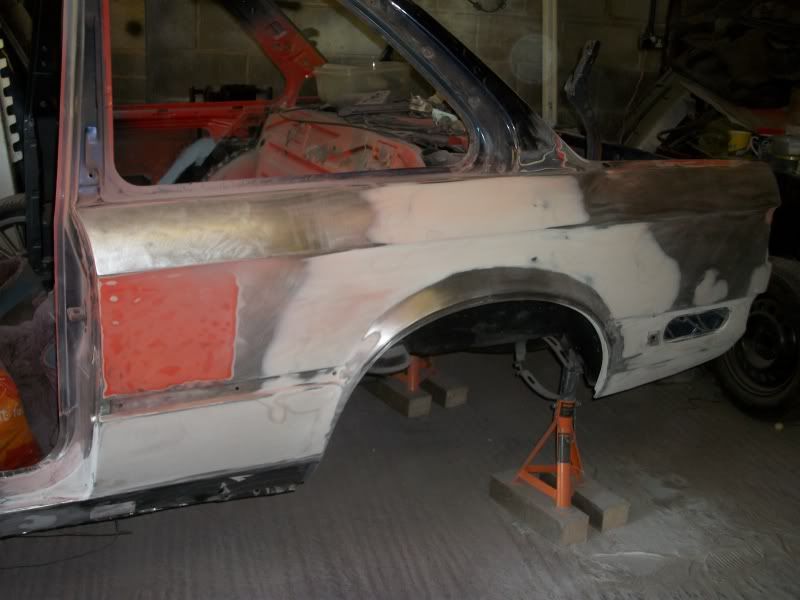
Decided to tackle the rear outer wings next. They both had a few scab holes around the lips but thought not messing around repairing i might aswell replace the lot as they are inexpensive.
First of cut the old ones and and carefully measured up the new ones to get a snug fit for welding. Unfortunatly this is where the problems started, this showed the state of the otherwise looking good inner arches.
Turns out this definatly wasnt as rust free as it first seemed.
It had been "repaired" before and covered over with underseal.
So with my birthday being last month i kindly got 2 new inner arch outer sections.
Cut a bit more out for access, then cut out the outer part of the inner wing.

Then some more annoyance :mad.
the inner section is holy aswell. These are over £200 a side at the stealers . So seeing as the structual part where the shock goes is ok it was cut out and plated. Really didnt want to tackle replacing these and felt a decent repair could be made.


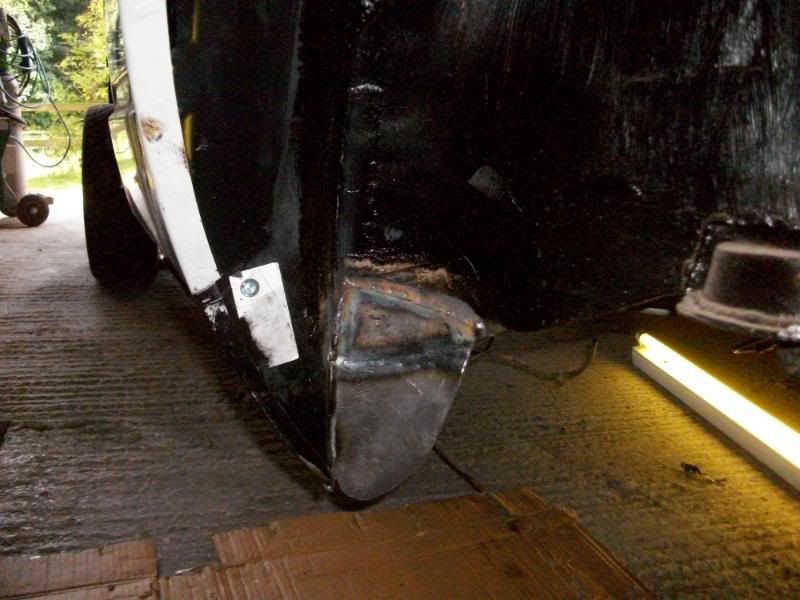
Then the new outer part went on

then welded the rear quater bit back on that was removed for access.
then the outer wing went on

Will require minimalistic filling near the front to bring the bodywork flush again.
The n/s is already cut waiting for the same.
I bought Pair of sill to repair the tin worm in the rear of the ones on the car, then thought well i got a whole sill may aswell fit a whole sill

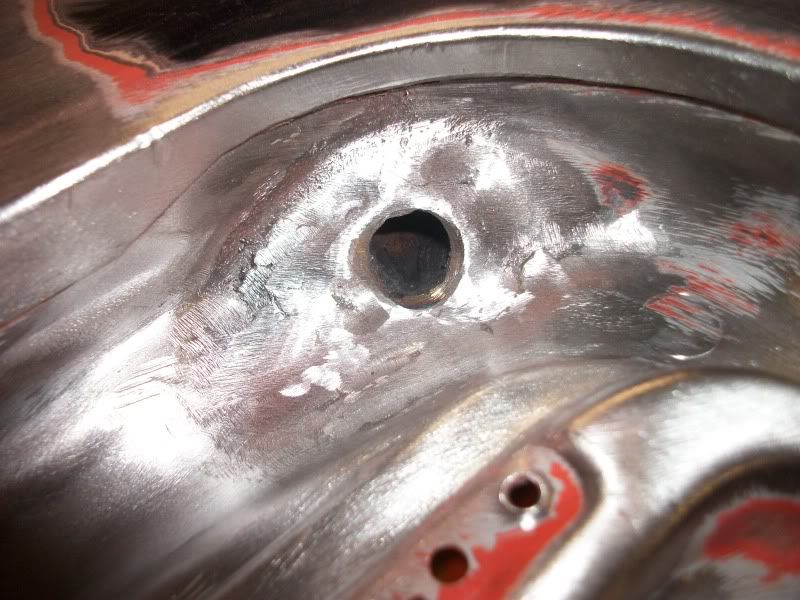
Right now the small hole in the inner part of the inner rear wing which turned out to be a bigger hole. :mad Cut it all out and welded a fresh bit of metal in.
Also the plate the top of the rear spring sits on strengthening had corroded away to nothingness. You can get this as a repair section from bmw, it comes on a rear chassis rail and is over £100. I thought that was a bit much just to cut the middle bit off of it as my chassis rails are solid its just the strengthening that has gone. God only know why bmw put a hole and a grommet in the centre of this but it appears to be what causeed the rot on it.None the less it was tackled like this. A template was drawn up out of card. Then used to make this

and then tacked on for now but already the top plate has its strength back at the edge

Still a hole to cut out and plate here but need to replace a section of that metal tube you can see before that is done.
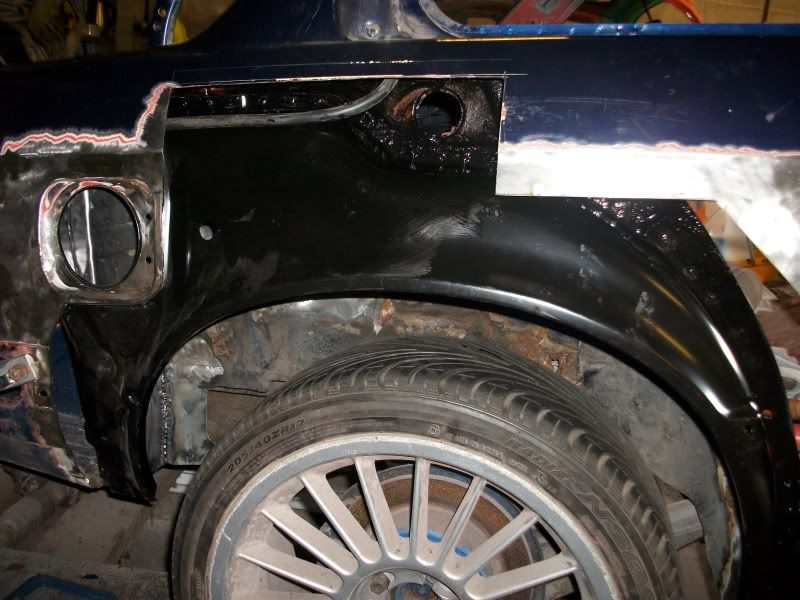
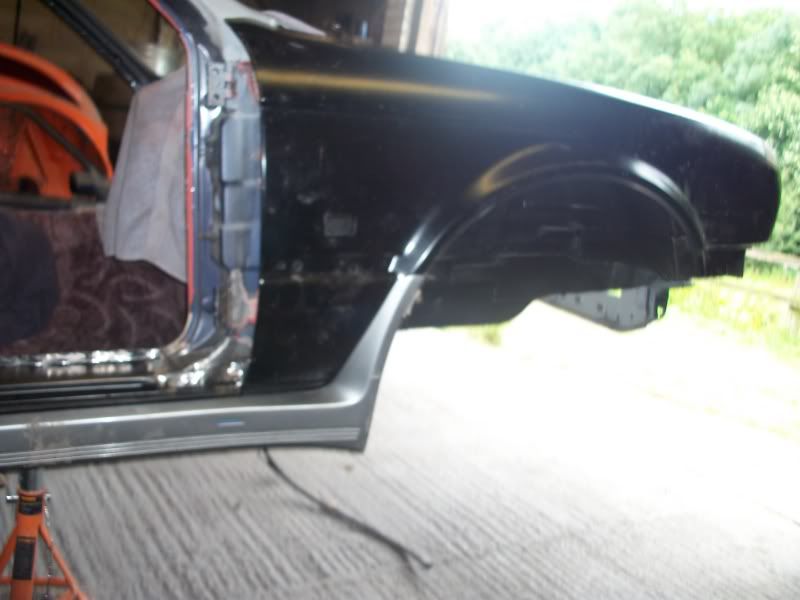
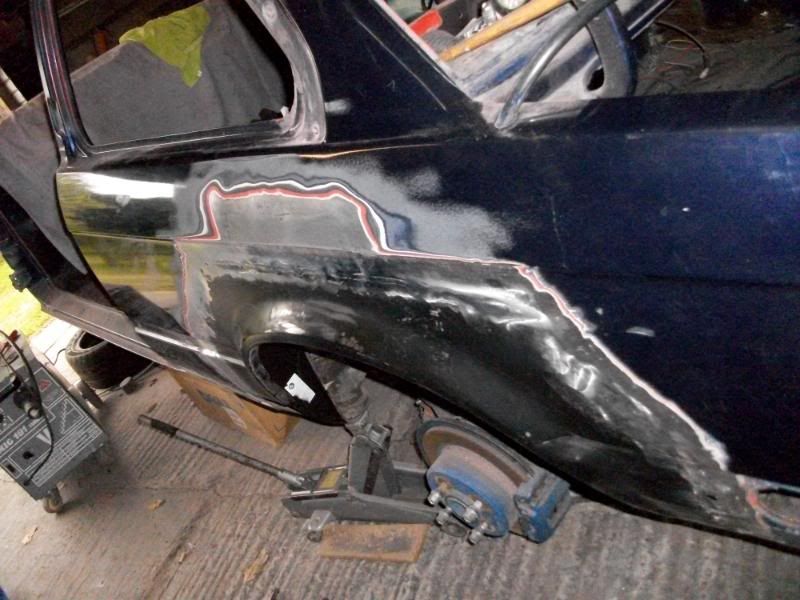
And a last one for good measure, offering up the sideskirt and front wing to check the alignment and see roughly where i need to make a template for the holes for the sideskirt fasteners in the sill.

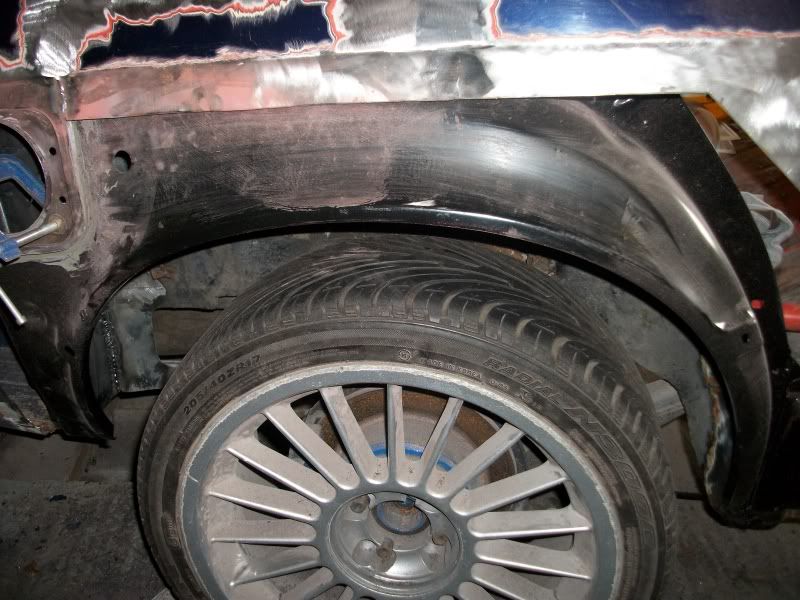
starting to look like a car again
Then finally the o/s/r was finished!
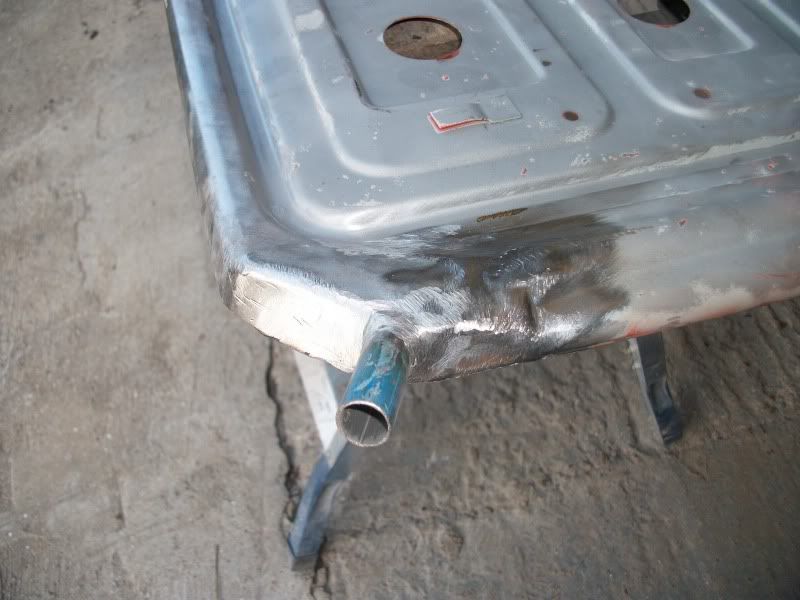
Cut out the remaining rot and a metal handled wheel barrow kindly donated part of itself to repair the end of the fuel breather pipe tube that runs over the rear bench :hihi.
Then one final clean up then undersealed. Looks 100x better

made up new brackets for the breather bottle and mud guard.
One rear arch down one to go
Once the n/s/r is done and a clean up and re undersel underneath i think thats pretty much it welding wise then i can start to prep it for painting, well thats if we get any decent weather at all this year
Stripped all of the old paint and seam sealer off of the interior, sand blasted it and plated a few small holes. Re seam sealed all over
Then painted all inside in primer, I tell ya what a task it was getting in all the nooks and craneys of the firewall area and get a decent finish.
A picture of the muppet (me) doing the spraying :hihi
Then after sanding some dusty bits down
Onto some colour!
Considering im no pro if i do say so myself it didnt come out half bad considering shapes of the thing inside. I tell ya when it comes the exterior it will be a breeze :hihi
Decided to tackle the rear outer wings next. They both had a few scab holes around the lips but thought not messing around repairing i might aswell replace the lot as they are inexpensive.
First of cut the old ones and and carefully measured up the new ones to get a snug fit for welding. Unfortunatly this is where the problems started, this showed the state of the otherwise looking good inner arches.
Turns out this definatly wasnt as rust free as it first seemed.
It had been "repaired" before and covered over with underseal.
So with my birthday being last month i kindly got 2 new inner arch outer sections.
Cut a bit more out for access, then cut out the outer part of the inner wing.
Then some more annoyance :mad.
the inner section is holy aswell. These are over £200 a side at the stealers
Then the new outer part went on
then welded the rear quater bit back on that was removed for access.
then the outer wing went on
Will require minimalistic filling near the front to bring the bodywork flush again.
The n/s is already cut waiting for the same.
I bought Pair of sill to repair the tin worm in the rear of the ones on the car, then thought well i got a whole sill may aswell fit a whole sill
Right now the small hole in the inner part of the inner rear wing which turned out to be a bigger hole. :mad Cut it all out and welded a fresh bit of metal in.
Also the plate the top of the rear spring sits on strengthening had corroded away to nothingness. You can get this as a repair section from bmw, it comes on a rear chassis rail and is over £100. I thought that was a bit much just to cut the middle bit off of it as my chassis rails are solid its just the strengthening that has gone. God only know why bmw put a hole and a grommet in the centre of this but it appears to be what causeed the rot on it.None the less it was tackled like this. A template was drawn up out of card. Then used to make this
and then tacked on for now but already the top plate has its strength back at the edge
Still a hole to cut out and plate here but need to replace a section of that metal tube you can see before that is done.
And a last one for good measure, offering up the sideskirt and front wing to check the alignment and see roughly where i need to make a template for the holes for the sideskirt fasteners in the sill.
starting to look like a car again
Then finally the o/s/r was finished!
Cut out the remaining rot and a metal handled wheel barrow kindly donated part of itself to repair the end of the fuel breather pipe tube that runs over the rear bench :hihi.
Then one final clean up then undersealed. Looks 100x better
made up new brackets for the breather bottle and mud guard.
One rear arch down one to go
Once the n/s/r is done and a clean up and re undersel underneath i think thats pretty much it welding wise then i can start to prep it for painting, well thats if we get any decent weather at all this year
-
bmwe30mtech
- Engaged to the E30 Zone
- Posts: 5288
- Joined: Thu Feb 03, 2005 11:00 pm
You are re-making your shell Nath! Brilliant ammount of effort and work going into this.
Paul
Paul
1988 M3 EvoII, Macau Blue/EvoII trim
1989 325i Sport M Tech II, Diamond Black/Black leather
1989 325i Sport M Tech II, Diamond Black/Black leather
agreed ! amazing to see, wish i had the skill and means to do such a thingbmwe30mtech wrote:You are re-making your shell Nath! Brilliant ammount of effort and work going into this.
Paul
how much would it cost to get done to a shell ?
Dread to think, Its cost a few pennies in panels and consumables so far but im not really keeping a tab. Just stuffing the recipets in a draw at home at the momentpolsta wrote:agreed ! amazing to see, wish i had the skill and means to do such a thingbmwe30mtech wrote:You are re-making your shell Nath! Brilliant ammount of effort and work going into this.
Paul
how much would it cost to get done to a shell ?
right time for the next instalment
much of the same as the o/s, had to repair the inner part of the inner wing, cut out rot and welded in fresh metal.
Next the outer section was welded on
then outer wing cut out and new one welded in

then i refitted the front suspension to move the whole car off of my pit ( first time its moved in over a year :hihi) to drop the rear axle to tackle the last bit of the crusty stuff
Also in this pic the outer sill has been cut out ready

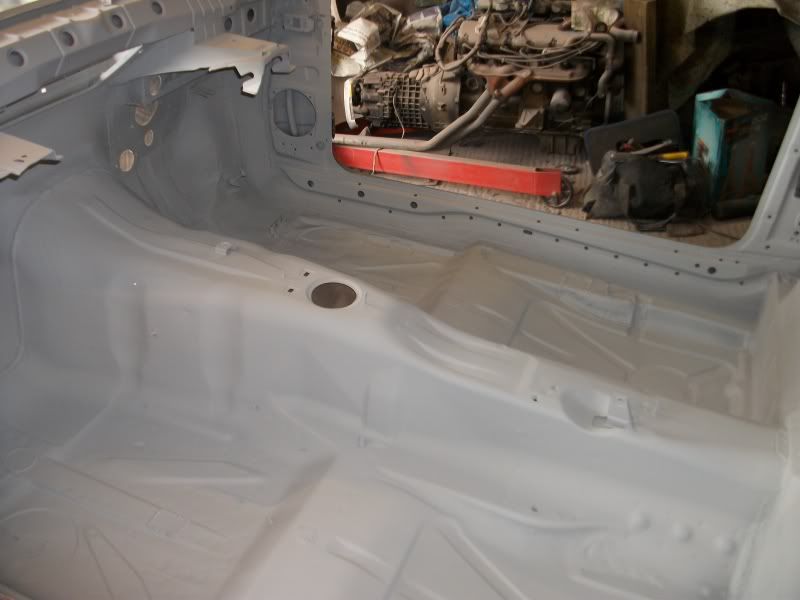
A hole that was in the rear bench above the fuel tank cut out and plated. Was going to paint this with the rest of the interior back in May but it was too hard to do with the rear axle in the way.
the sorry state of the n.s.r inner seal where the fuel pump mounts before
and after
and starting to seal the inner arch.
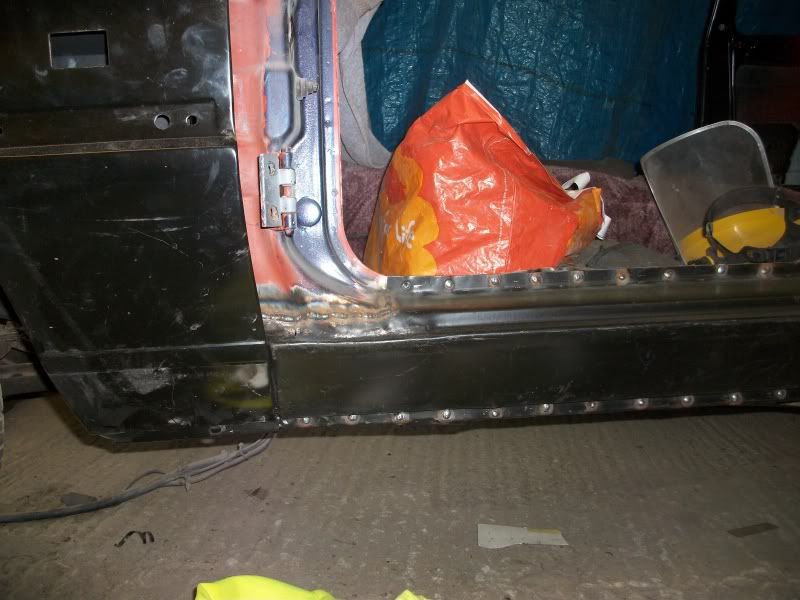
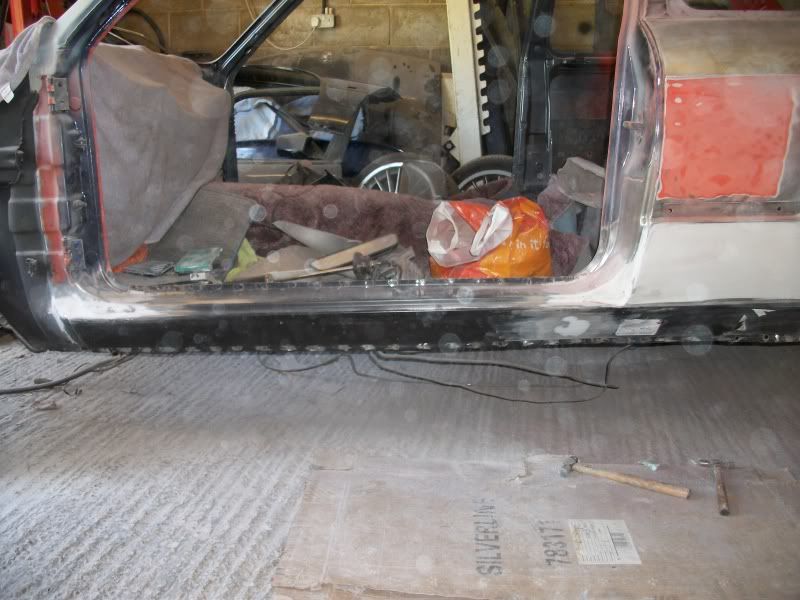
Then time for the n/s sill to go on!


and the n/s has been taken back, skim of filler on the welds and the strenuous task of flattening the filler
hopefully get the other side done next week, then some primer ready for the winter...
much of the same as the o/s, had to repair the inner part of the inner wing, cut out rot and welded in fresh metal.
Next the outer section was welded on
then outer wing cut out and new one welded in
then i refitted the front suspension to move the whole car off of my pit ( first time its moved in over a year :hihi) to drop the rear axle to tackle the last bit of the crusty stuff
Also in this pic the outer sill has been cut out ready
A hole that was in the rear bench above the fuel tank cut out and plated. Was going to paint this with the rest of the interior back in May but it was too hard to do with the rear axle in the way.
the sorry state of the n.s.r inner seal where the fuel pump mounts before
and after
and starting to seal the inner arch.
Then time for the n/s sill to go on!
and the n/s has been taken back, skim of filler on the welds and the strenuous task of flattening the filler
hopefully get the other side done next week, then some primer ready for the winter...
-
MINTER_325i
- E30 Zone Newbie

- Posts: 26
- Joined: Tue Sep 06, 2011 11:00 pm
- Location: Derry N.Ireland
man that is some serious work and dedication right there,that car will be like a new car when finished...nothing but respect for that effort man!!