Page 1 of 3
Clarko74's Chromie - Update: Rust...
Posted: Tue Mar 03, 2009 10:14 pm
by clarko74
After my first e30 (a 325 chromie) rusted away to pretty much nothing I was determined that this wouldn't happen to my second one.
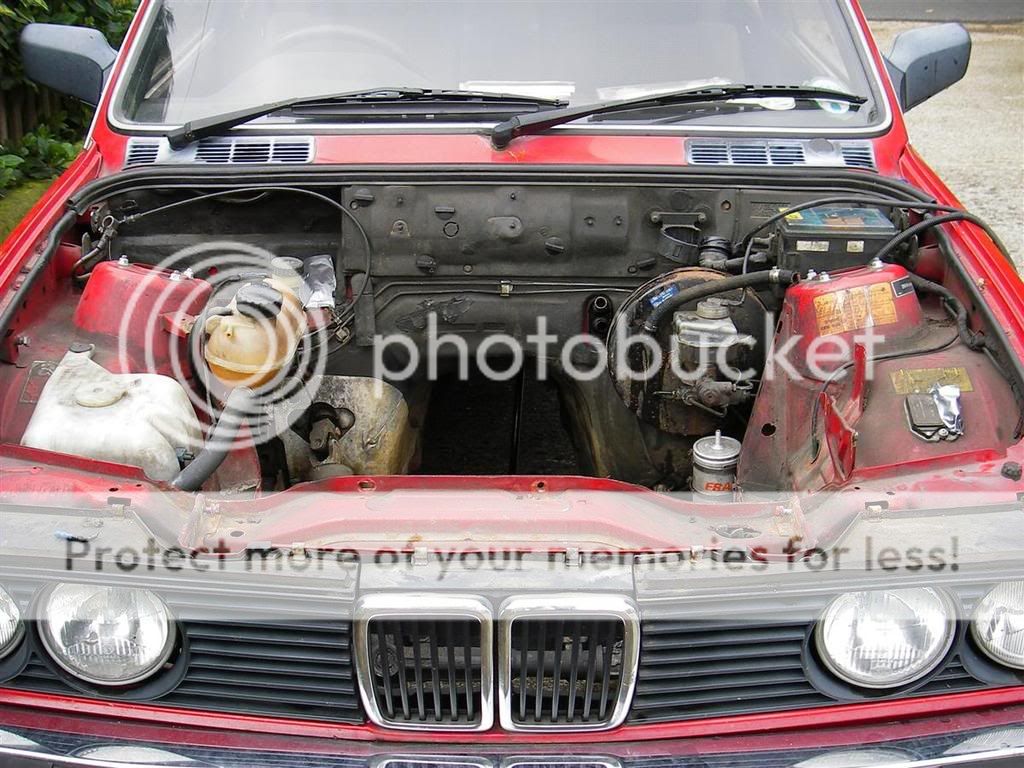
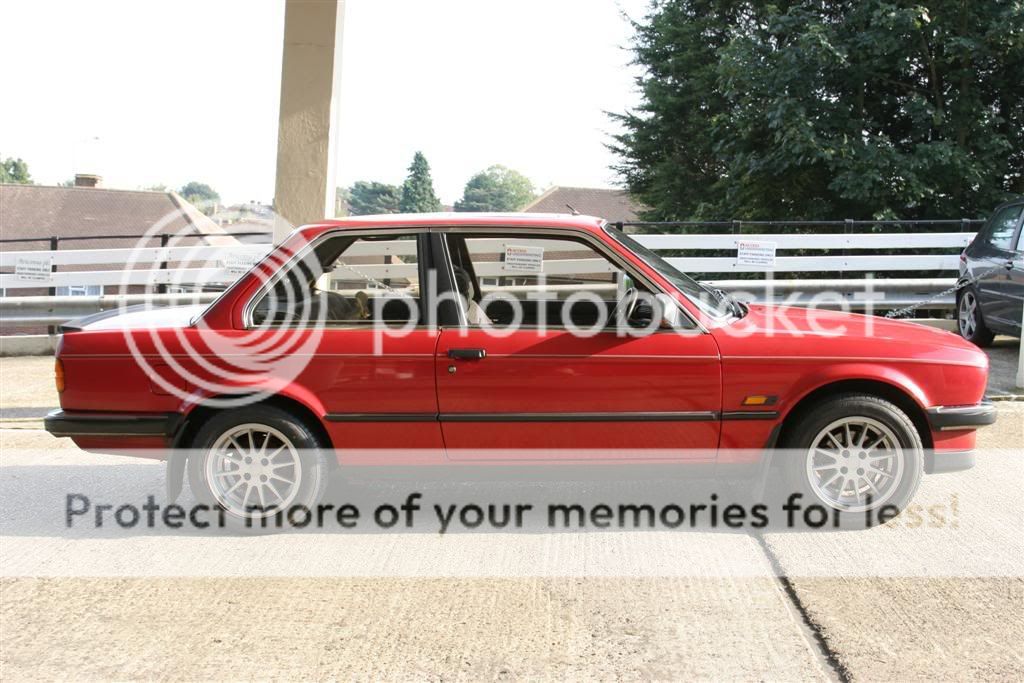
In late 2007 I got myself a 1987 320 chromie in zinnober red with 132,000 miles on it. I'd heard that the 320 is a little lacking in power but I was unprepared for how slow it was compared to the 325. This was put right by swapping the engine from the (now sorn) 325 into it.
m20b25 engine on it's way out:
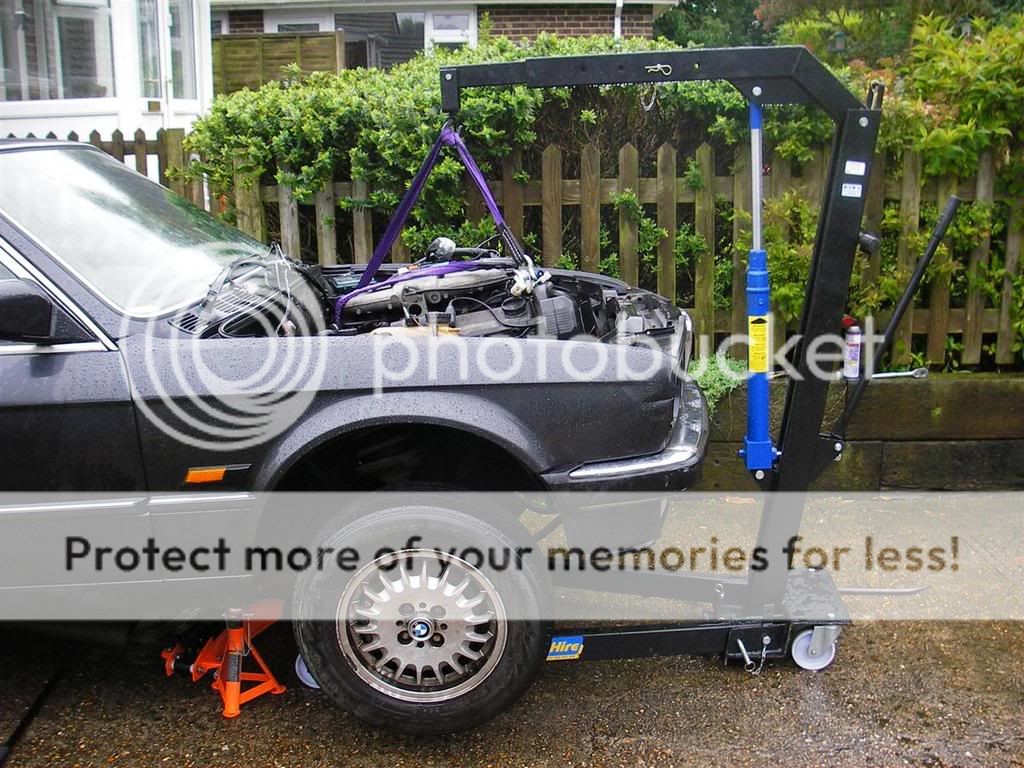
and here it is:
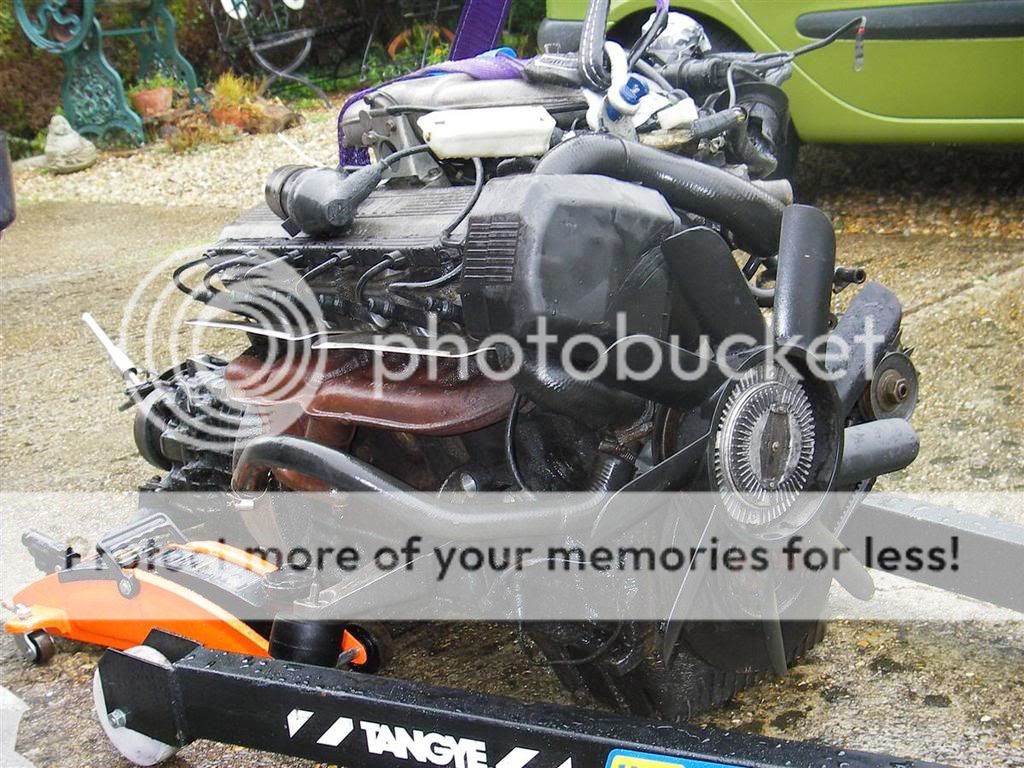
ready to go in here:
It hammered it down with rain on the final day of the swap and it wasn't fun so I didn't take any pictures. It did start first time though, which was nice.
After that I swapped the front struts and arb. Then I got rid of the bottletops and fitted a set of mims:
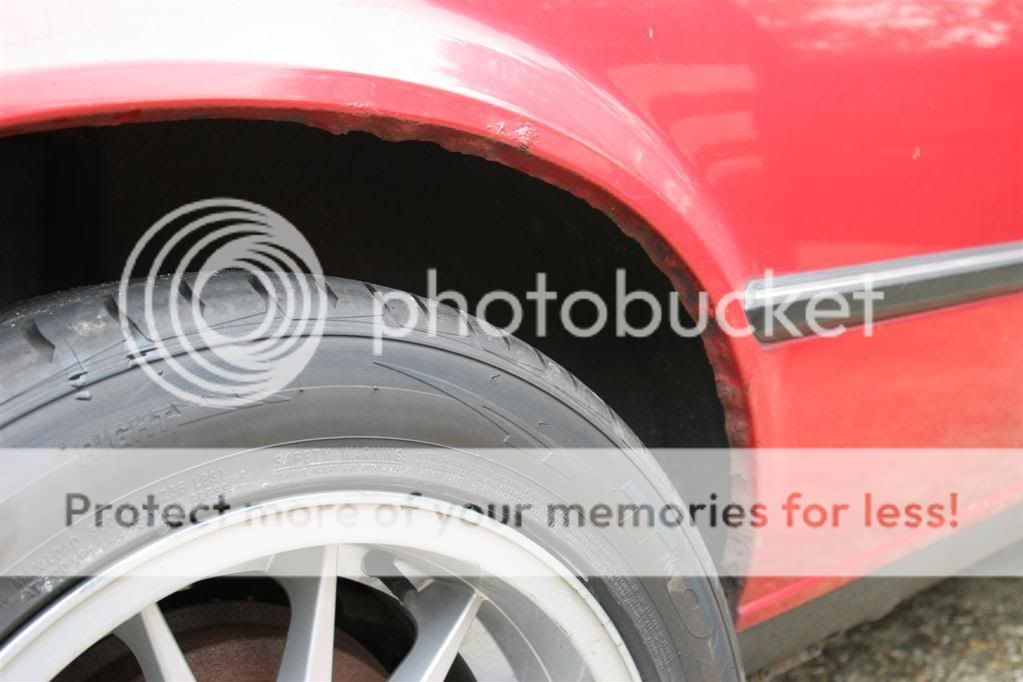
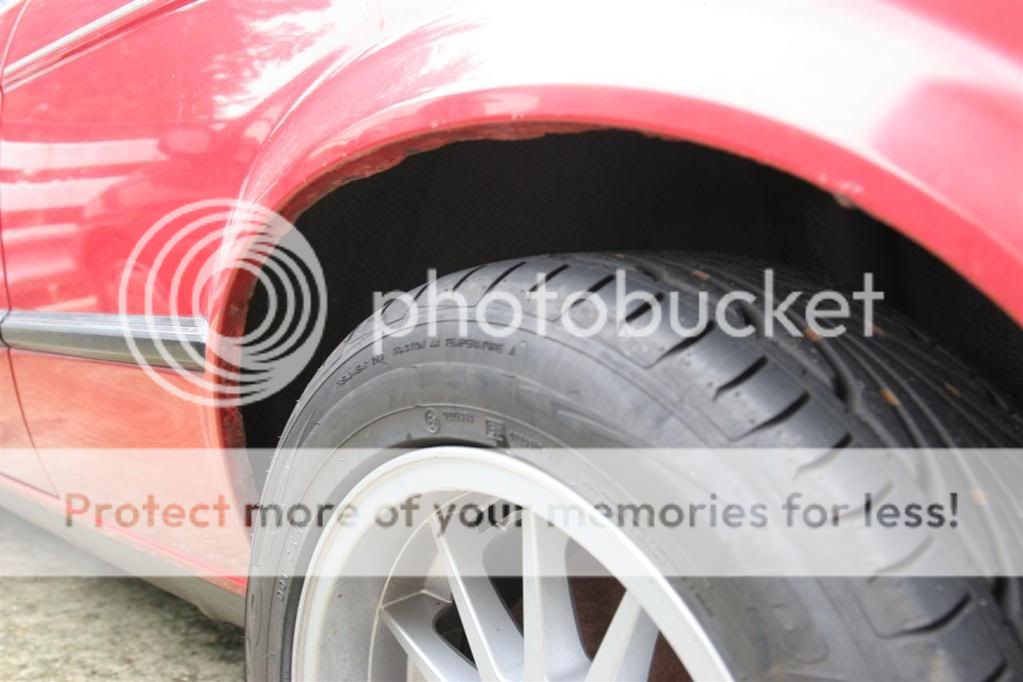
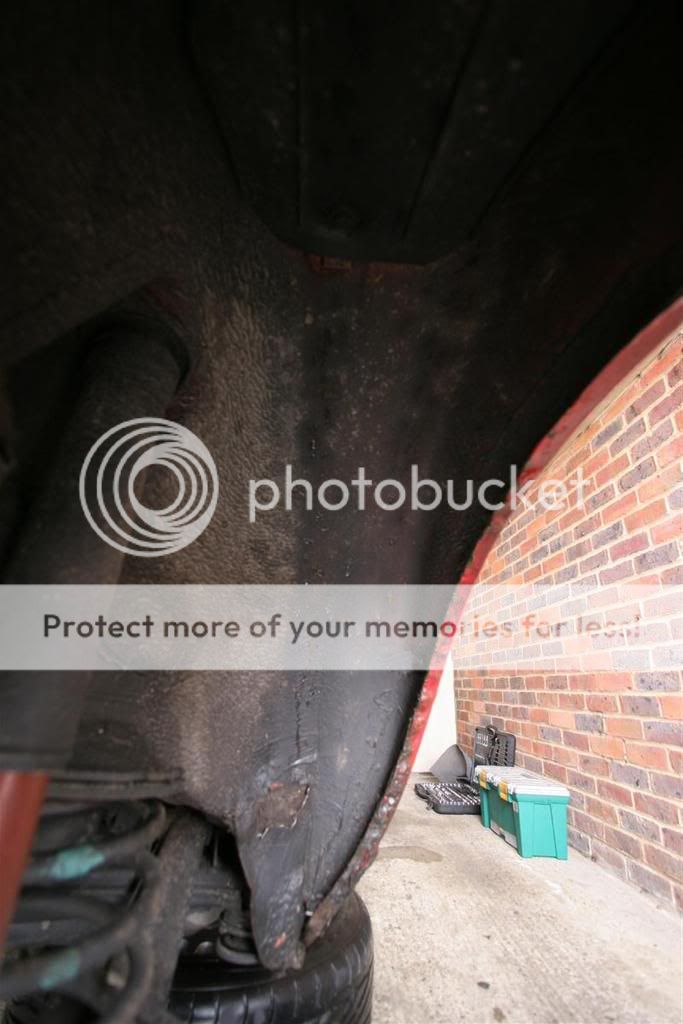
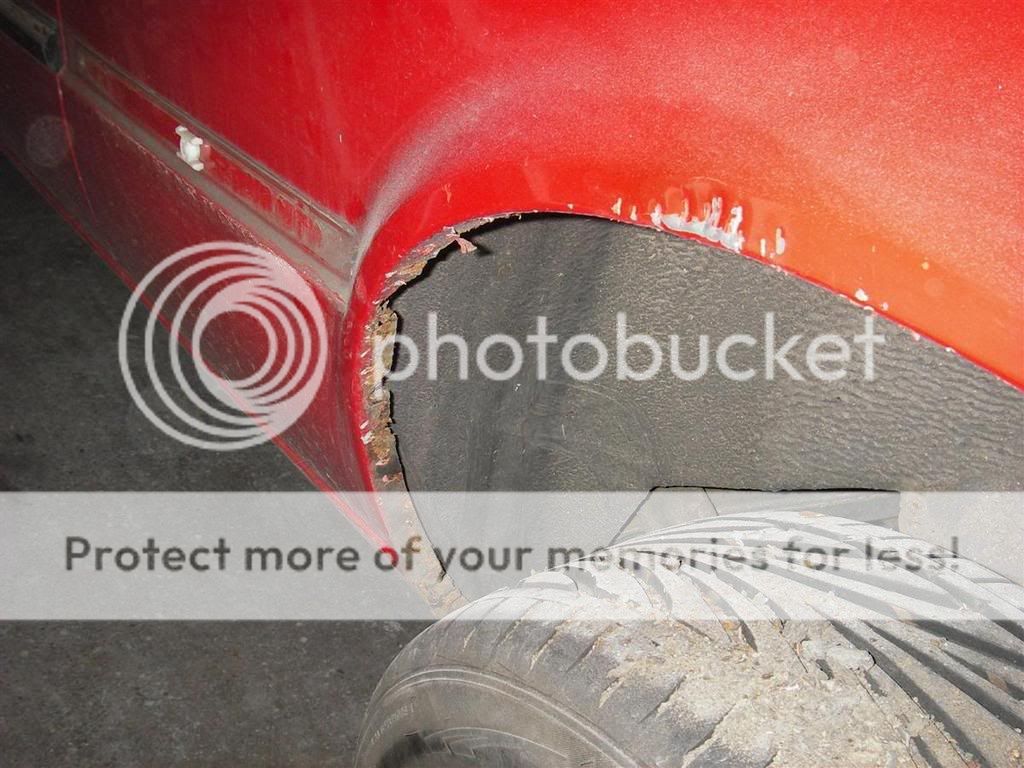
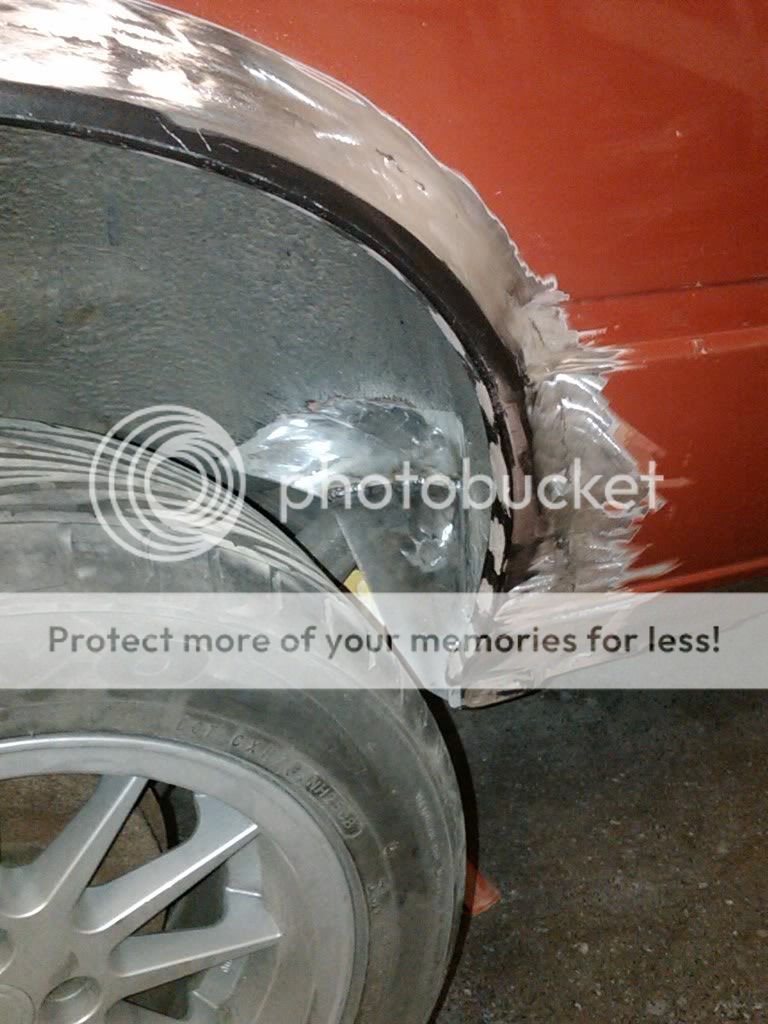
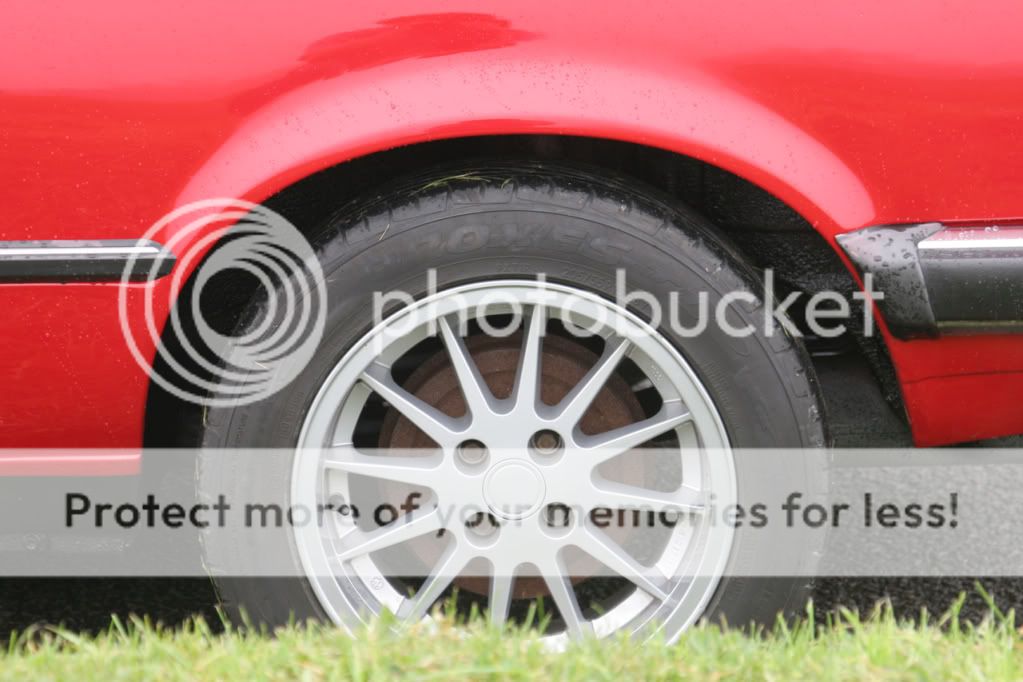
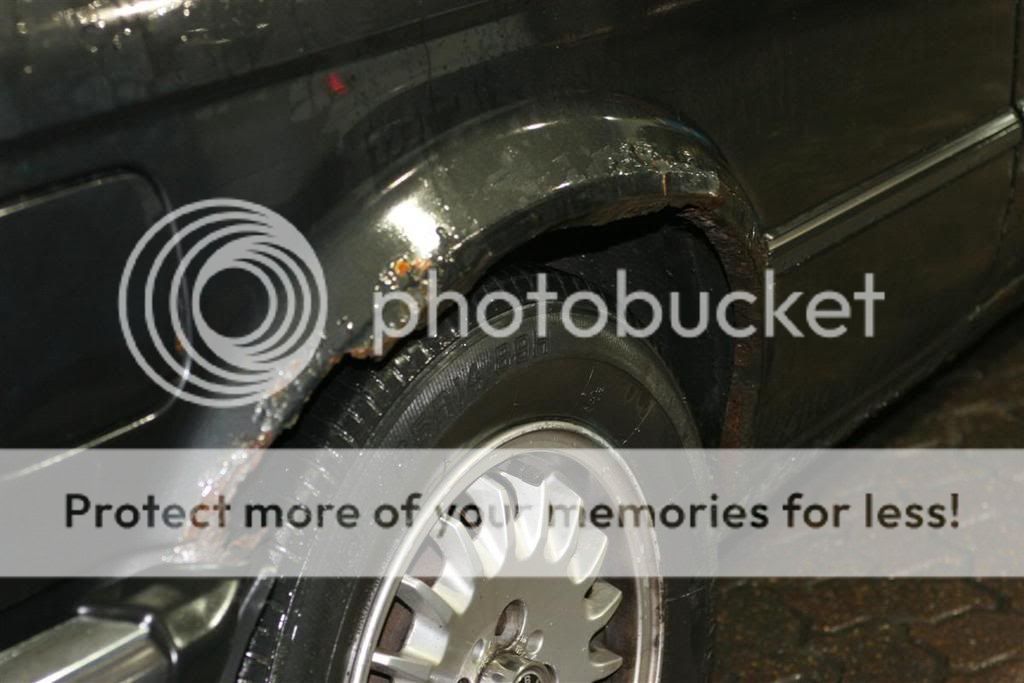
The bodywork is in pretty good condition but needed a little sorting. The wheelarch lips are starting to go:
And once I'd summoned up enough courage I took the rear cards out to see how the inner arches looked. The drivers side looked good, confidence was growing:
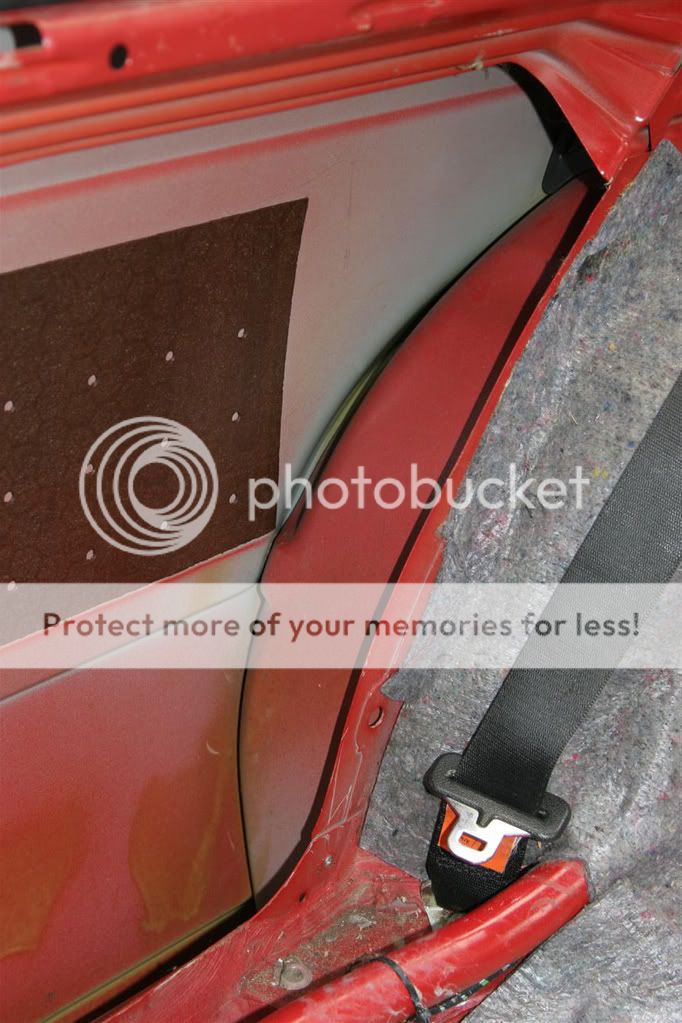
And then dissappeared again when I saw the passenger side inner arch:
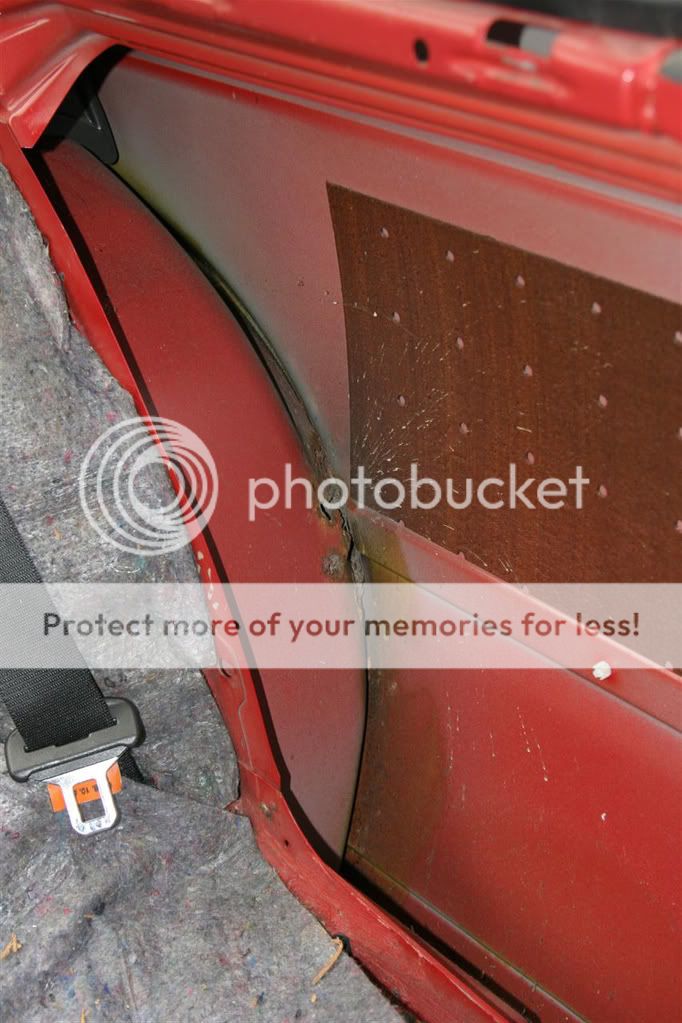
It is only a small hole though and it didn't look as if too much filth had got through into the car. It can be seen here from the outside. The rest of the passenger side inner arch looks ok:
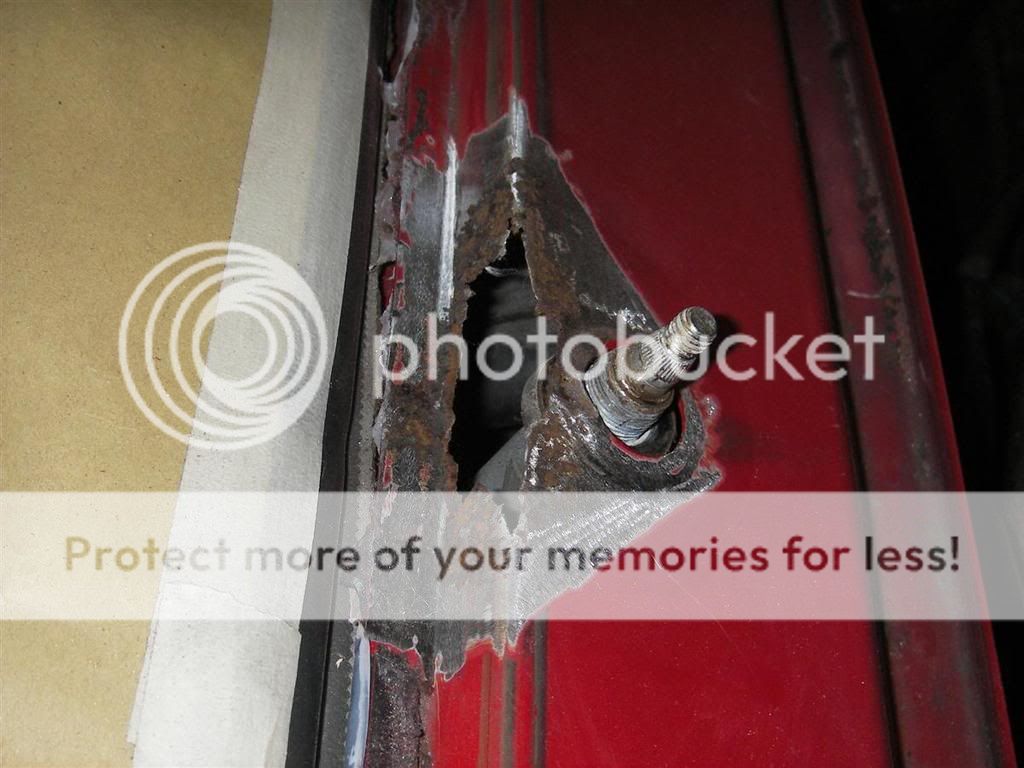
The front section of the inner drivers side dosesn't look too good though, I can move the bottom bit with my hand!
Although it's going to cost more than I paid for it I thought that for a chromie it's in pretty good nick and well worth saving. So I found myself a bodyshop and booked it in.
The bodyshop are going to take photos as the work progresses so hopefully I'll have a few of the work being done in the next few days...
Re: Chromie Resto and 325 Conversion
Posted: Tue Mar 03, 2009 10:25 pm
by bss325i
I didn't realise it had a B25 in there.

Re: Chromie Resto and 325 Conversion
Posted: Tue Mar 03, 2009 10:37 pm
by clarko74
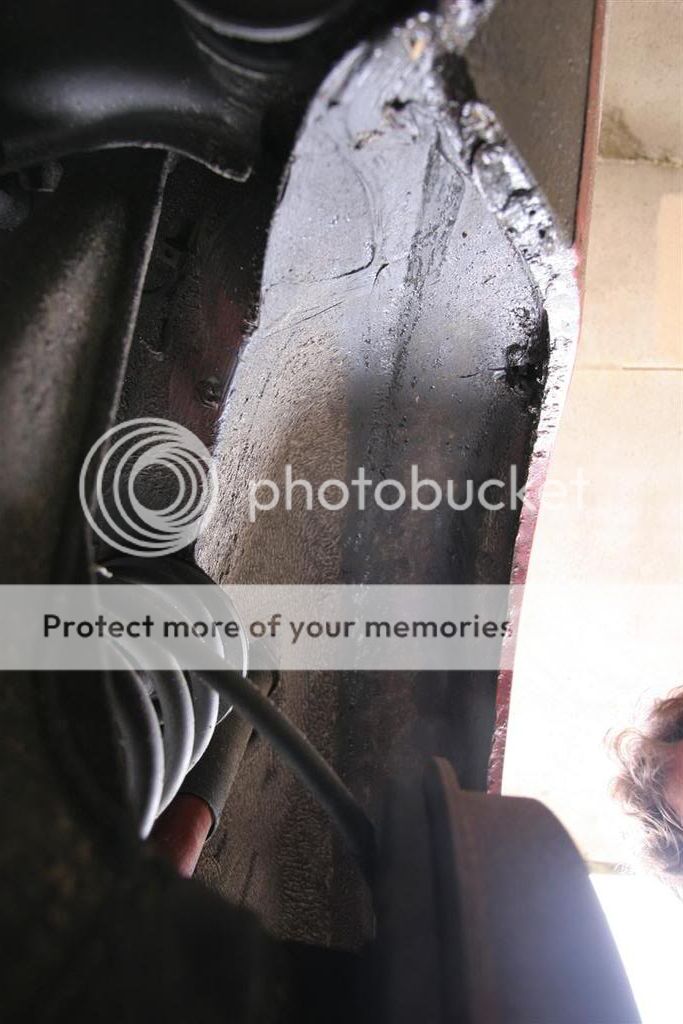
I popped in to the bodyshop a couple of days ago to see how it was going. They've stripped it down and uncovered rusty bits.
Apparently the boot was full of water but it is in surprisingly good condition:
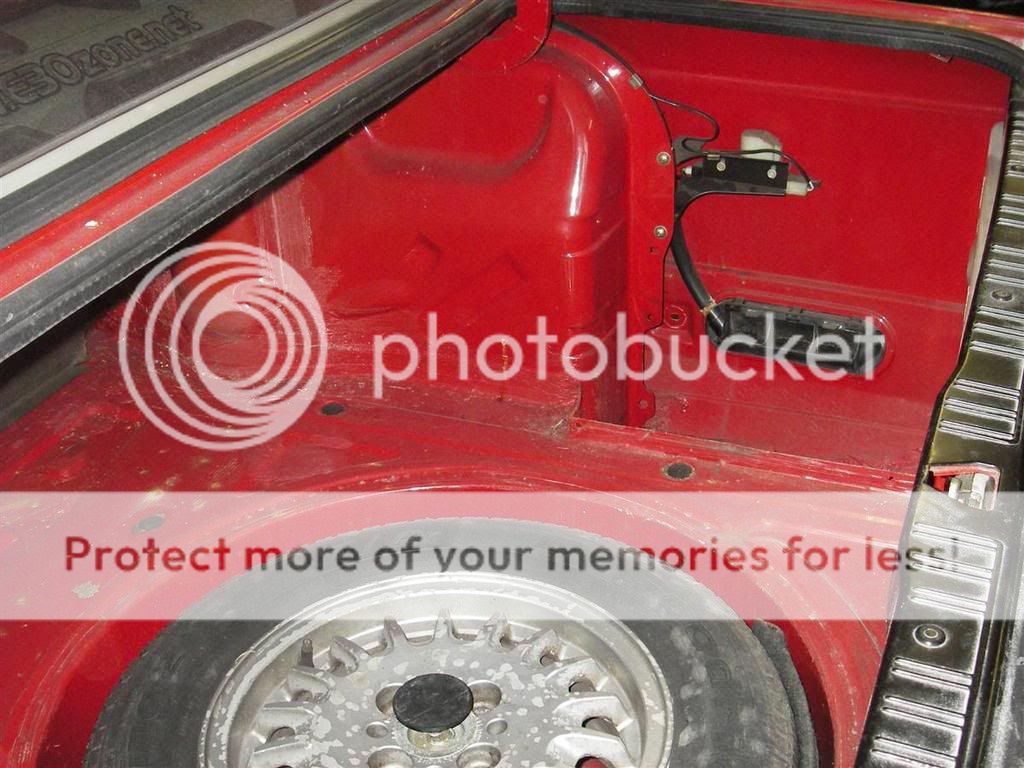

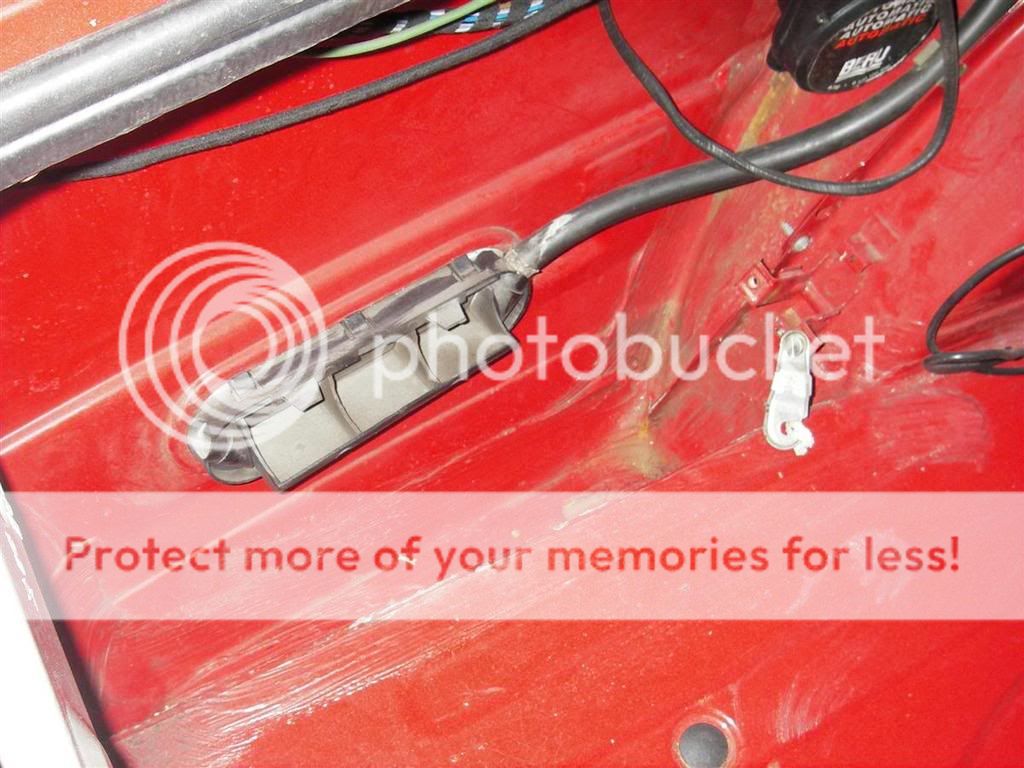
It took a few days days just dry out. They've since had a poke around and uncovered these bits at the rear:
the worst bit
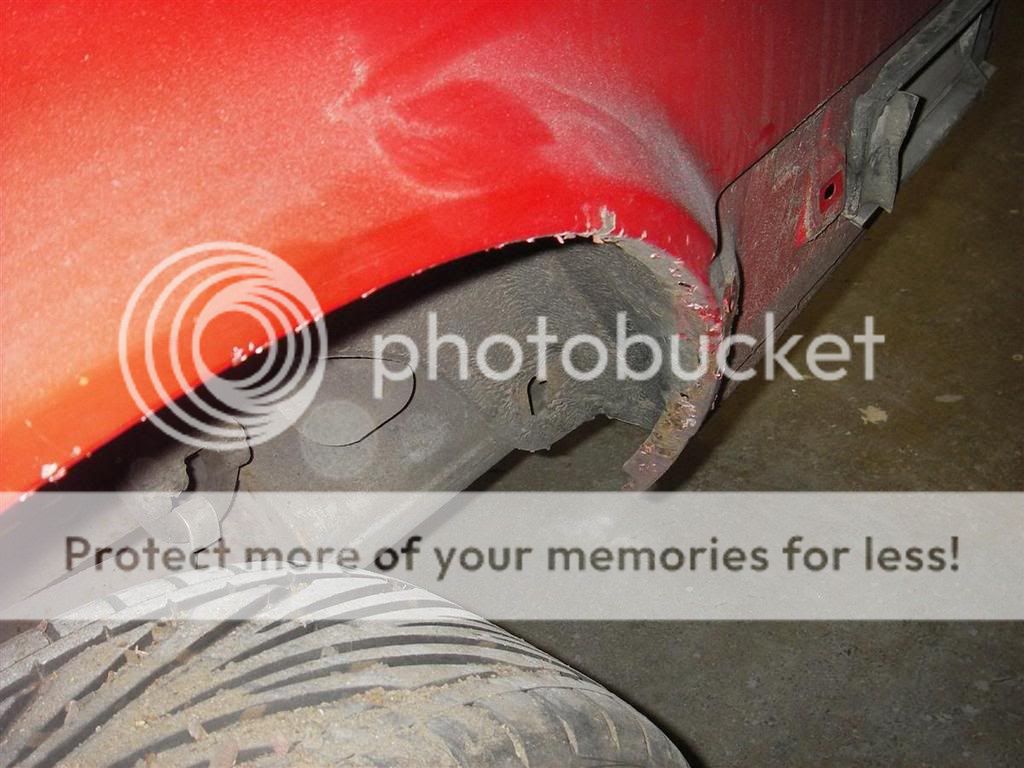
Wheel arch lips looking ragged:
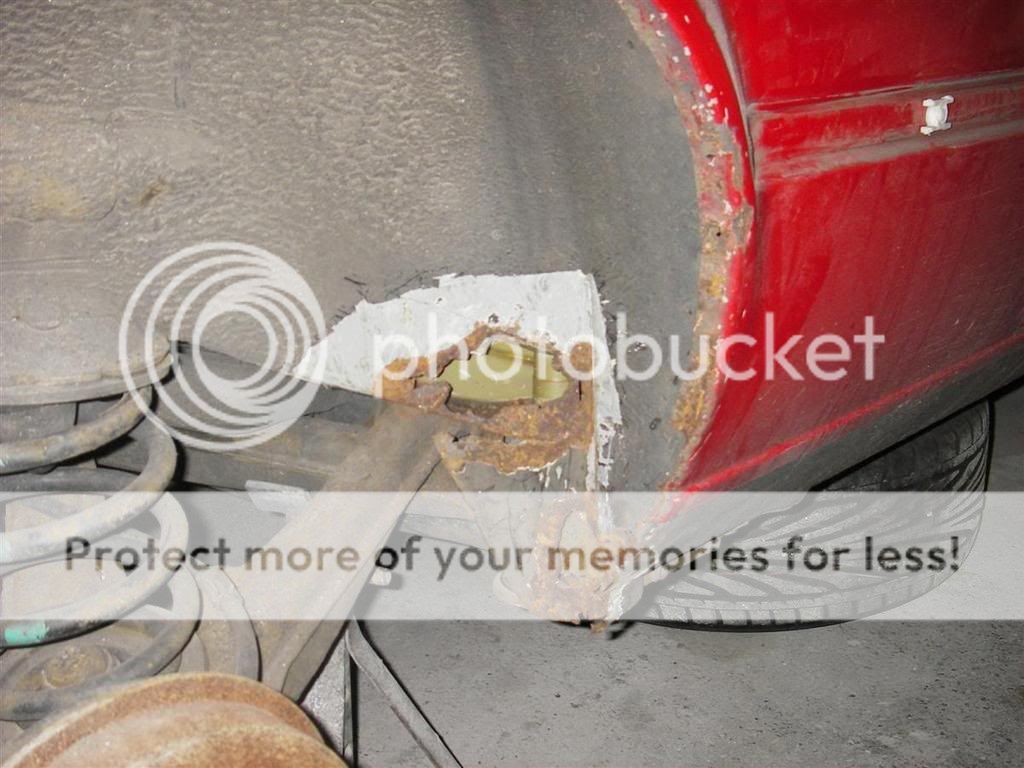
And an unpleasant legacy from the mudflaps (which are not going back on):

There's also a nasty hole between the windscreen and central wiper:
I'm heading back over there on Friday so should have an update then.
Re: Chromie Resto and 325 Conversion
Posted: Tue Mar 03, 2009 10:40 pm
by bss325i
Are you haveing the whole car painted?
Re: Chromie Resto and 325 Conversion
Posted: Tue Mar 03, 2009 10:47 pm
by clarko74
Yes indeed.
I've still got to '325' the back end of the car, but I've got pretty much everything to finish it off: rear disc conversion, lsd, braided brake lines, new bmw bushes, stuff for battery in boot.
Can't wait to get that lot on.
Re: Chromie Resto and 325 Conversion
Posted: Tue Mar 03, 2009 10:49 pm
by clarko74
sorry that 'yes indeed' was to your b25 comment Barry.
No, I'm not getting the whole car resprayed, I should do really but can't afford it at the moment.
Re: Chromie Resto and 325 Conversion
Posted: Fri Mar 20, 2009 9:22 am
by clarko74
It's been a while but things are happening! I popped in to the bodyshop last night the see how it's going. Steve in the bodyshop has taken photos of the work as it progresses so there will be a load more soon but here are a couple of dodgy phone photos that I took last night:
Passenger side rear arch is been cut back with the new one ready to be welded on (rusty drums are soon to be replaced with shiny discs):
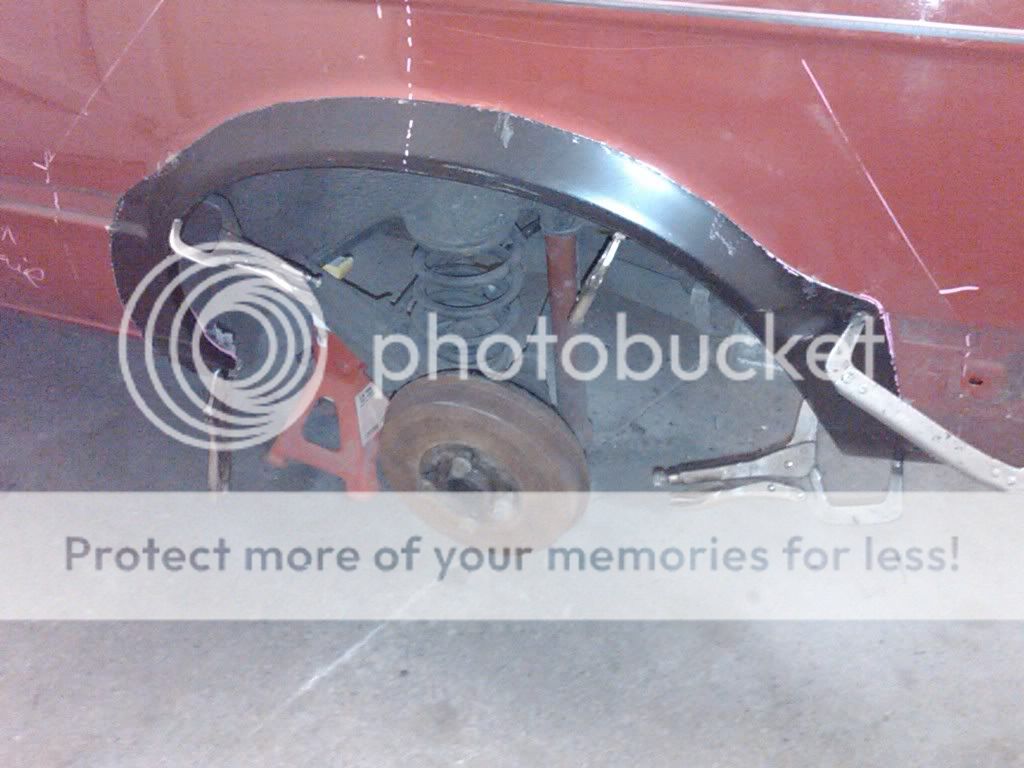
Driver's side arch is welded up and ready for finishing:
There were also a couple of bits required on the inner arch:
Really looking forward to getting it back now, although since it's been in the corner of the workshop for a few weeks quite a large pool of oil has appeared under the engine that I will have to investigate and sort out.
Re: Chromie Resto and 325 Conversion
Posted: Fri Mar 20, 2009 9:39 am
by jbh
good progress going on there. cant wait till mines is at the putting back together stage its at the strip down and find the rust one at the moment

Re: Chromie Resto and 325 Conversion
Posted: Fri Mar 20, 2009 10:58 am
by capri_rob
I Like this car and this thread. The wheelarches look in similar condition to the ones on my car ( needs repairs to inner and new outers ).
Like the MiMs too
Re: Chromie Resto and 325 Conversion
Posted: Sun Mar 22, 2009 9:20 am
by Baz666
lookin good fella nice work going on there...just got myself a mic welder to give this sort of thing ago.

Re: Chromie Resto and 325 Conversion
Posted: Mon Mar 23, 2009 1:15 pm
by clarko74
Cheers for the comments. Seeing this work being done in the bodyshop makes me want to learn how to weld, I'd love to be able to do this sort of thing myself.
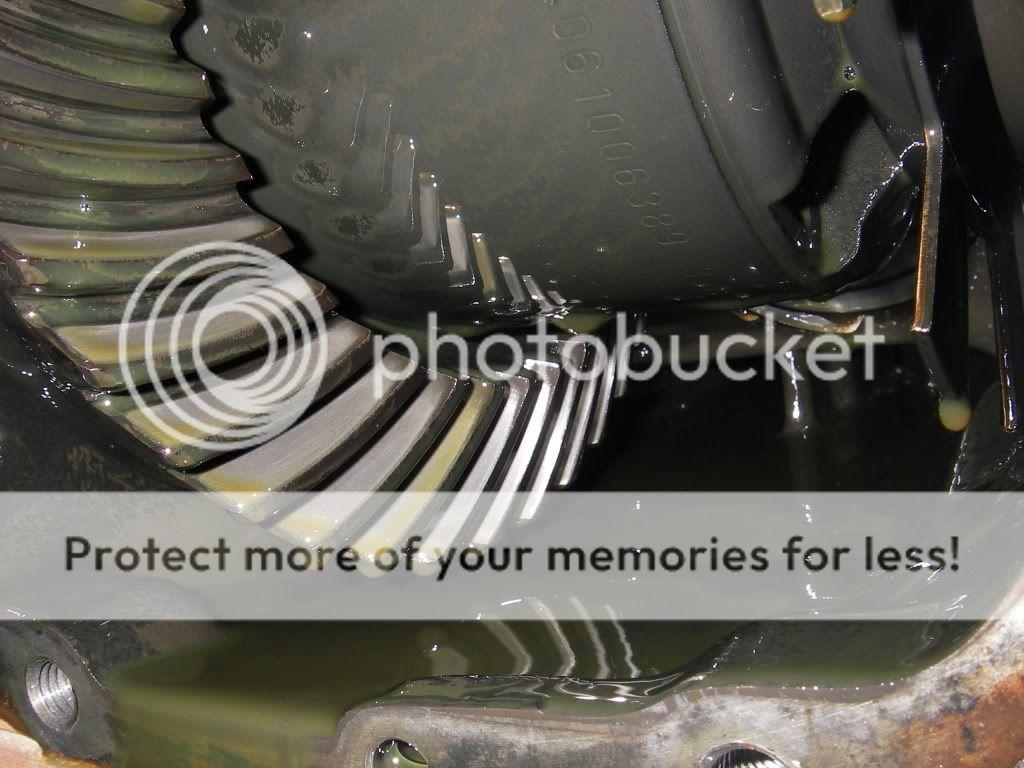
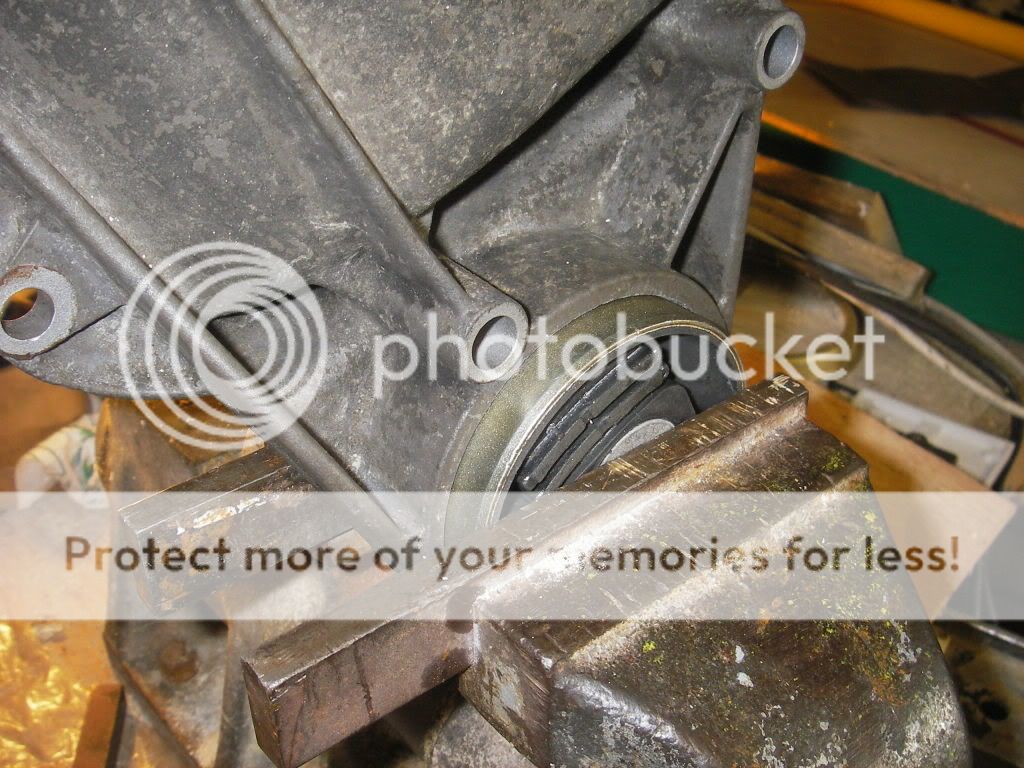
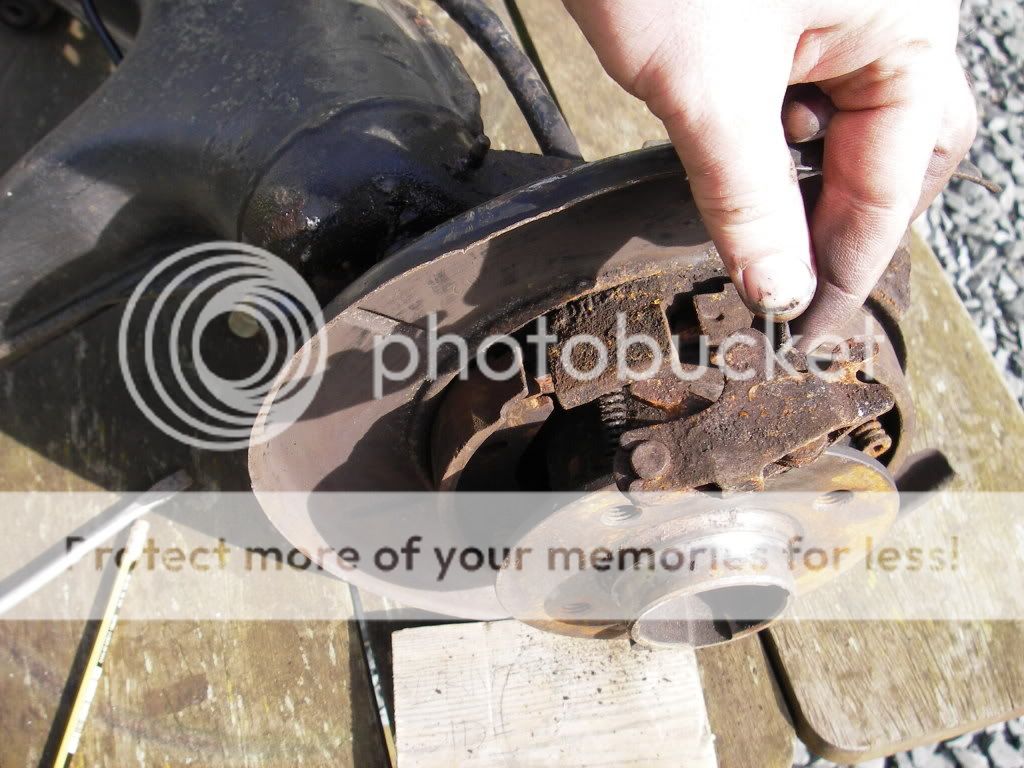
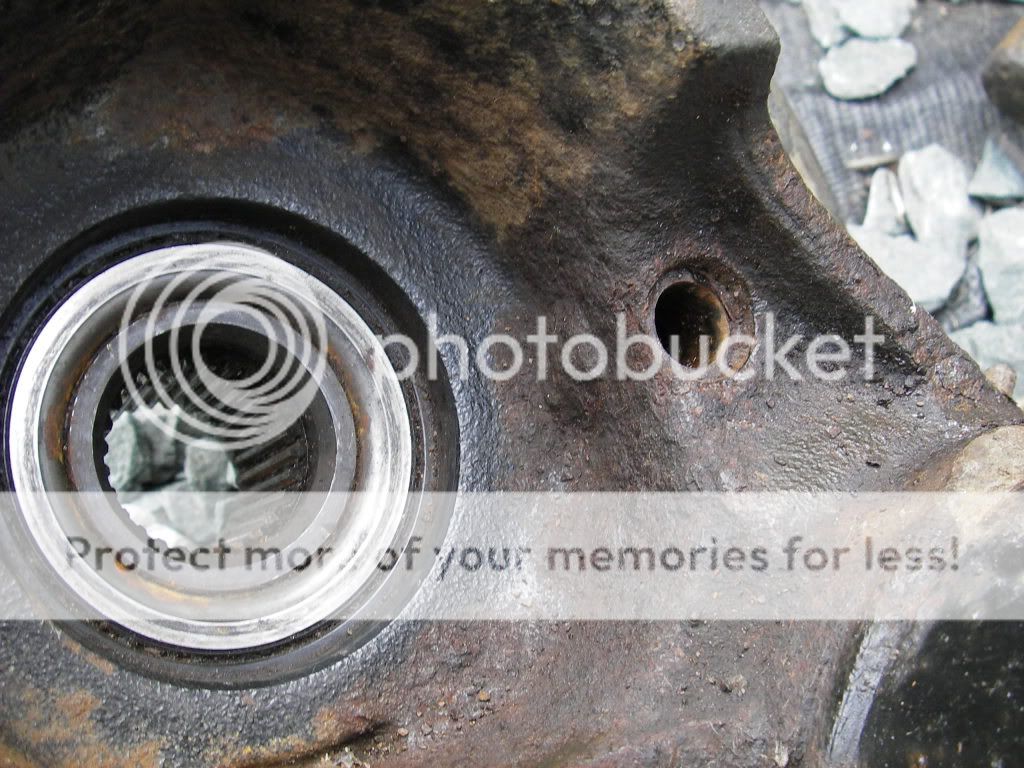
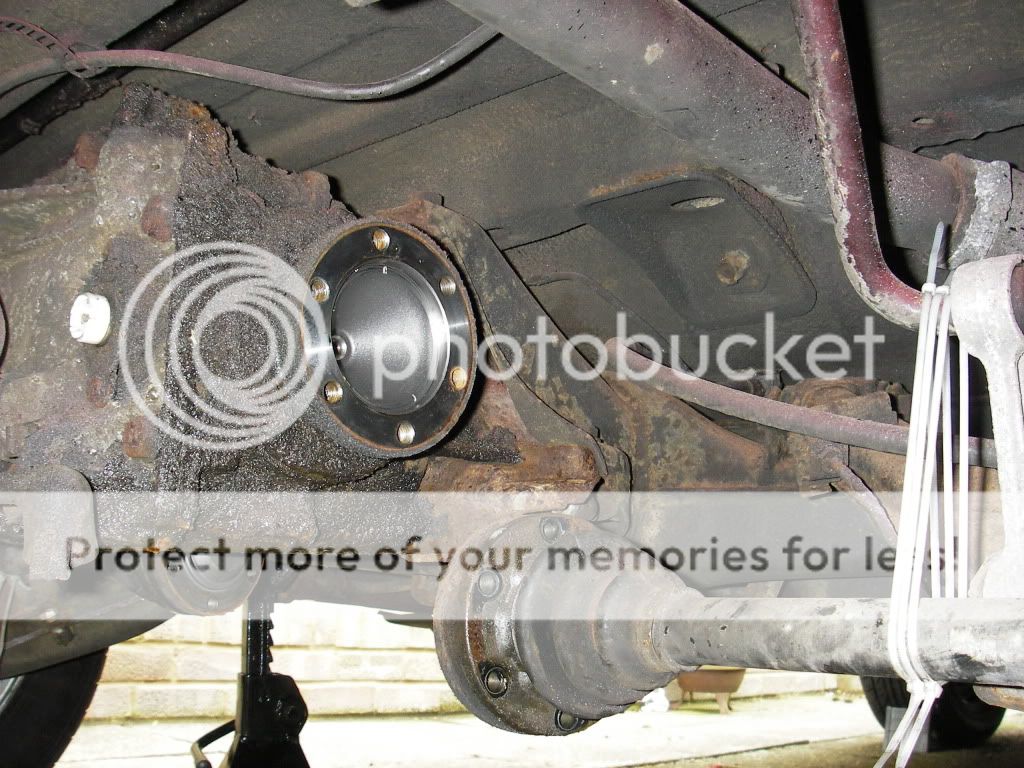
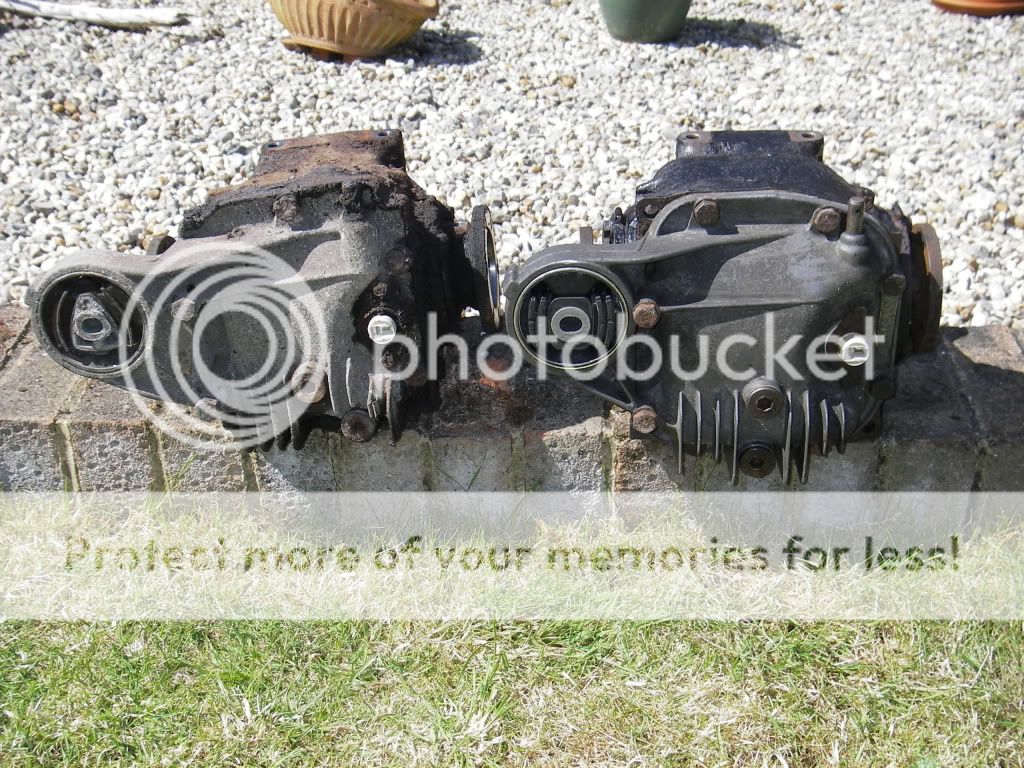
While it's in the bodyshop I thought I'd get a few of the bits that I've been collecting ready to put on. My recently acquired diff needed a new bush so I got to work on that, I didn't realise how big the bits inside the diff were, very impressive stuff:
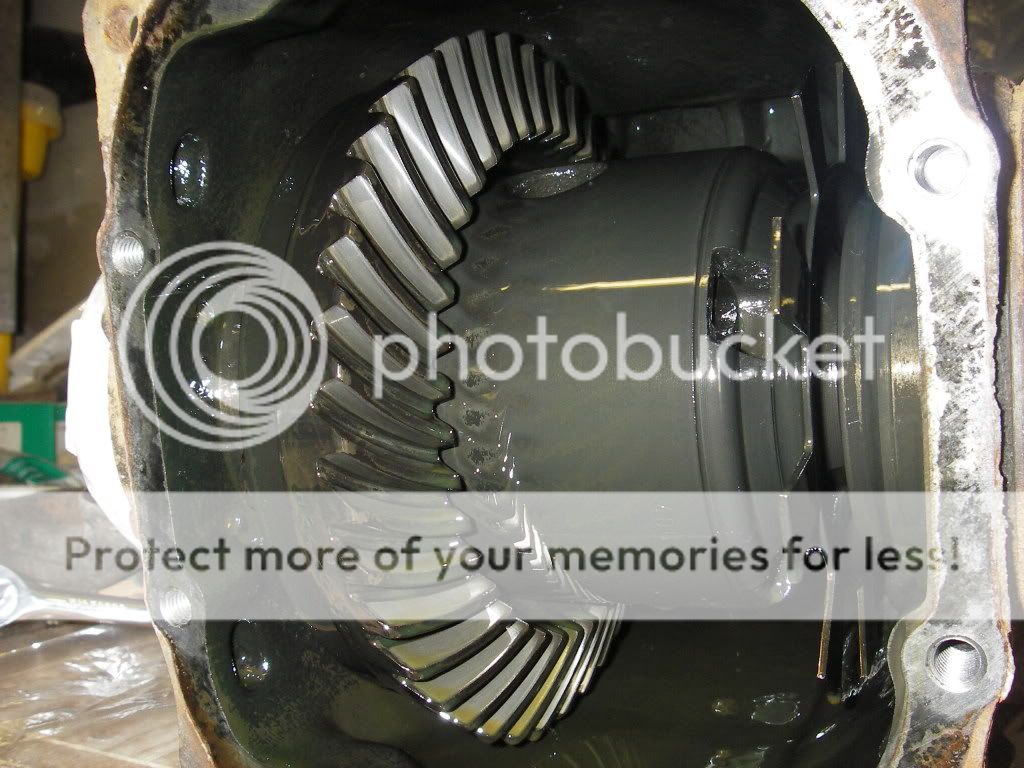
The bits on the right confused me for a few minutes until I realised that they are what the sensor reads for the speedo.
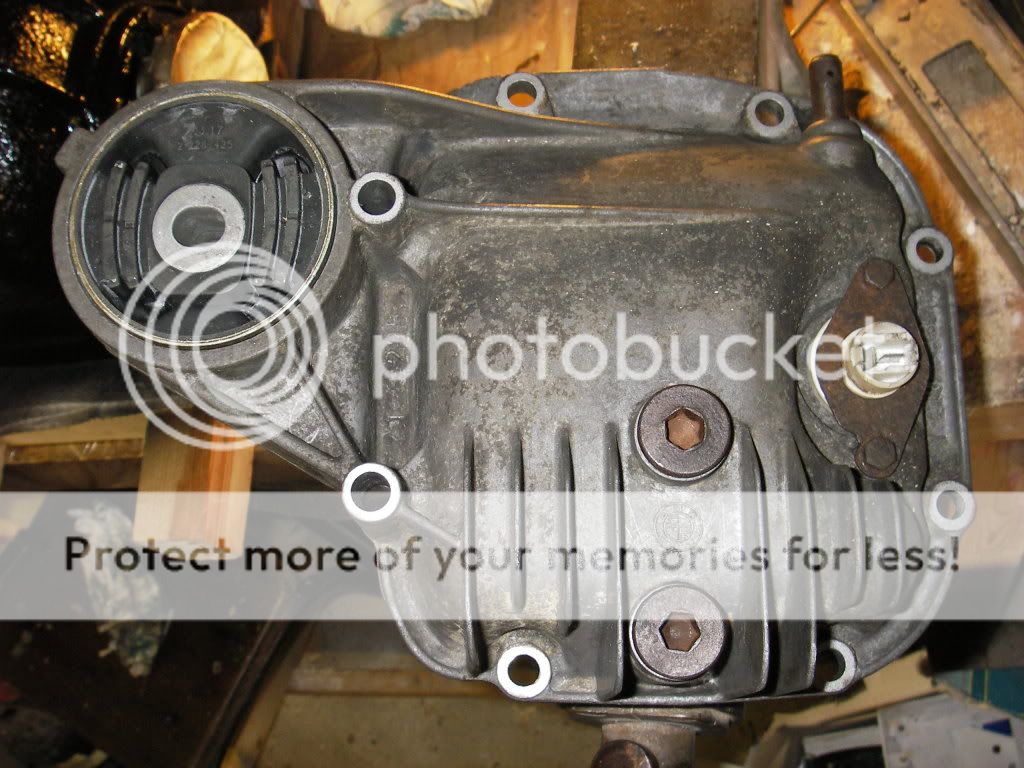
Once the backplate was off pushing the new z3m bush in was quite straightforward:
Bush all done (I really hope it's not upside down!?) and backplate after a load of scrubbing:
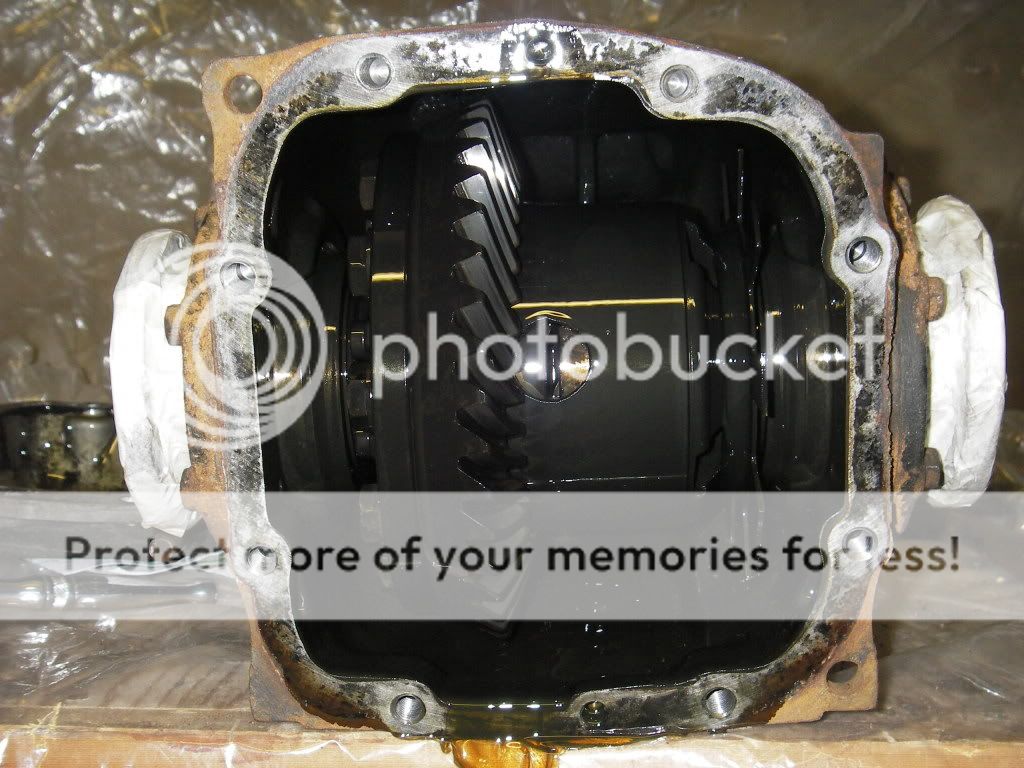
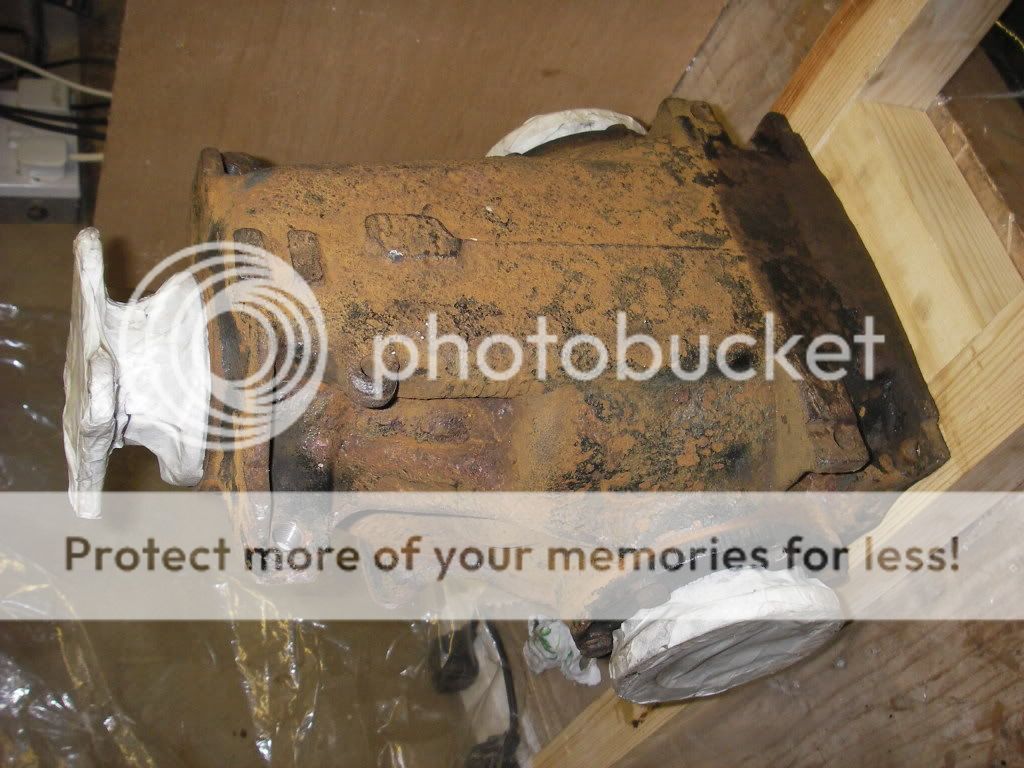
I thought I'd give the diff a lick of paint too as it looked like a small meteorite. So it went from this:
To this:
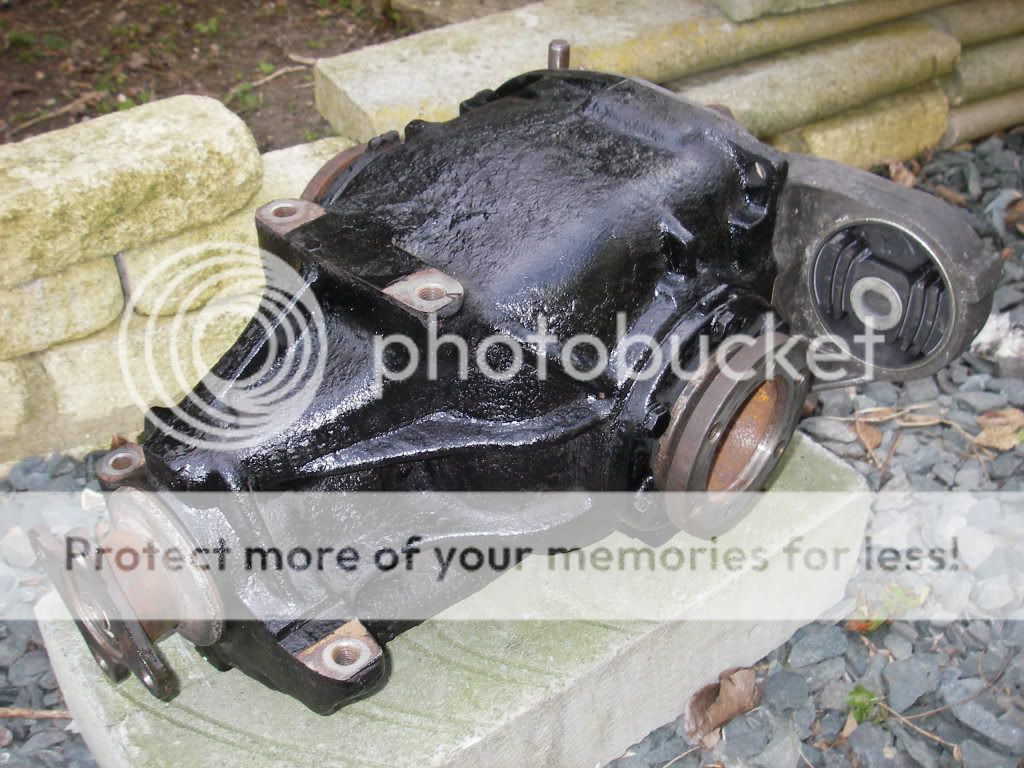
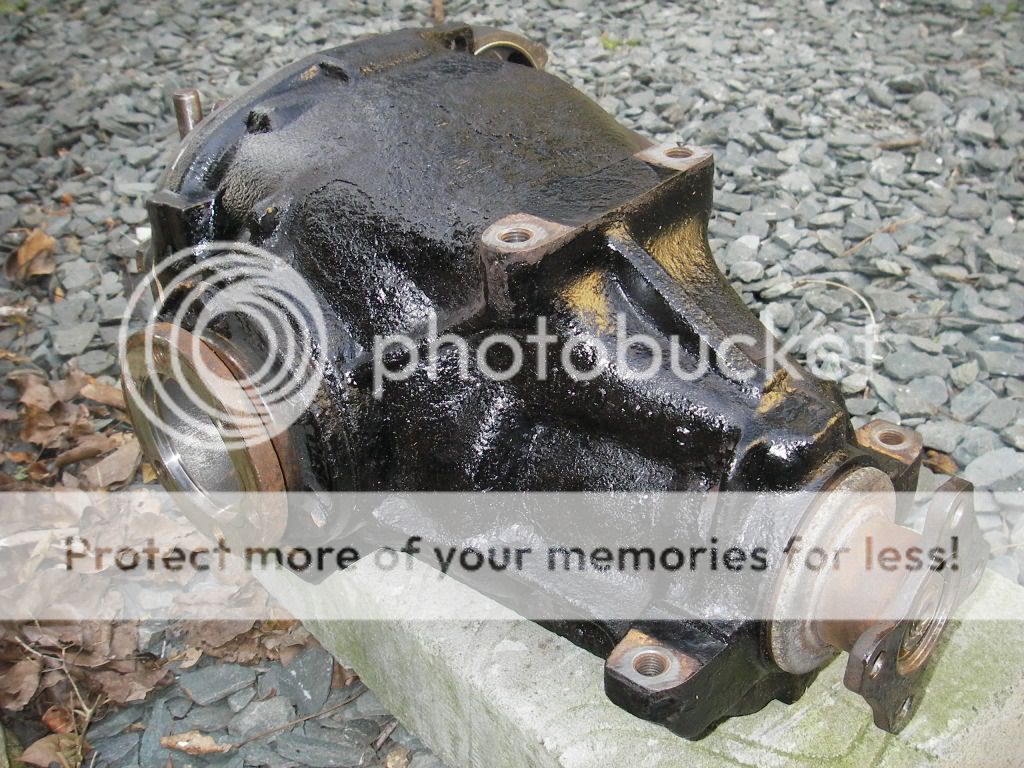
Much better, I can pick it up now without getting covered in rust, which is nice.
Re: Chromie Resto and 325 Conversion
Posted: Mon Mar 23, 2009 1:27 pm
by clarko74
I also had a go at the trailing arms, I'd read that getting old handbrake cables out could be a b*tch of a job so was expecting the worst, but it wasn't too bad in the end.
First of all I removed the inner cables:
Then after a soak in wd40 I used a metal rod through a wheel nut hole to whack the end of the outer cables out from the inside:
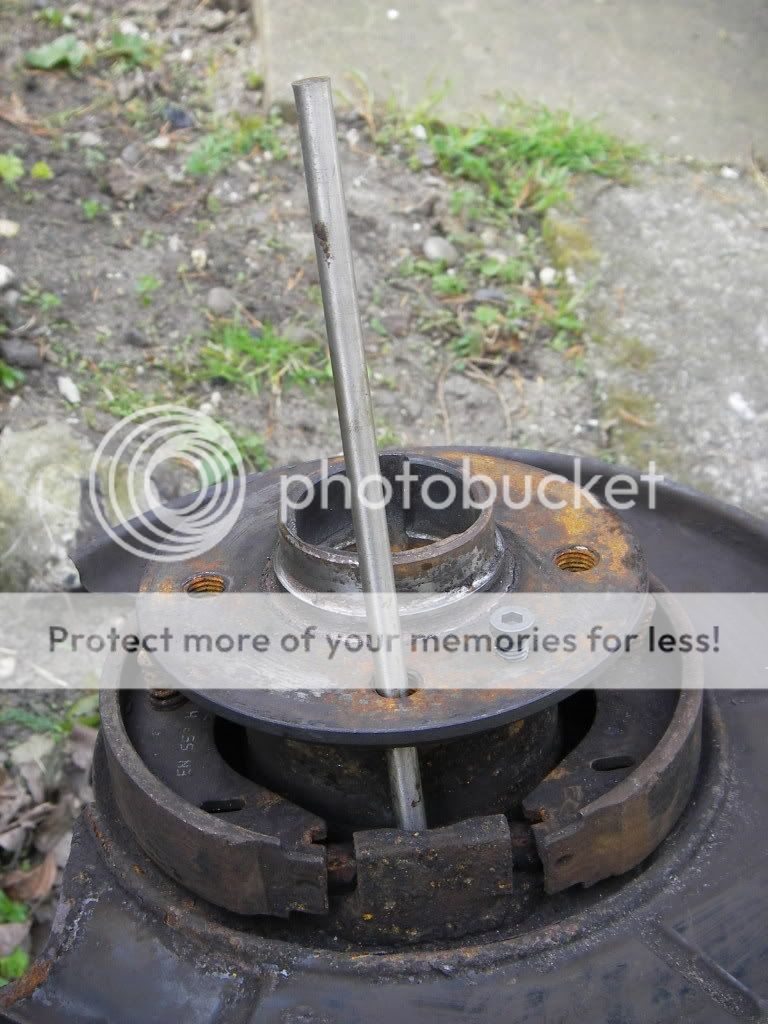
Here are the little buggers:
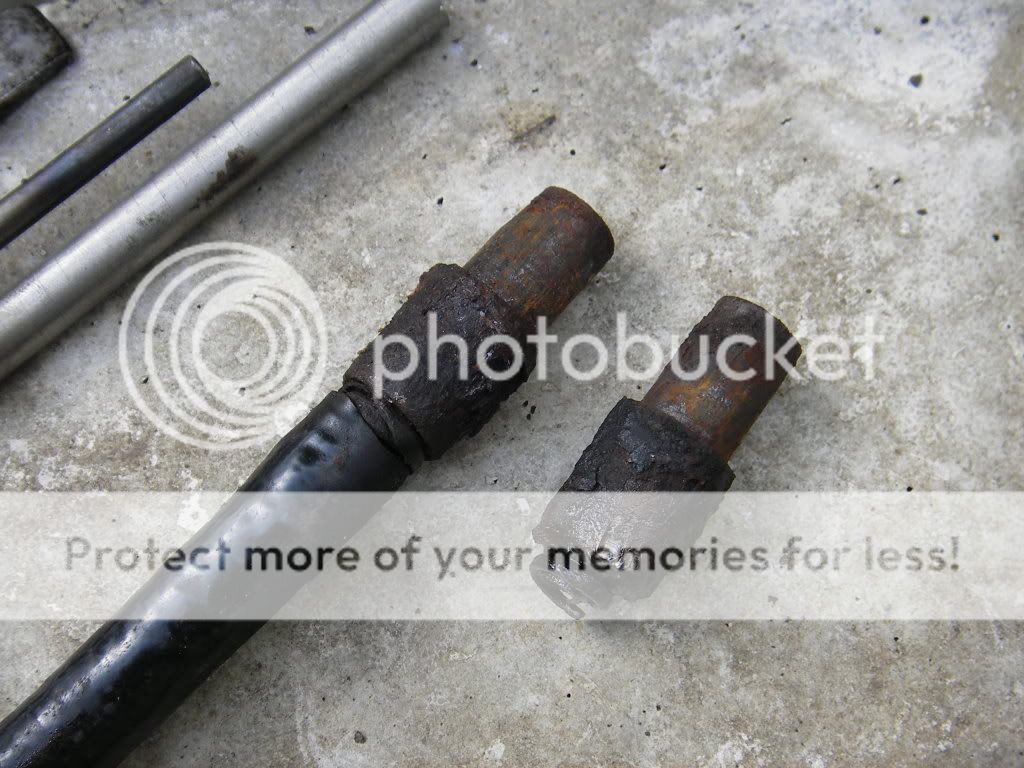
and their old home:
Just need to do the trailing arm bushes and then the new rear sub frame, arms and diff are pretty much ready to go on.
Re: Chromie Resto and 325 Conversion
Posted: Mon Mar 23, 2009 5:40 pm
by CourtM3
Nice progress!
Posted: Sun Apr 12, 2009 3:07 pm
by clarko74
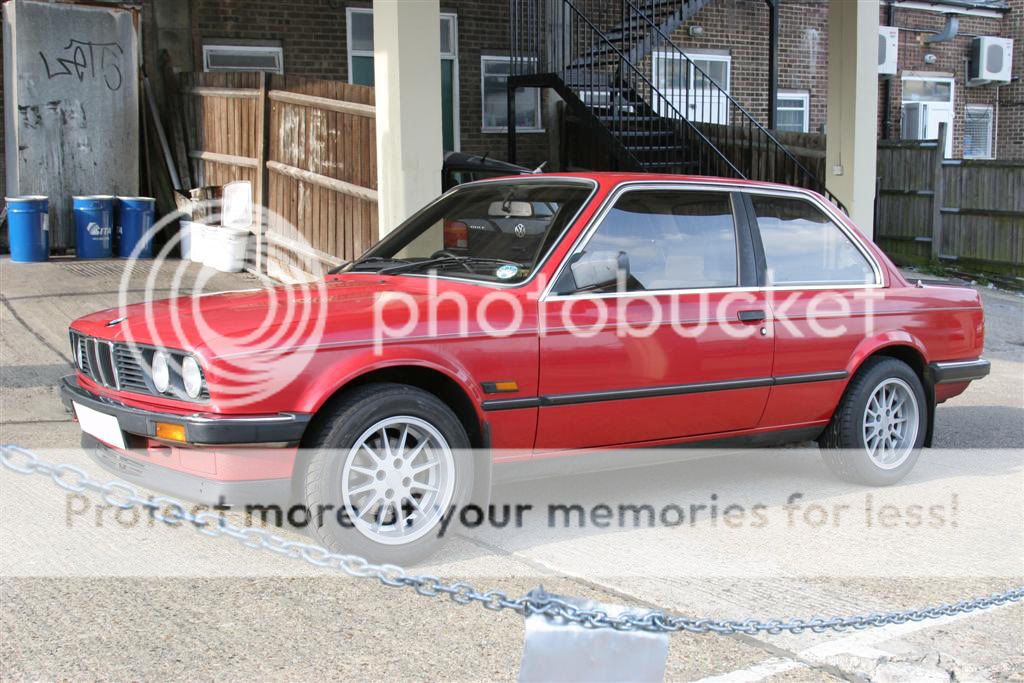
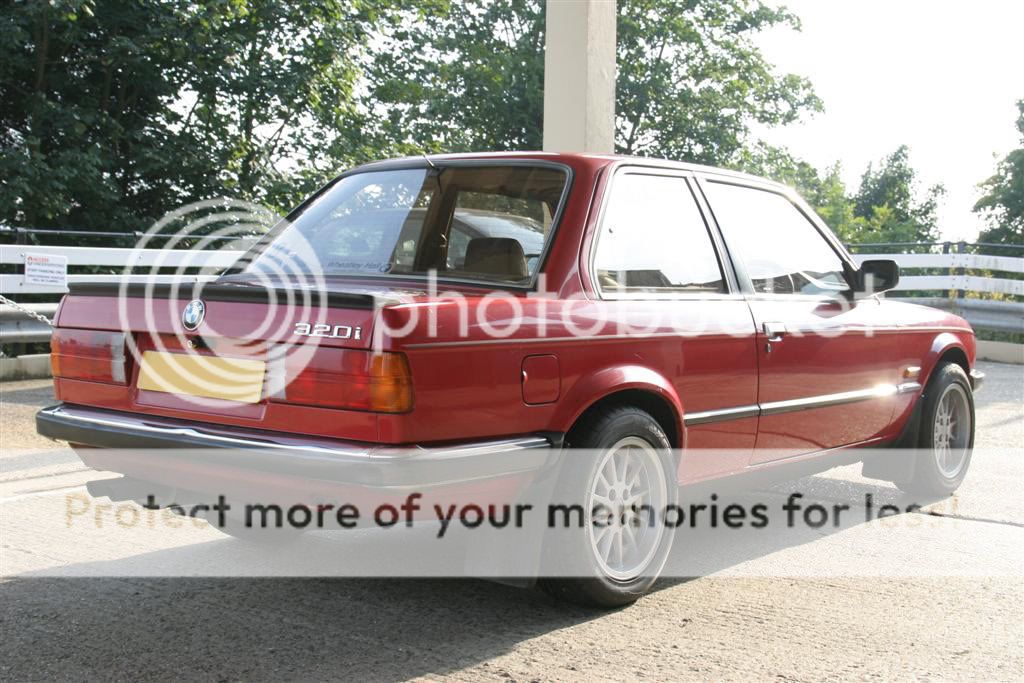
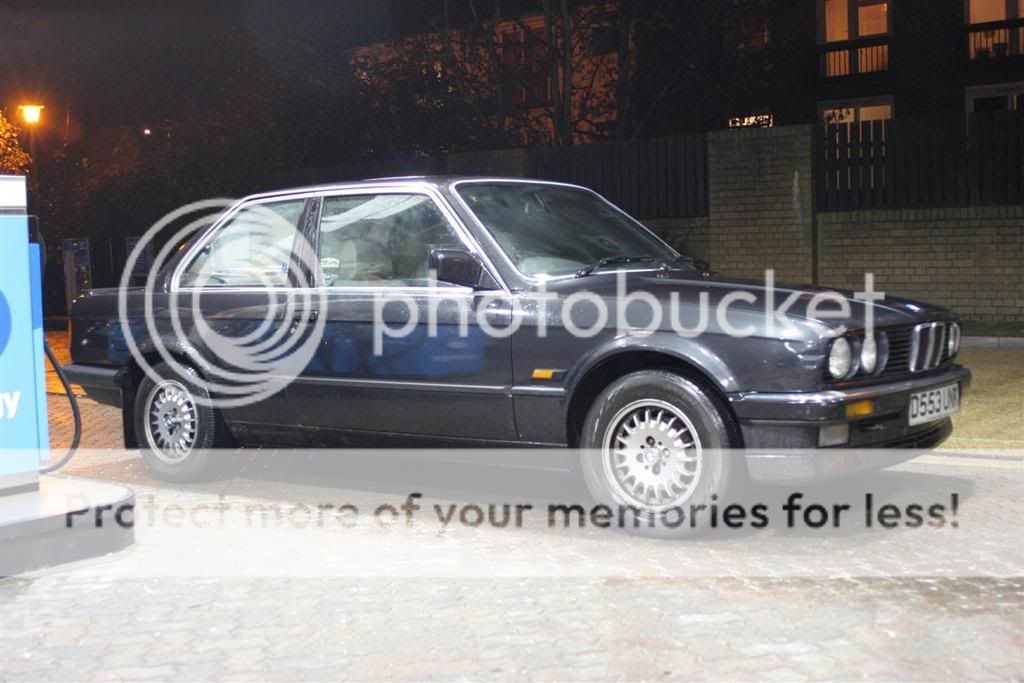
Right, I've finally got my e30 back from the bodyshop, It took a bit longer than expected as I told them I wasn't in a hurry for it and I took it on just after all the snow so they were up to their eyes with insurance jobs. They have done a top job though, I'm well pleased with the result. Conditions haven't been great over the past few days but I popped out this morning and took a few pics:


The new paint is very slightly lighter than original, it seems to show more in overcast conditions, I didn't notice it when it was brighter. I'm planning to get the rest of the car painted in stages as I can afford it so I'm not too worried.
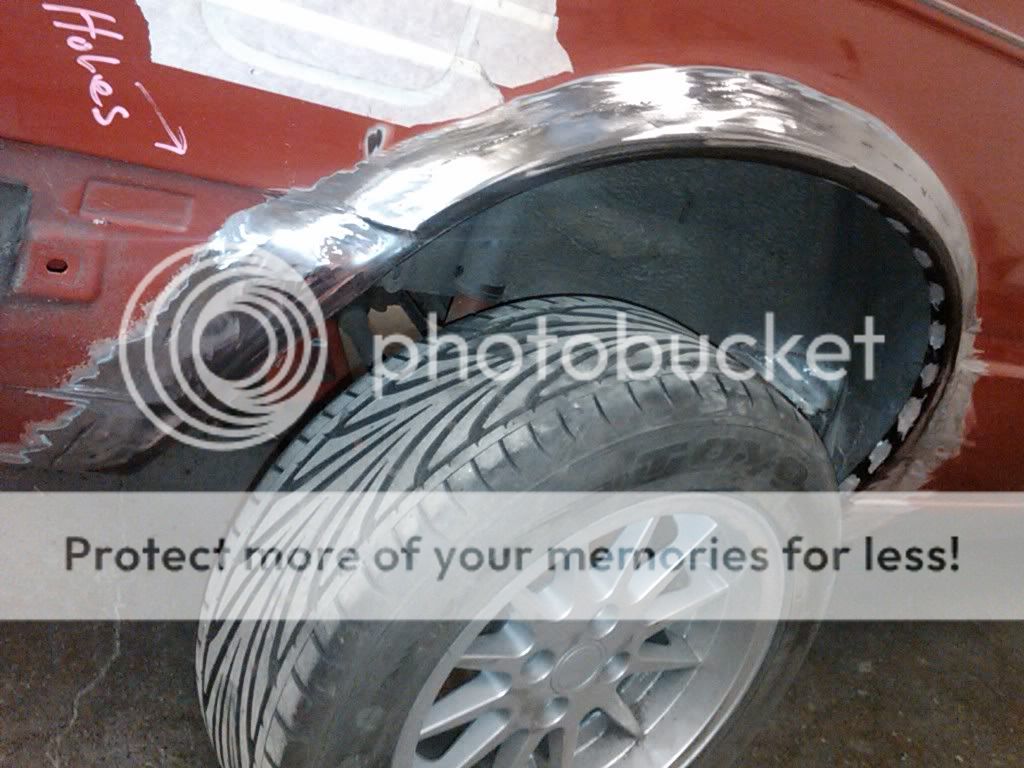
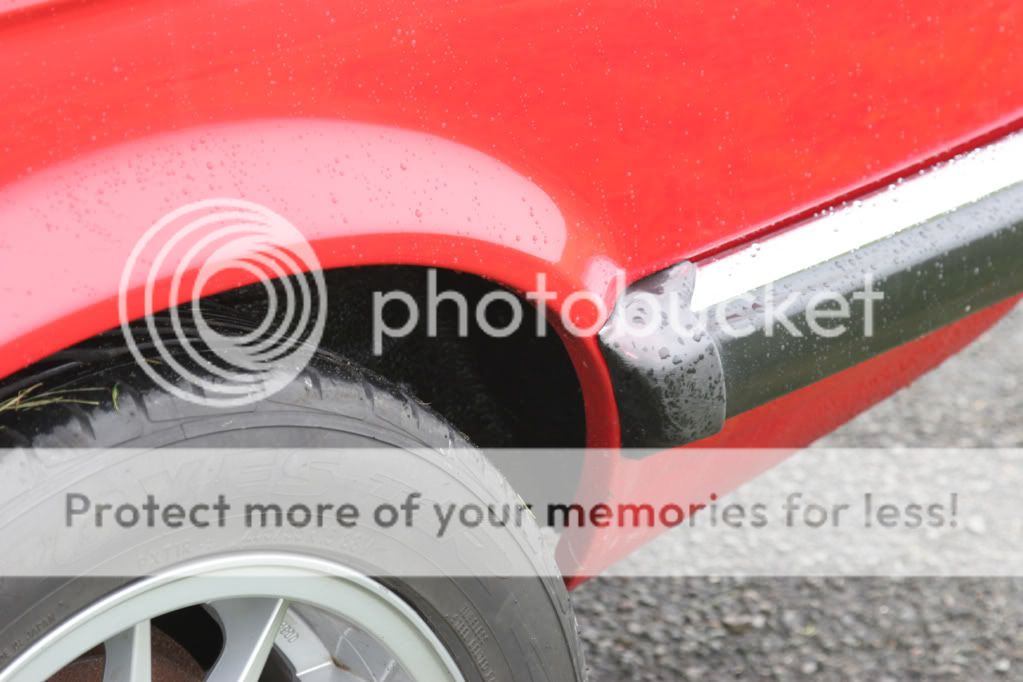
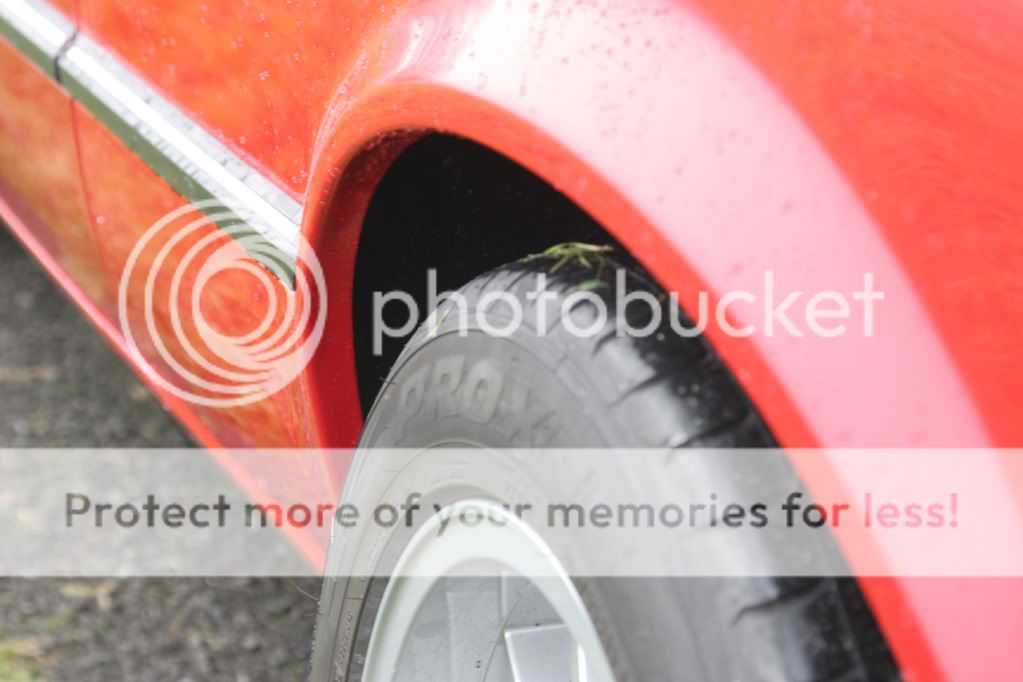
Here are a few details of the new arches, can't quite believe I now own an e30 that doesn't have rusty rear arches!
I'll be posting up a load more in progress shots soon but I have yet to get them of the bodyshop.
I've been collecting quite a few morsels while it's been away, so now all I have to do fit the following:
- rear beam
disc trailing arms
lsd
rear brake lines
zender steering wheel
map light mirror
obc
That should keep me busy for a few weekends...
Re:
Posted: Sun Apr 12, 2009 3:34 pm
by aj_mckay
looks fantastic.
Re:
Posted: Sun Apr 12, 2009 4:14 pm
by Blitz
Wow!
Re:
Posted: Sun Apr 12, 2009 8:16 pm
by bss325i
Nice work there Adrian.
Re:
Posted: Sun Apr 12, 2009 8:41 pm
by clarko74
Cheers for the comments fellas, I'm well chuffed with it.
Re:
Posted: Sun Apr 12, 2009 8:42 pm
by Ollie_bwoii
AWESOME! Loving the chromie rescue! Great Job!
Out of interest was the black one a 2dr or 4dr?????
Re:
Posted: Sun Apr 12, 2009 9:22 pm
by clarko74
it was a 2 door. I used to prefer the diamond black but the zinnoberrot is really growing on me now, especially now it's had a proper polish. The photos don't do it justice but it's a beautiful deep red. I'll get some more done when the sun comes out...
Here's a shot of the black one for you Ollie (one of the few I have), it went really well but the body was to far gone to save it
Check out the arches on it!
Re:
Posted: Sun Apr 12, 2009 10:02 pm
by E30Gheko
This looks like a cracking motor now! Nice one! They made a nice job in the body shop eh? Lovin those wheels too fella. I bet ur on cloud 9 now!
Defo needs a coat of paint on the rest though eh?
Red is one of the hardest colours to blend unfortunately due to it's fading properties. It all looks very clean though, an impressive shell for a chromie.

Re:
Posted: Sun Apr 12, 2009 10:48 pm
by Ollie_bwoii
WOW those arches are awful! Although black chromies are awesome!
Re:
Posted: Mon Apr 13, 2009 11:09 am
by aj_mckay
What sort of ball park figure did the bodyshop charge for the work if you don't mind me asking?
Re:
Posted: Mon Apr 13, 2009 12:33 pm
by cliffybabe
Nice pics, where they taken at the downs???
Re:
Posted: Mon Apr 13, 2009 1:01 pm
by clarko74
Rear arches were £250-300 per side and the repair to the windscreen was around £150. Quite reasonable I thought considering the amount of work that goes into this kind of repair.
Yeah Cliffy, the photos were taken at Riddlesdown in the fog yesterday. By the way don't sell your cab.
Re:
Posted: Mon Apr 13, 2009 5:15 pm
by Alex
awsome looks
very nice

needs some bmw badges on them mims

Posted: Mon Apr 13, 2009 5:22 pm
by darkchild
A really good and interesting read. Good work!
Re:
Posted: Mon Apr 13, 2009 5:46 pm
by clarko74
Cheers.
You're right Alex, it does need bmw badges on the wheels, does anyone know where I can get them or which ones will fit?
Re:
Posted: Mon Apr 13, 2009 5:50 pm
by aj_mckay
Measure them and get some off ebay - there are badges of all different sizes on there, perfect for this sort of thing.
Re:
Posted: Mon Apr 13, 2009 6:02 pm
by Alex
^^^^ what he said

Re:
Posted: Tue Apr 14, 2009 4:00 am
by SUMPCRACKER
I really like this car, a propper E30.
Re:
Posted: Mon May 18, 2009 1:34 am
by clarko74
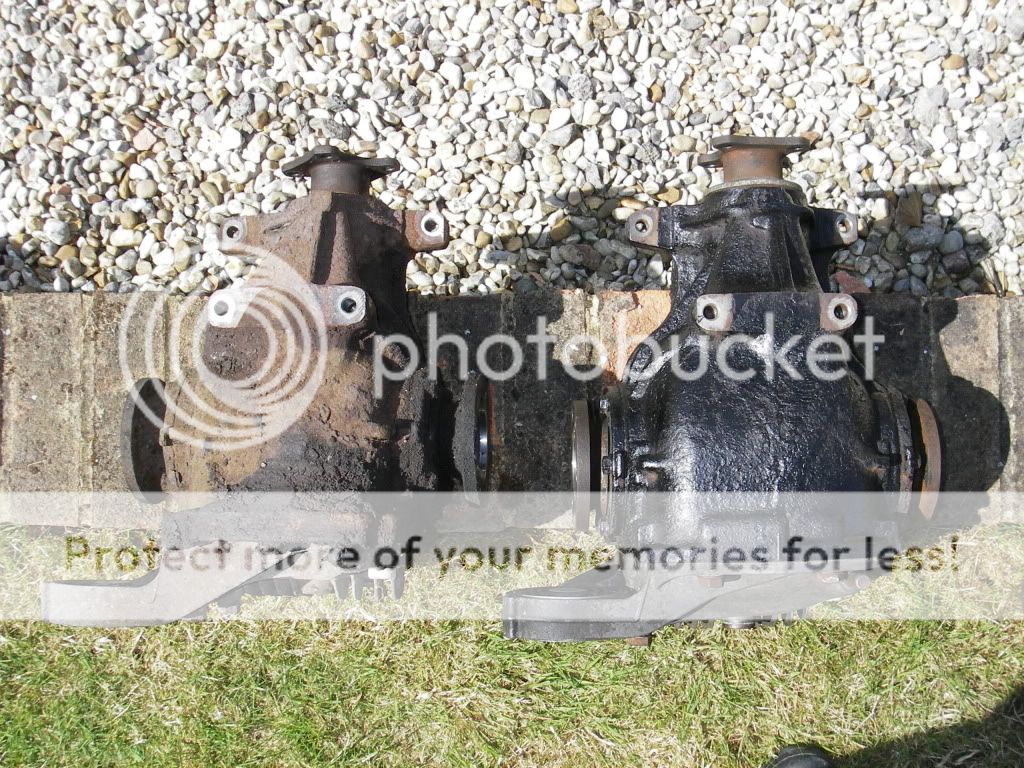
Right, it's been a while but I had a spare day over the weekend so did a bit of work. My plan was to replace the rear sub frame; do the rear disc conversion; put the new diff in and do all the brake lines all in one go, but I think I'll need a whole weekend to get this done so I just did the diff as I only had saturday free. I realise it'll have to come off again when I do the sub frame but I've had it lying around for a while now and just wanted to get it on and have a decent ratio (3.64) rather than the small case one (4.20) that it's replacing. The new one's an lsd too, which is nice.
Anyway, it was a nice day on saturday and it all went rather well, after reading a bit about diff swaps I was expecting it to be a bit of a nightmare job but it wasn't too bad.
I'd heard that getting the allen bolts on the driveshafts of can be tricky as it's easy to round off the heads.

I gave the bolts a good clean with a wire brush then an allen socket and breaker bar made it fairly easy, I had to take the exhaust off as I had to adjust the prop length because I was going from small to medium case diff so access was good.
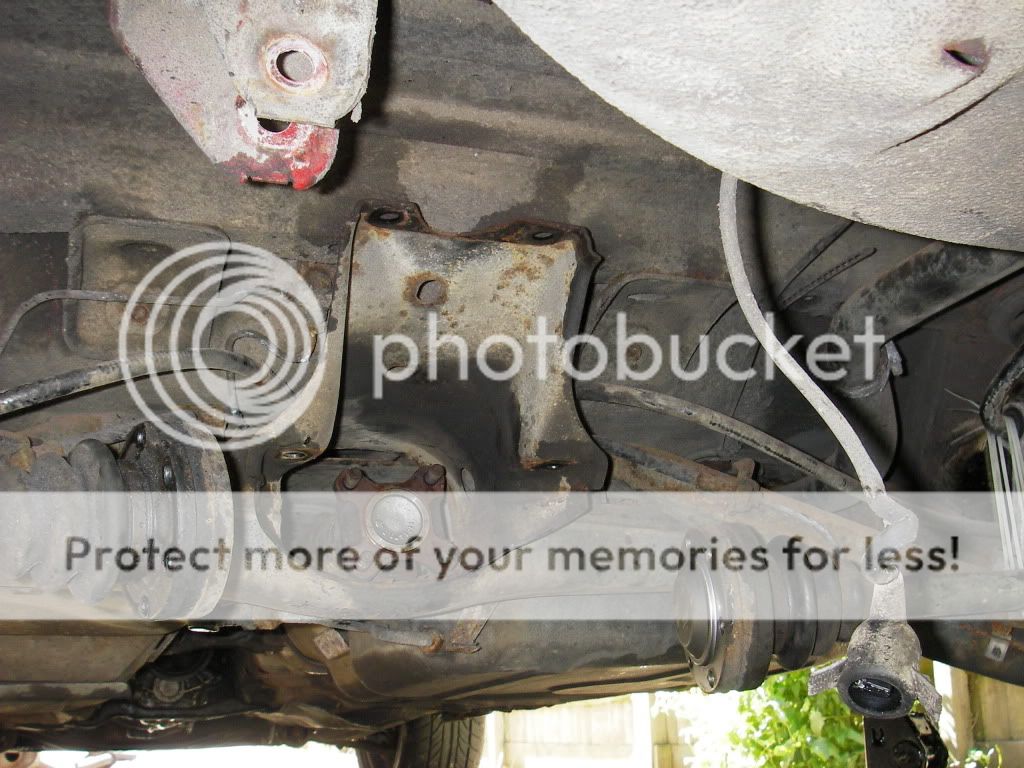
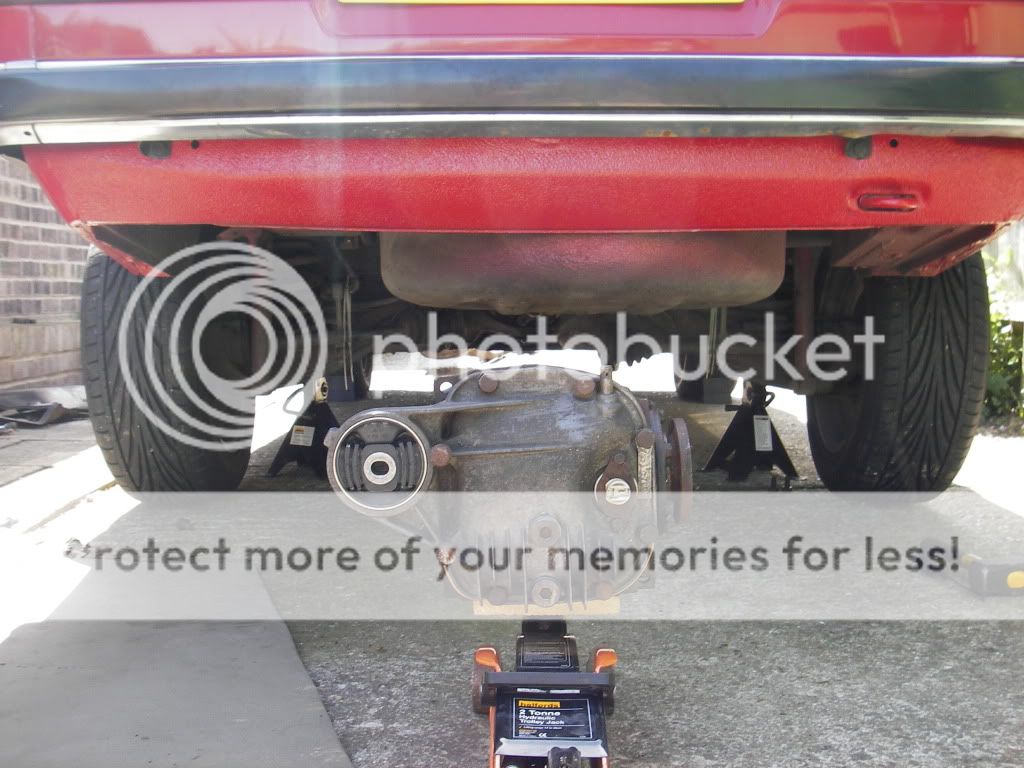
The 4 bolts holding the diff to the sub frame were very tight but a bit of wd40 and the old 2 spanners joined together trick for extra leverage and they were off, here's the diff balancing precariously as it's lowered on my cheap small jack.

And the car sans diff.
Small and medium case diff.
Here's the lsd ready for installation, it's a bit scary balancing 40kg of diff on a jack then having to roll it over a rough concrete drive but I managed without any drama.
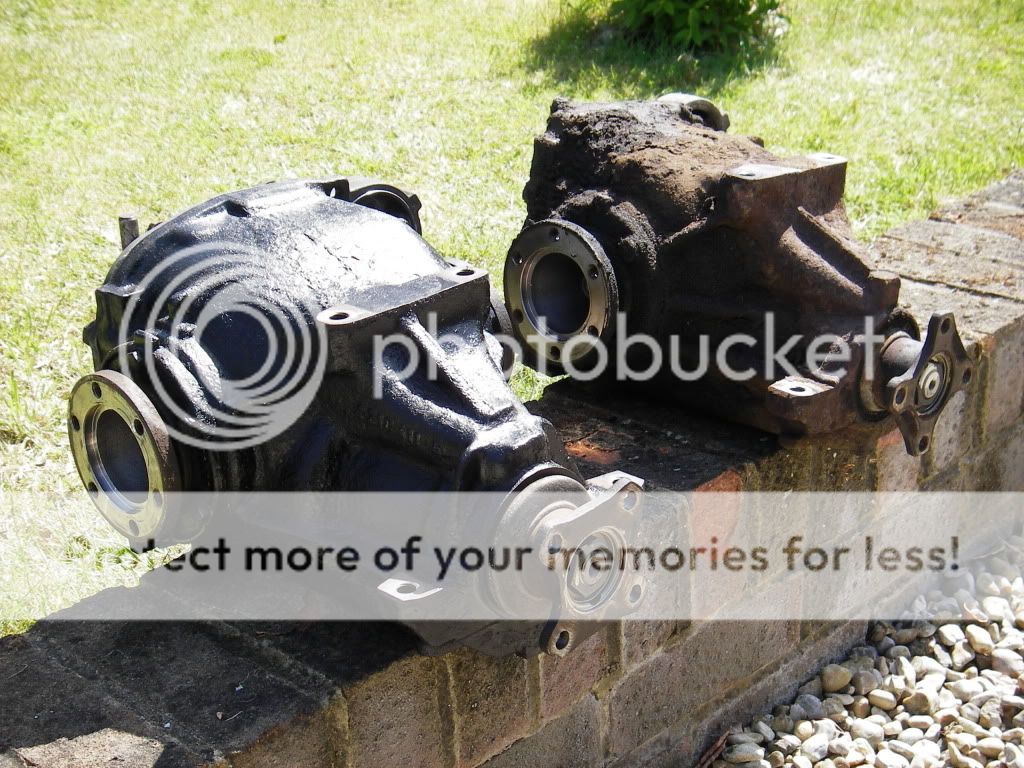
And here's the diff installed and ready to go, I got some new torx bolts to replace the hex bolts as these are less likely to round off.
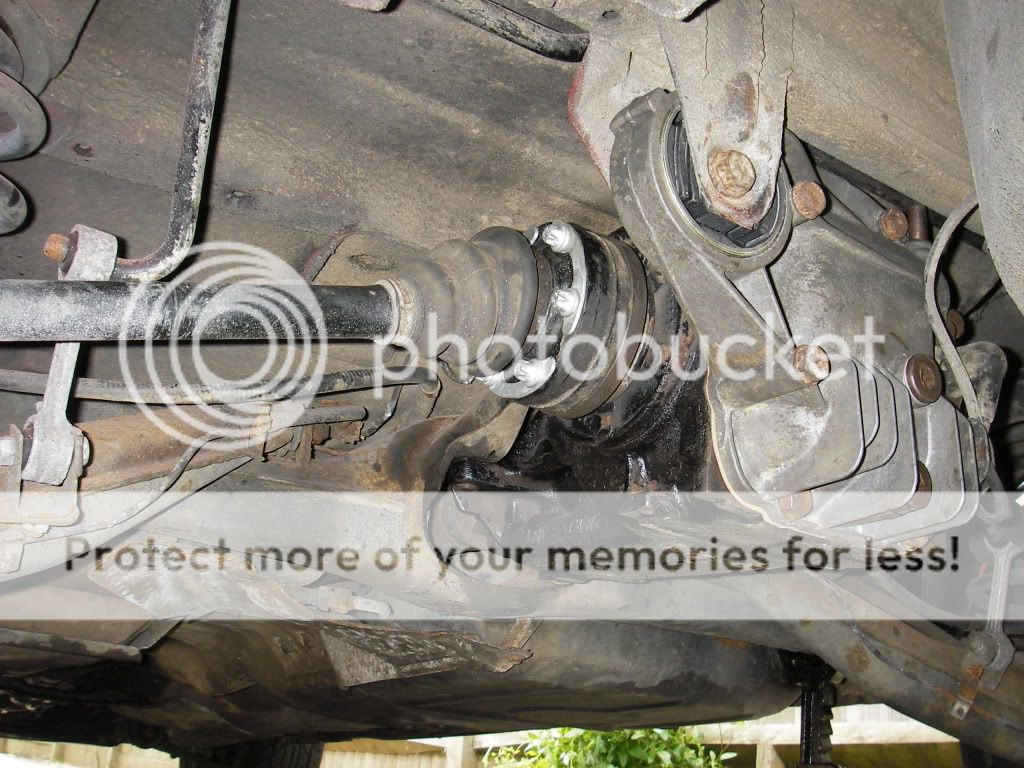
It was a good half days work, I feel more confident about the whole sub frame swap now too, although I'm expecting the sub frame to be a b*tch to get off as I've heard many nightmare reports of that job.
Re:
Posted: Mon May 25, 2009 8:17 pm
by clarko74
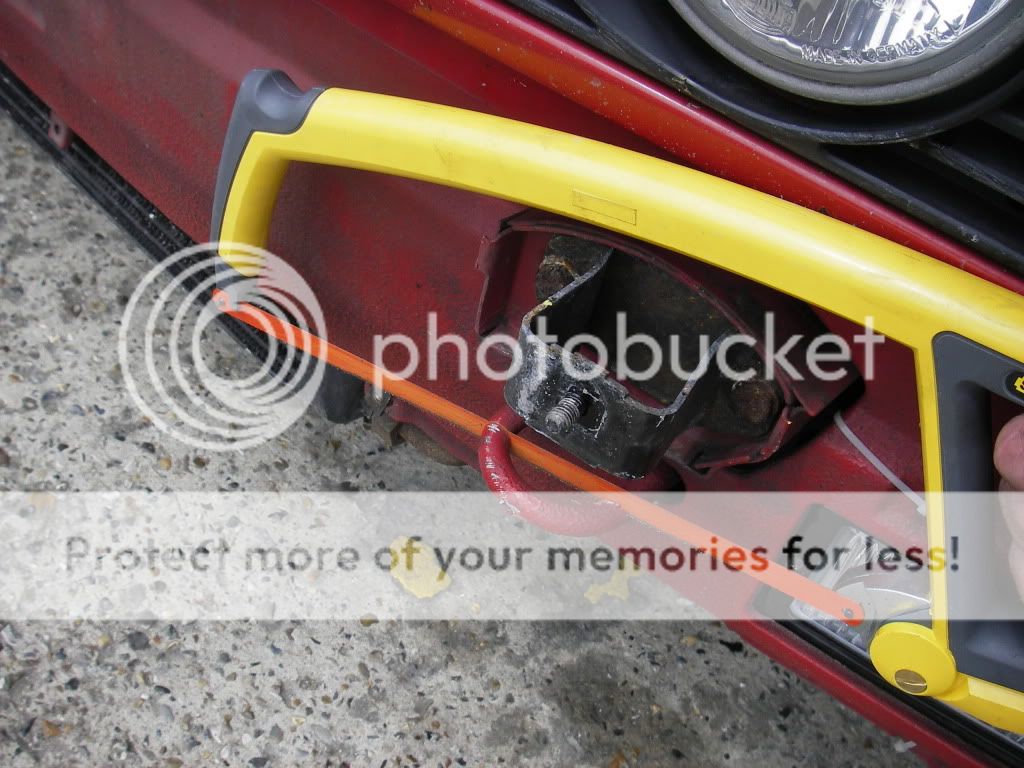
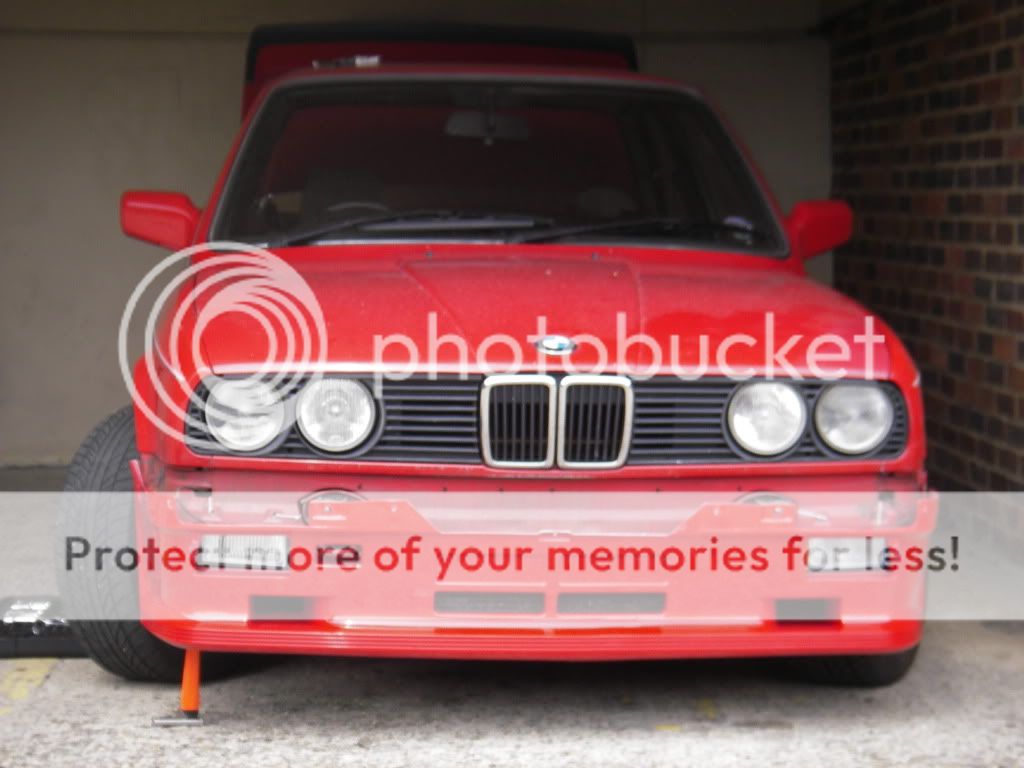
Got round to fitting my mtec front valance today. First thing to do was to get rid of the towing eye on the passenger side, I really didn't like the idea of taking a hacksaw to my e30 but it had to be done. Gave the exposed metal a couple of coats with a rattle can
Did a quick test fit before attaching anything to the valance. It's going to look good.
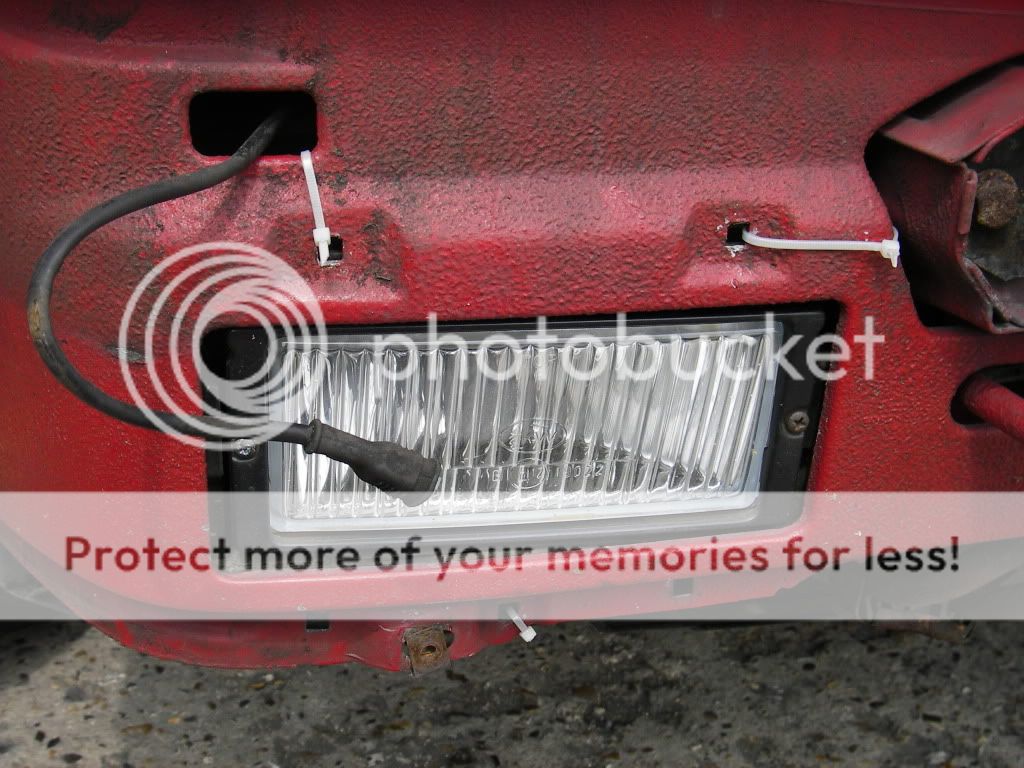
Note the quality workmanship of my foglight install! I didn't have any suitable bolts when I put them in a few weeks ago and knew I'd be fitting them in the valance so a cable tie bodge was in order
All the bits went on pretty easily. The rear of my bumper is a right mess though, I've got another one but that's hiding in a garage up in Norfolk at the moment. Here it is finished
And the finishing touch
I'm not going to go over the top with the mtec bits, the front valance will do me. I like the simple look of the front valance with no side skirts or rear valance
It needs a good clean and polish which I'll do later this week, it's got to look it's best as I'm of to Le Mans in it in a couple of weeks
Re:
Posted: Mon May 25, 2009 9:47 pm
by fowler
very nice mate looks the nuts i will have to look out for this one when i am up selsdon giving it large in project fridge
Re:
Posted: Mon May 25, 2009 10:08 pm
by clarko74
Cheers, I'm really happy with it. I'll keep an eye out for you too, is 'project fridge' white by any chance?