Handbrake
Whether you're parking the car or sliding it round a corner, the Handbrake is a handy feature fitted to every E30. Here's everything you need to know about that handle between the front seats.
Contents
Overview
All E30s are fitted with a handbrake mechanism, which pulls brake shoes tight against the inner rim of a brake drum on each rear wheel. These shoes are cable-operated via the handbrake lever. For lesser E30s with rear drum brakes, the handbrake is self-regulating. For cars with disc brakes, the shoes operate inside the bell of the disc, and require periodic adjustment.
After 20+ years on the road, the vast majority of E30s will be running with gunked up mechanisms on overstretched cables with at least one shoe barely clinging on to life. So that you can excel at handbrake turns in the supermarket car park, we'll talk you through stripping down and overhauling your handbrake to get it working the way BMW intended.
Overhauling
For this tutorial, we're going to assume that your E30 has rear disc brakes. If it doesn't you can still follow the majority of these steps for replacing your handbrake parts, but it's worth considering a rear disc brake conversion.
With that in mind, follow this guide for:
- Replacing handbrake cable
- Replacing rear shoes
- Adjusting shoes
Parts
To overhaul the handbrake, you'll want the following parts:
- 2 handcables
- 2 sets of rear brake shoes for Z3
- Rear brake shoe set (pins and springs)
Replacing Cables
The cables run under from the handbrake lever to the rear axle, carried in special tubes that run the length of the transmission tunnel. If your car is a typical E30 then those cables will be the originals. The inners will be stretched, and the plastic outers will be torn and cracked, leading to reduced cable strength. The first part of an overhaul will be getting these cables off.
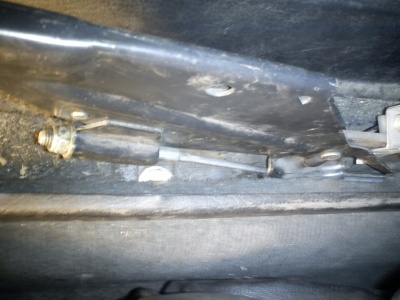
I warn you know - this is a hell of a job. At the wheel end you'll need the calipers and discs off to start, and for the lever end you'll need to undo the nuts holding the cables in their sleeves, which hide under the handbrake lever gaiter. Feel free to undo the two ends in your own time.
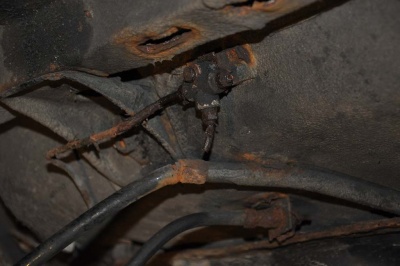
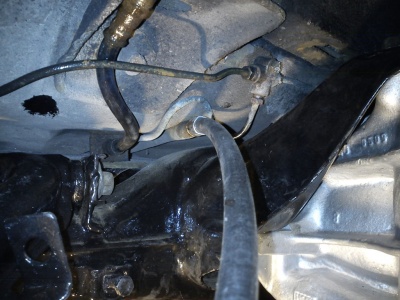
But it's the middle part that's the horror story. The cables run in metal sleeves above the prop shaft, and come out of these sleeves just above the rear beam. At this point, they develop a thick rubber outer sleeve, much like a bicycle brake cable, before disappearing into the wheel hub.
As you can see in the lower half of this pic, the ferrules will have rusted solid to their tubes. Lots and lots of penetrating oil will be needed here, as well as a handy Stilson wrench to grip the outer sleeve to twist it free.
If time is not on your side, you can try this. Slice through the cable; hacksaw, angle grinder or Dremel - the choice is yours, just get those cables cut. Then undo the nut at the lever and pull the inner handbrake cable out via the cabin.
Get back under the car, and use some pliers to twist out as much of the outer metal from the tubes as you can, and you'll be left with the solid metal ferrule rusted to the tube.
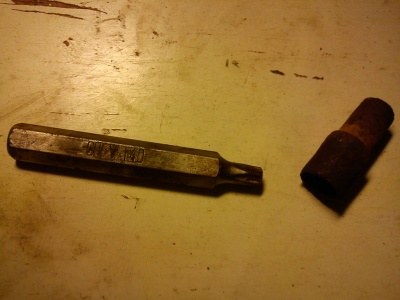
At this point, if you wrench too hard you'll rip the tube away from the car - it has happened. Instead of that, try hammering a Torx T45 bit into the remnants of the ferrule. With luck, it'll bite into the inner hole, allowing you to use your wrench to twist the ferrule out of the sleeve. Be patient, take your time, and rock the ferrule back and forth. If you can, get a blowtorch on it too. Eventually it'll come out, like so:
You can now slide your new handbrake cables into the tubes, making sure to liberally coat the new ferrules in copper grease before slotting them into the tubes. Go to the cabin and feed the inners into their slots in the handbrake lever, but don't tighten the nut yet.
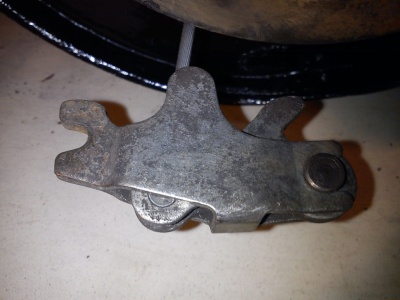
Now move to the axle end. If you've done as you're told you'll already have the caliper and disc off, so you'll see the existing mechanism in all its glory. To make things quick, simply undo the two allen bolts holding the shoes in place, and tug everything off the backplate of the hub. Ultimately, you'll find that you're left with this funny latch mechanism connected to the handbrake cable:
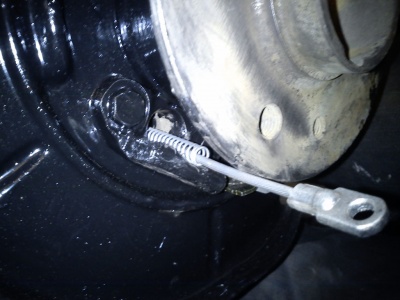
Pull it out, with the handbrake inner too. Note where the cable went through the hub; there'll be the corresponding stuff of outer cable on the back of the hub. To get this out, you'll need a hammer and a suitable drift, to smack the outer cable out of the hub. I used an 8mm allen key as a drift. Once it's out, feed your new cable through the hole with more copper grease for the ferrule, and you'll be left with something like this:
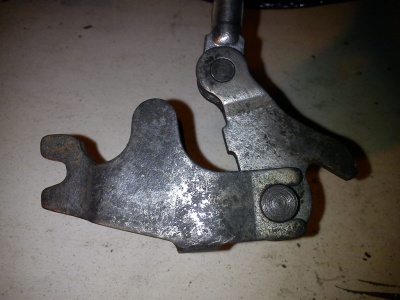
You can now remove the handbrake latch mechanism from the old cable and attach it to the new. As a guide, it goes together like this:
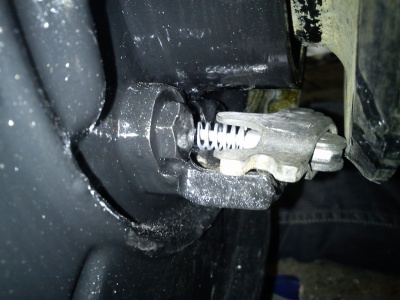
Tuck this back behind the hub, and we'll move on to fitting the handbrake shoes.
Shoes
The handbrake shoes are a pair of curves covered in a friction material.
Backplate Repair
Adjustment
Once
Chock the front wheels, lift the car and take the handbrake off. Then remove the handbrake gaitor and slacken the cable by undoing the nuts on the threaded rod.
Now remove one wheel, and rotate the disc until a hole is at the 12 o'clock position and look in with a torch. When you see the cog, push it round with a small flathead screwdriver. Adjust the top until the brake locks up, and then back it off a bit. Repeat on the other side.
After putting the wheels back on, tighten the nuts on the handbrake threaded rod to take up the slack in the cables, but no more than that. You are aiming for full handbrake operation at 5 clicks, or whatever feels right for you. If you have more handbrake travel than 5 clicks, go back and readjust the brake at the wheel again.
